This post is about how we pattern and why we require access to the frames in order to achieve the best job possible.
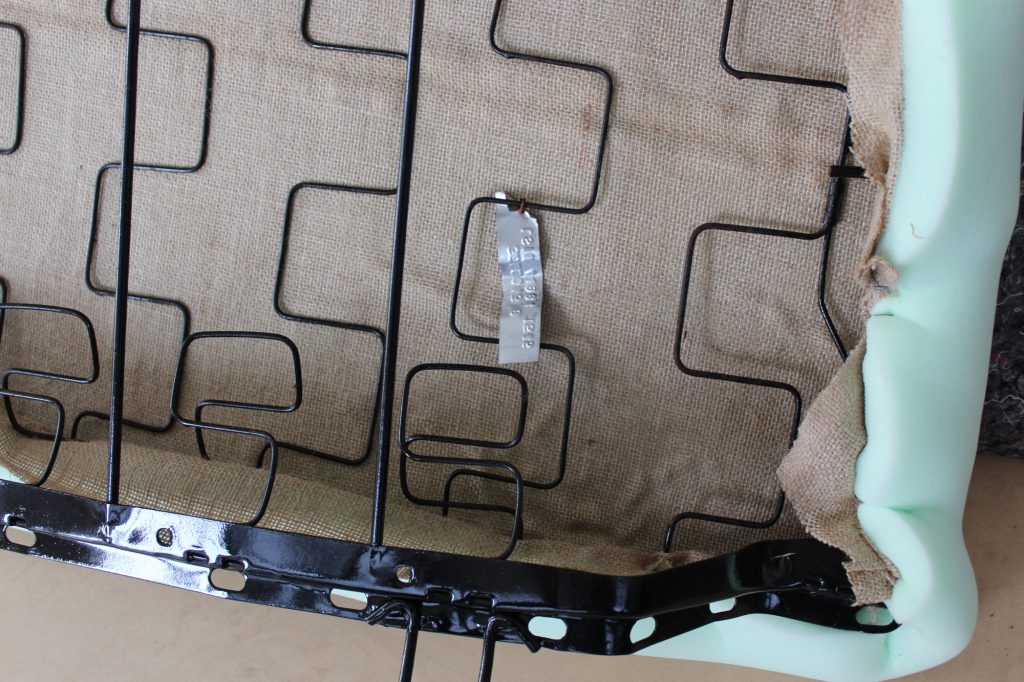
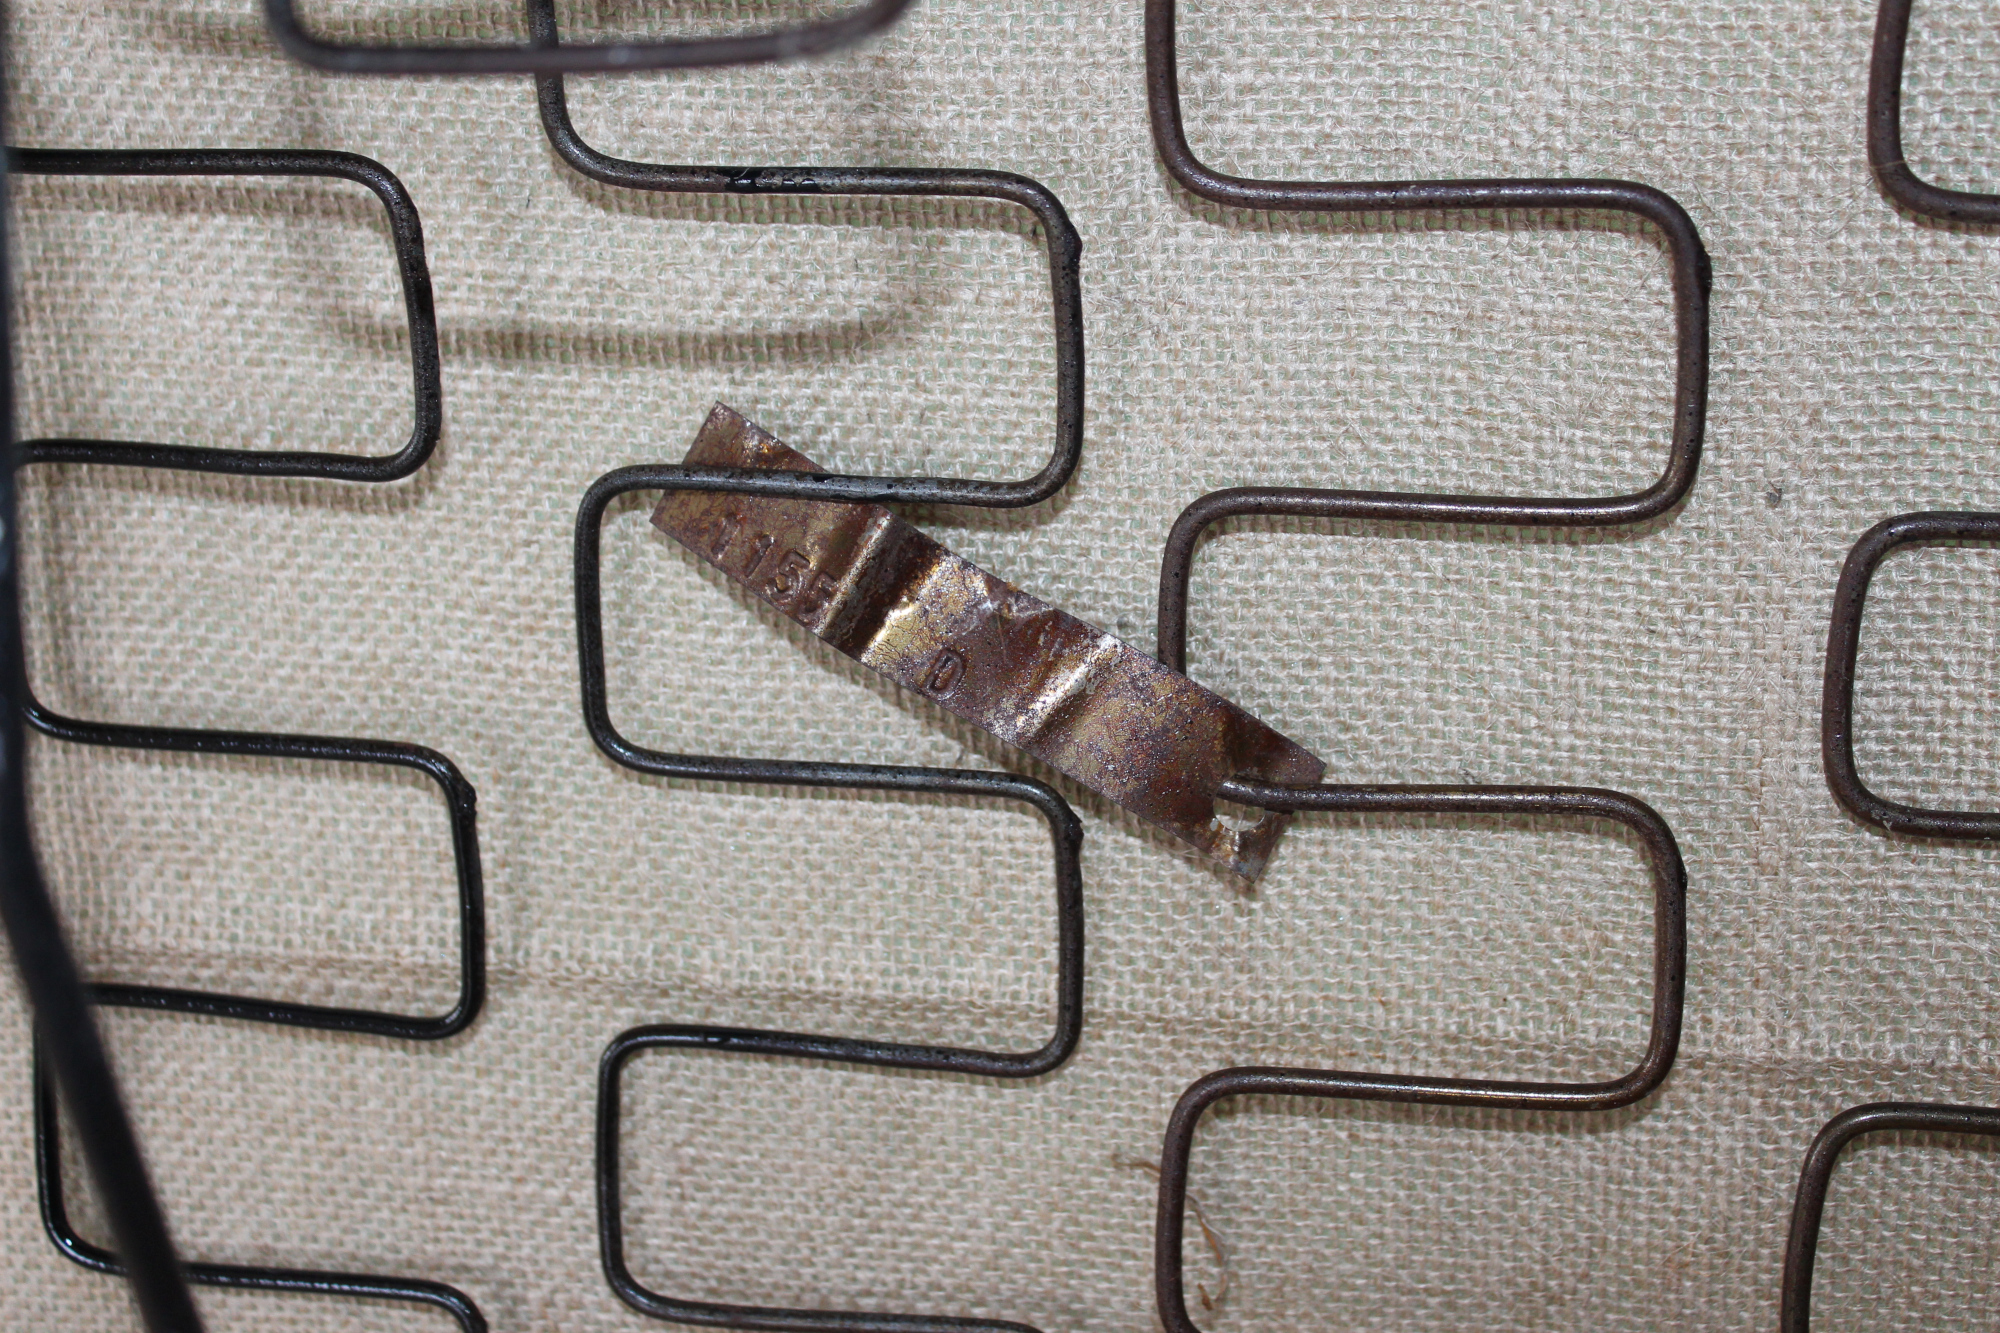
We recently got given a job to trim the seats for a Plymouth Duster that lives in the South Island. This customer’s front seats however are not of the original Duster, but came out of a New Zealand VH/VJ Charger. Luckily the back seat is still original and both frames even still have got their tags hog ringed to the springs.
What’s the job?
Our job is to make front seat skins and matching seat foam to suit the front bucket seats. This is straight forward as we already have the patterns for the Todd motors assembled VH/VJ Charger seats. Another trimmer down in the South will fit them.
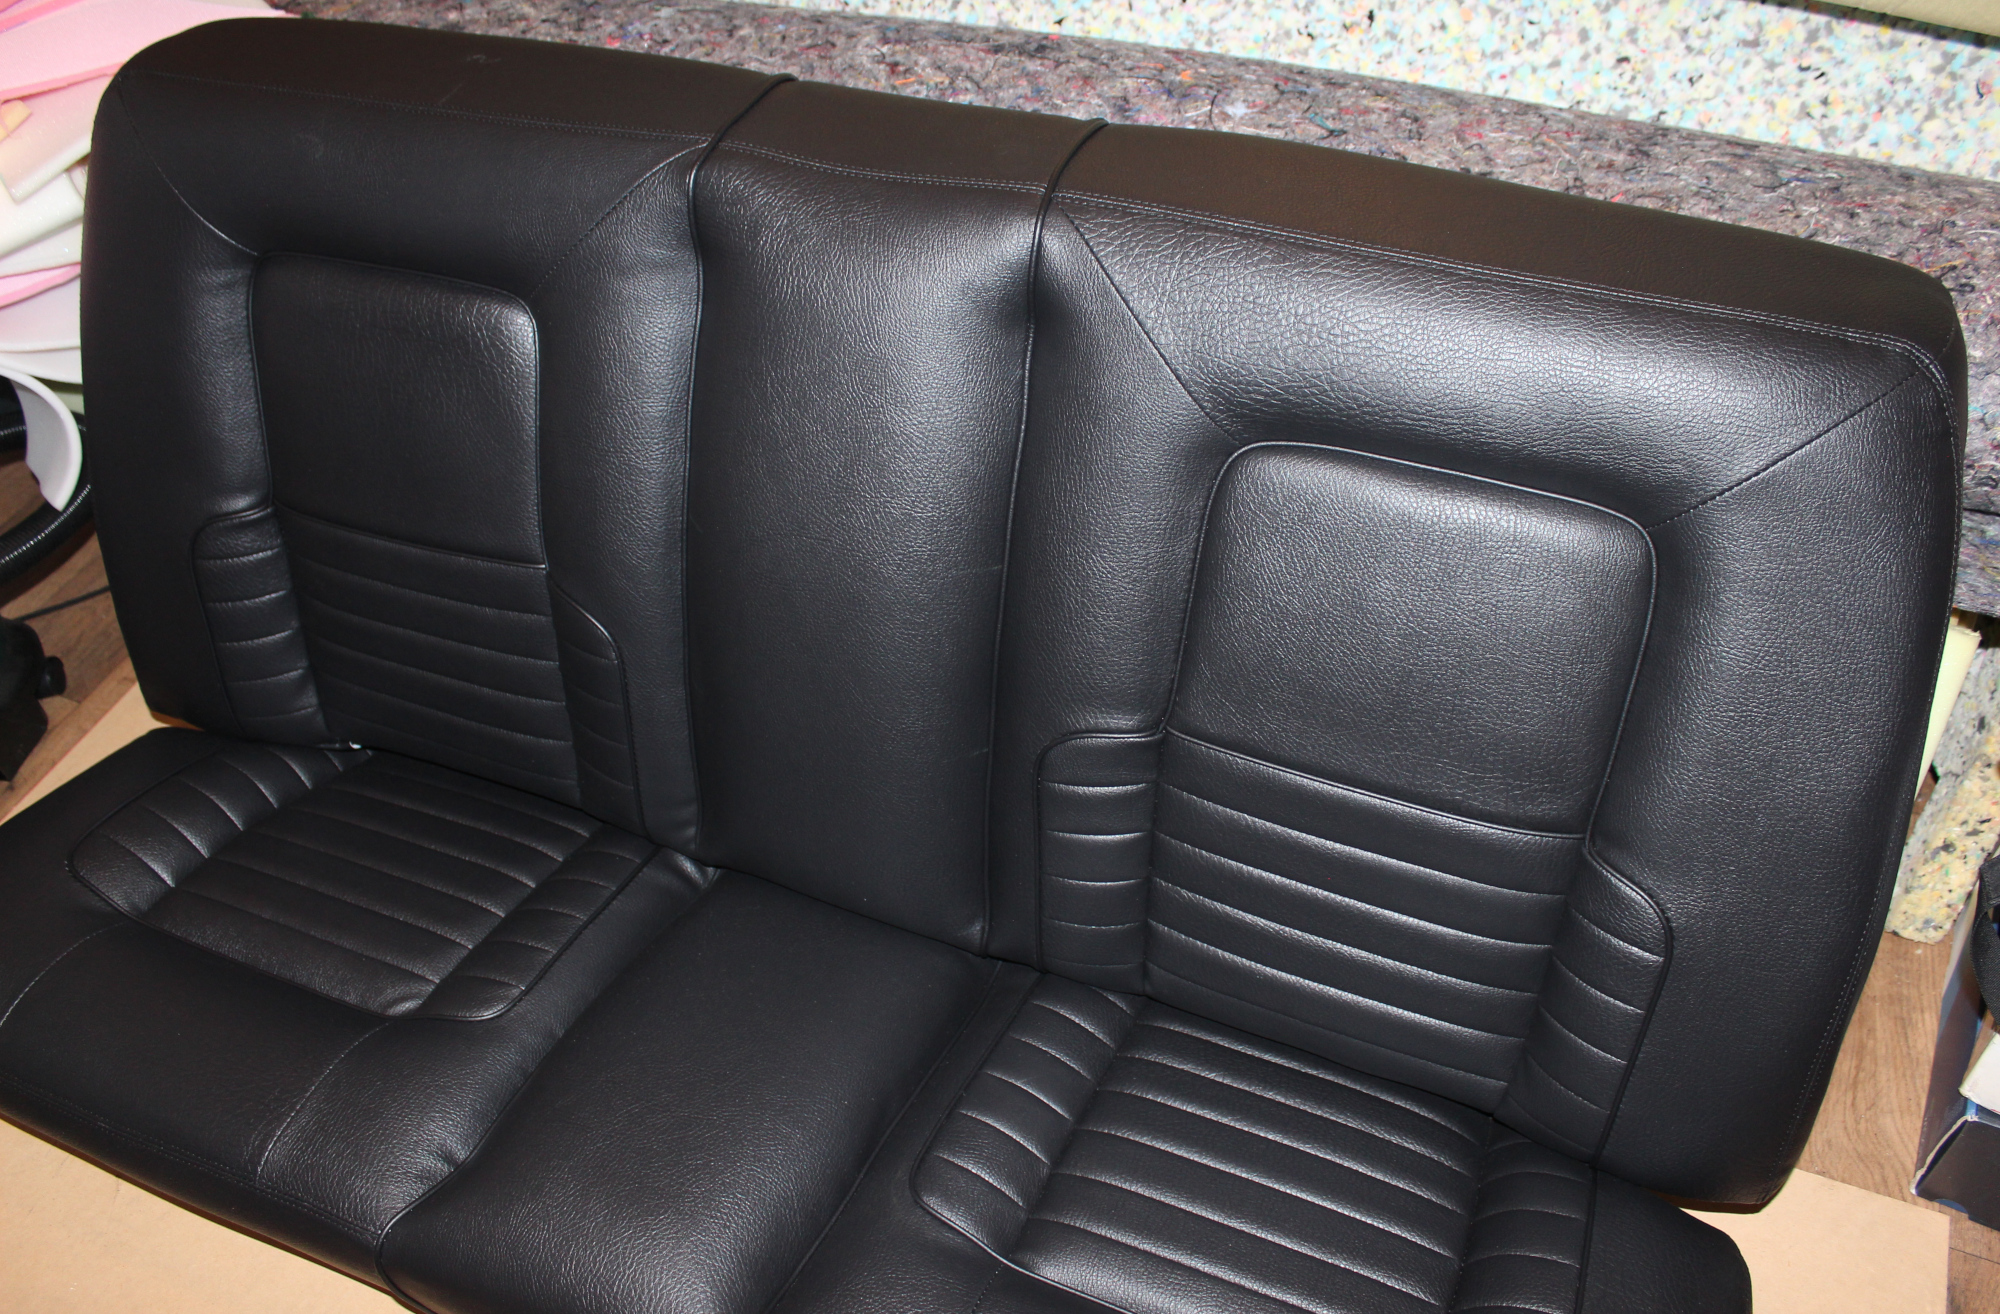
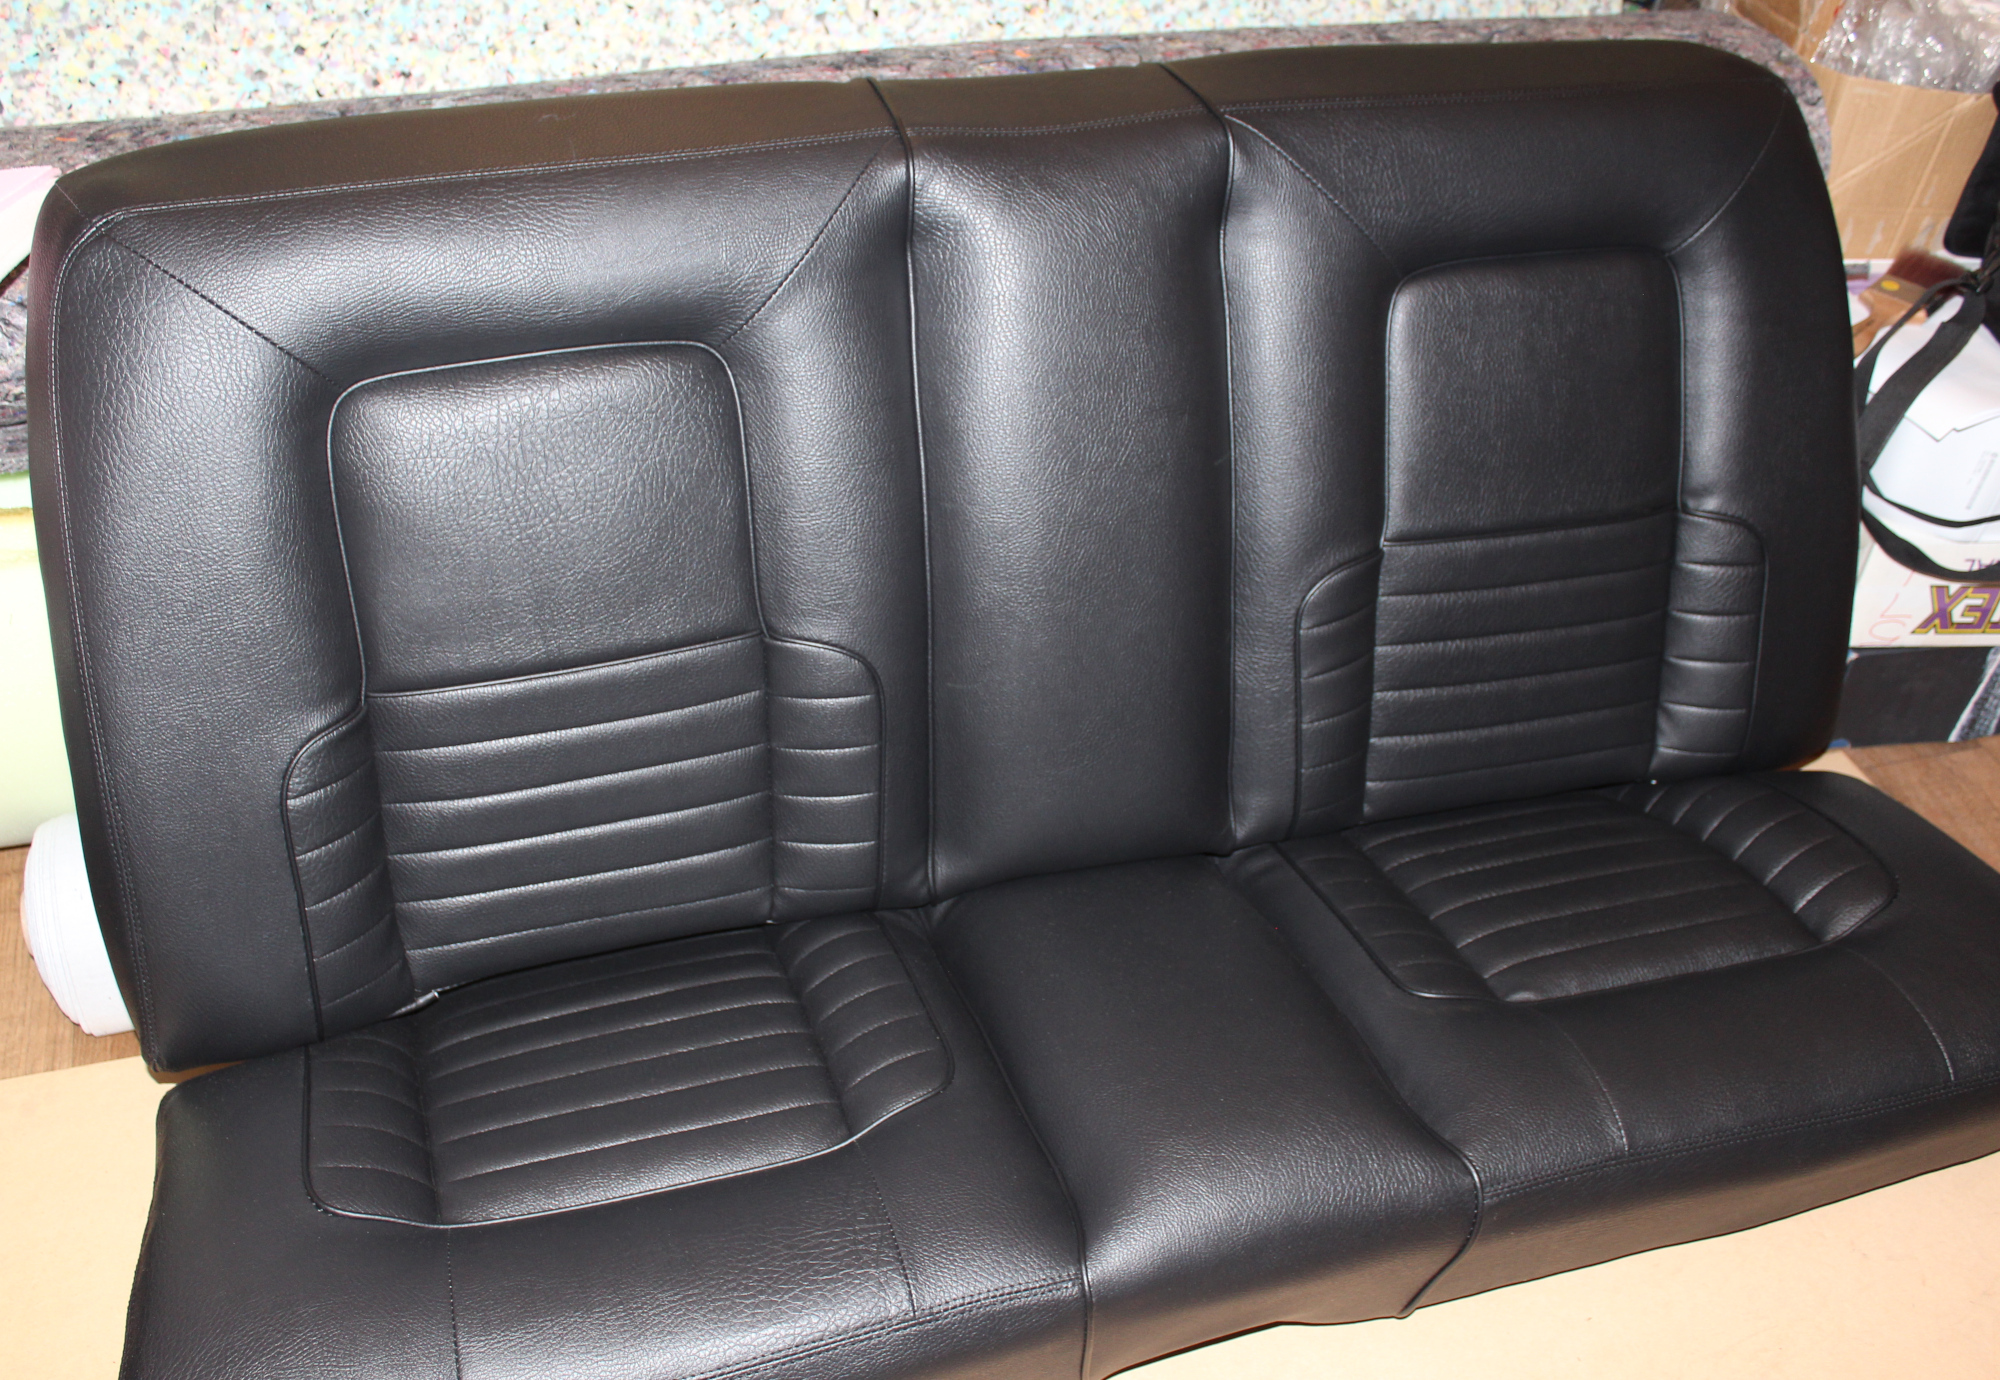
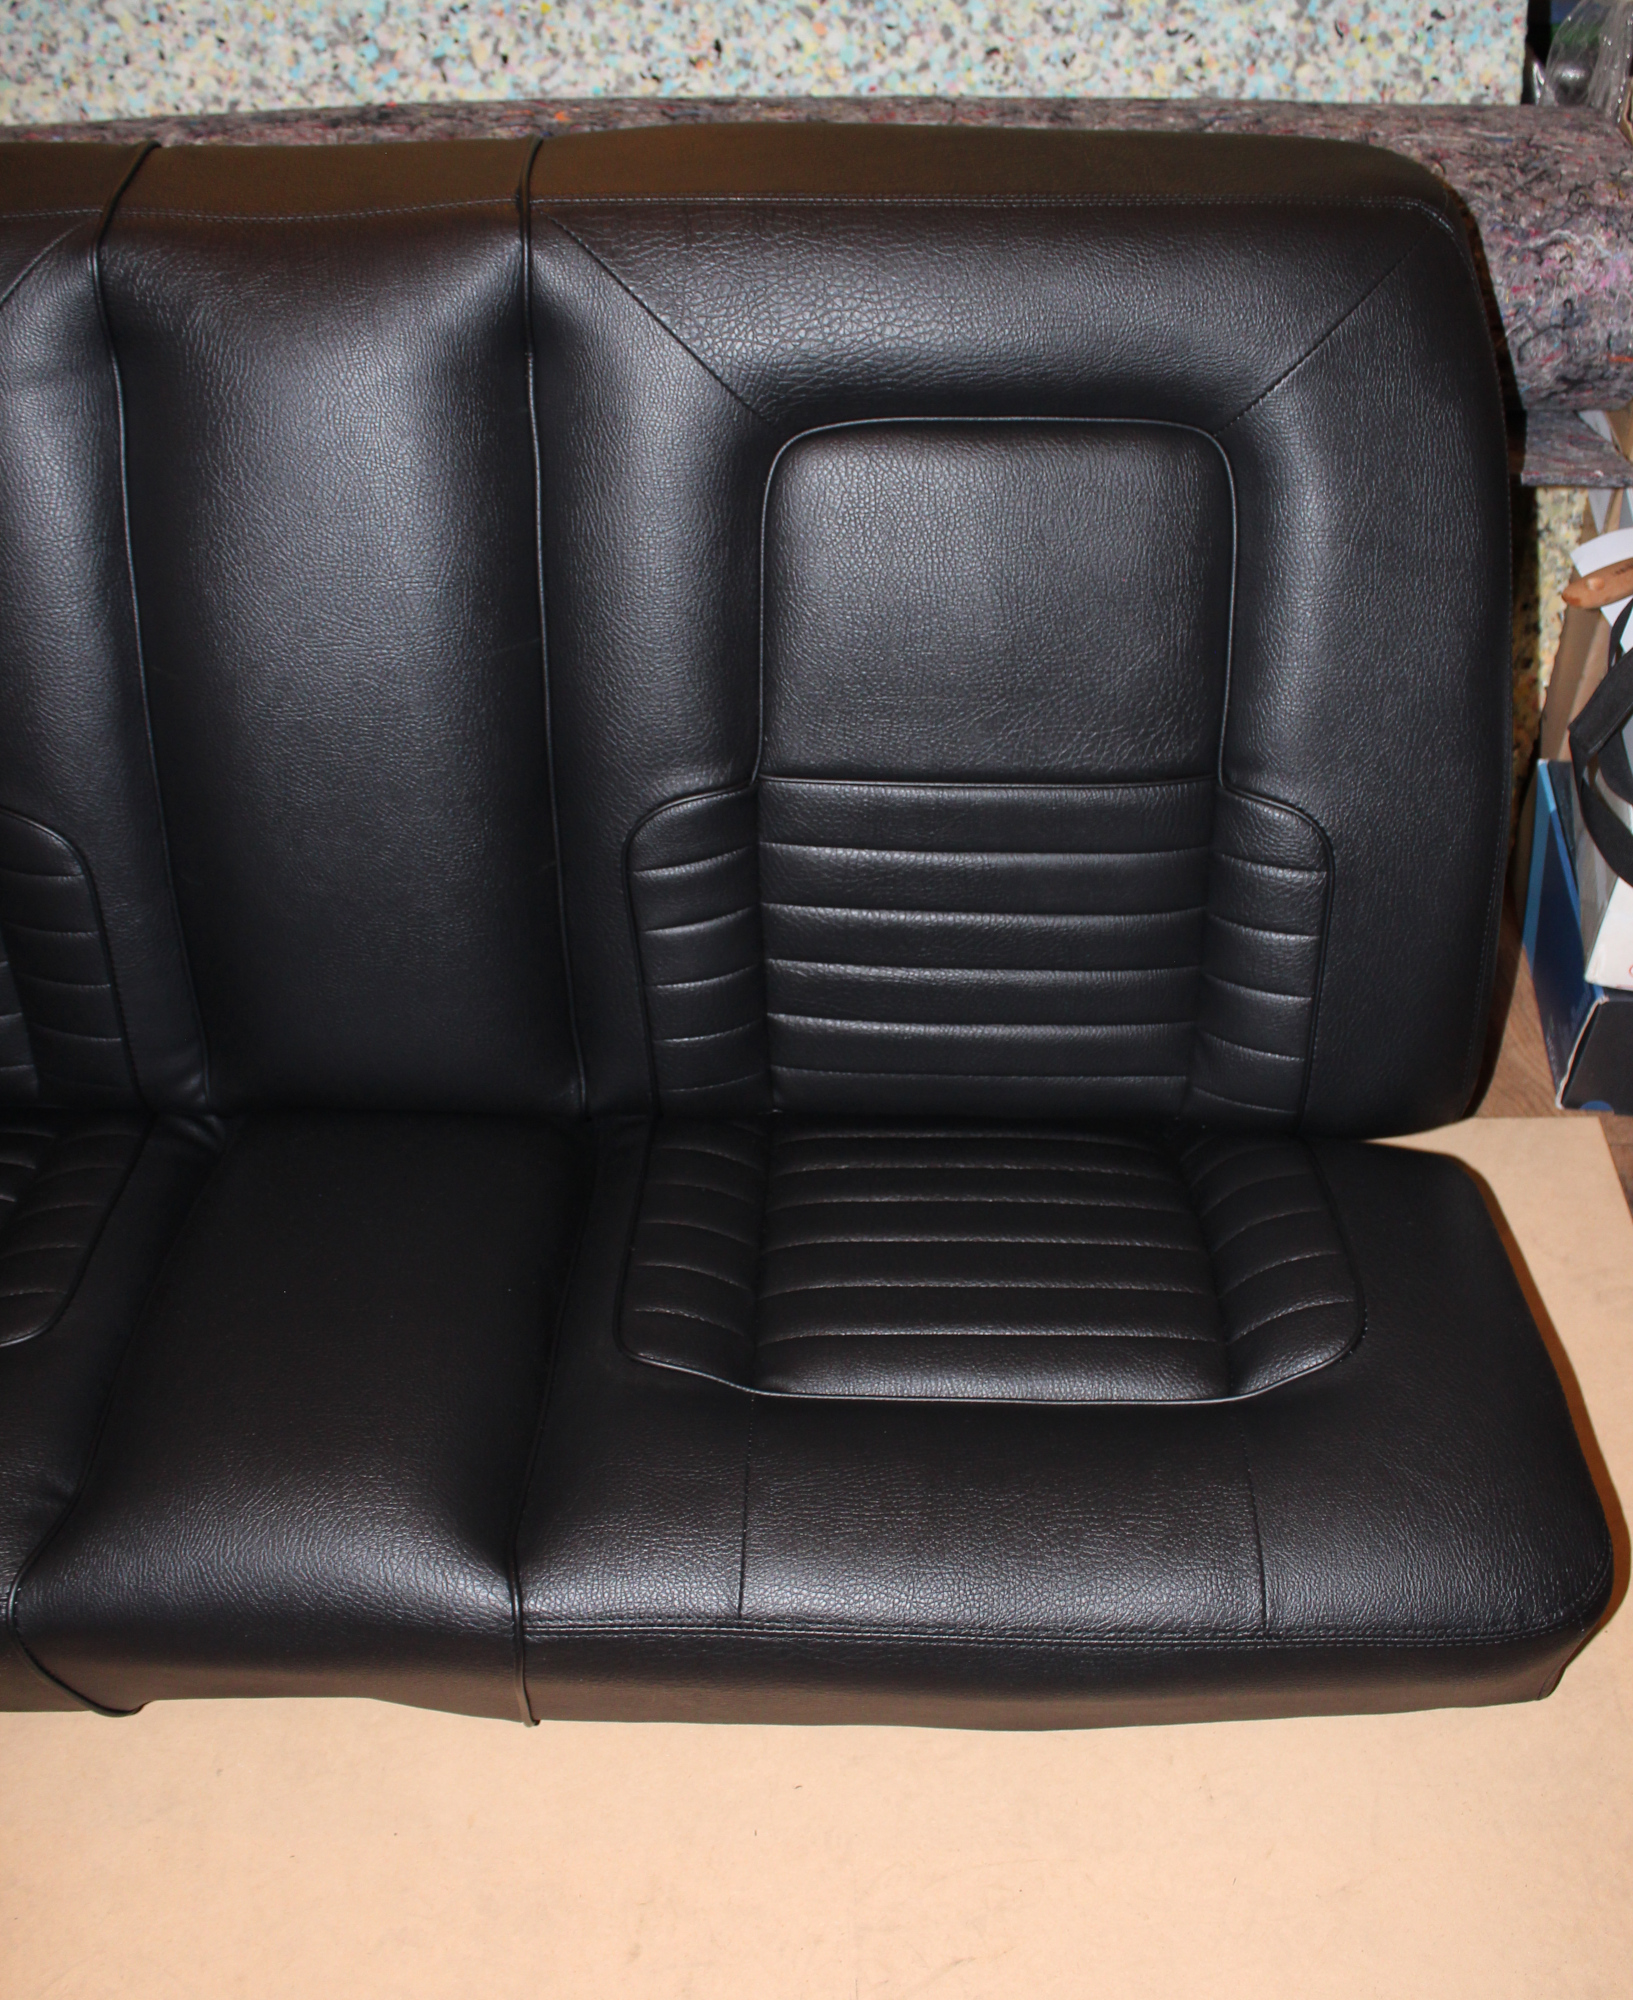
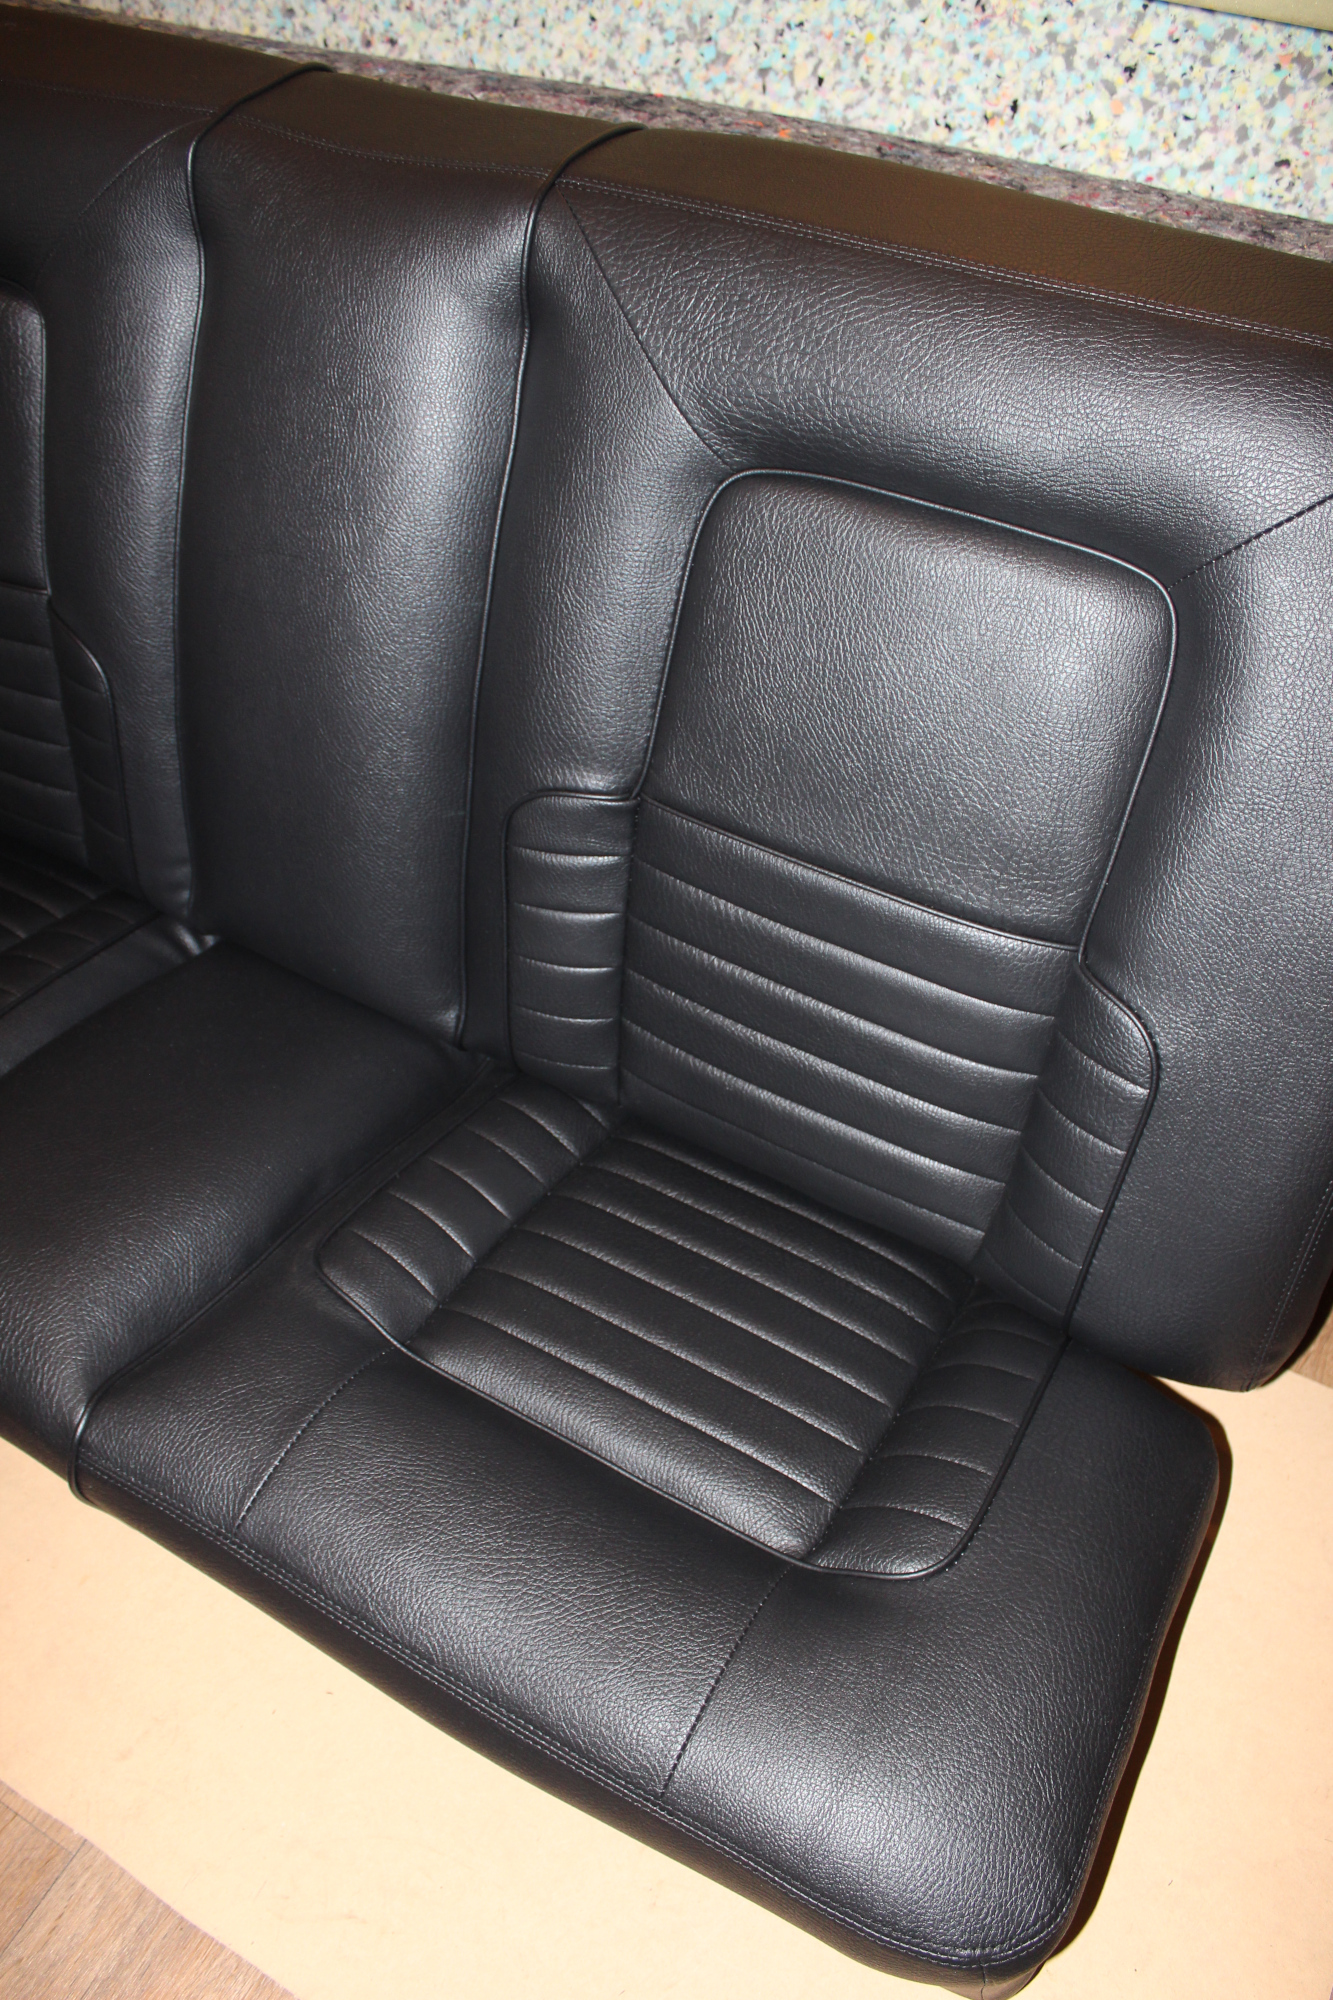
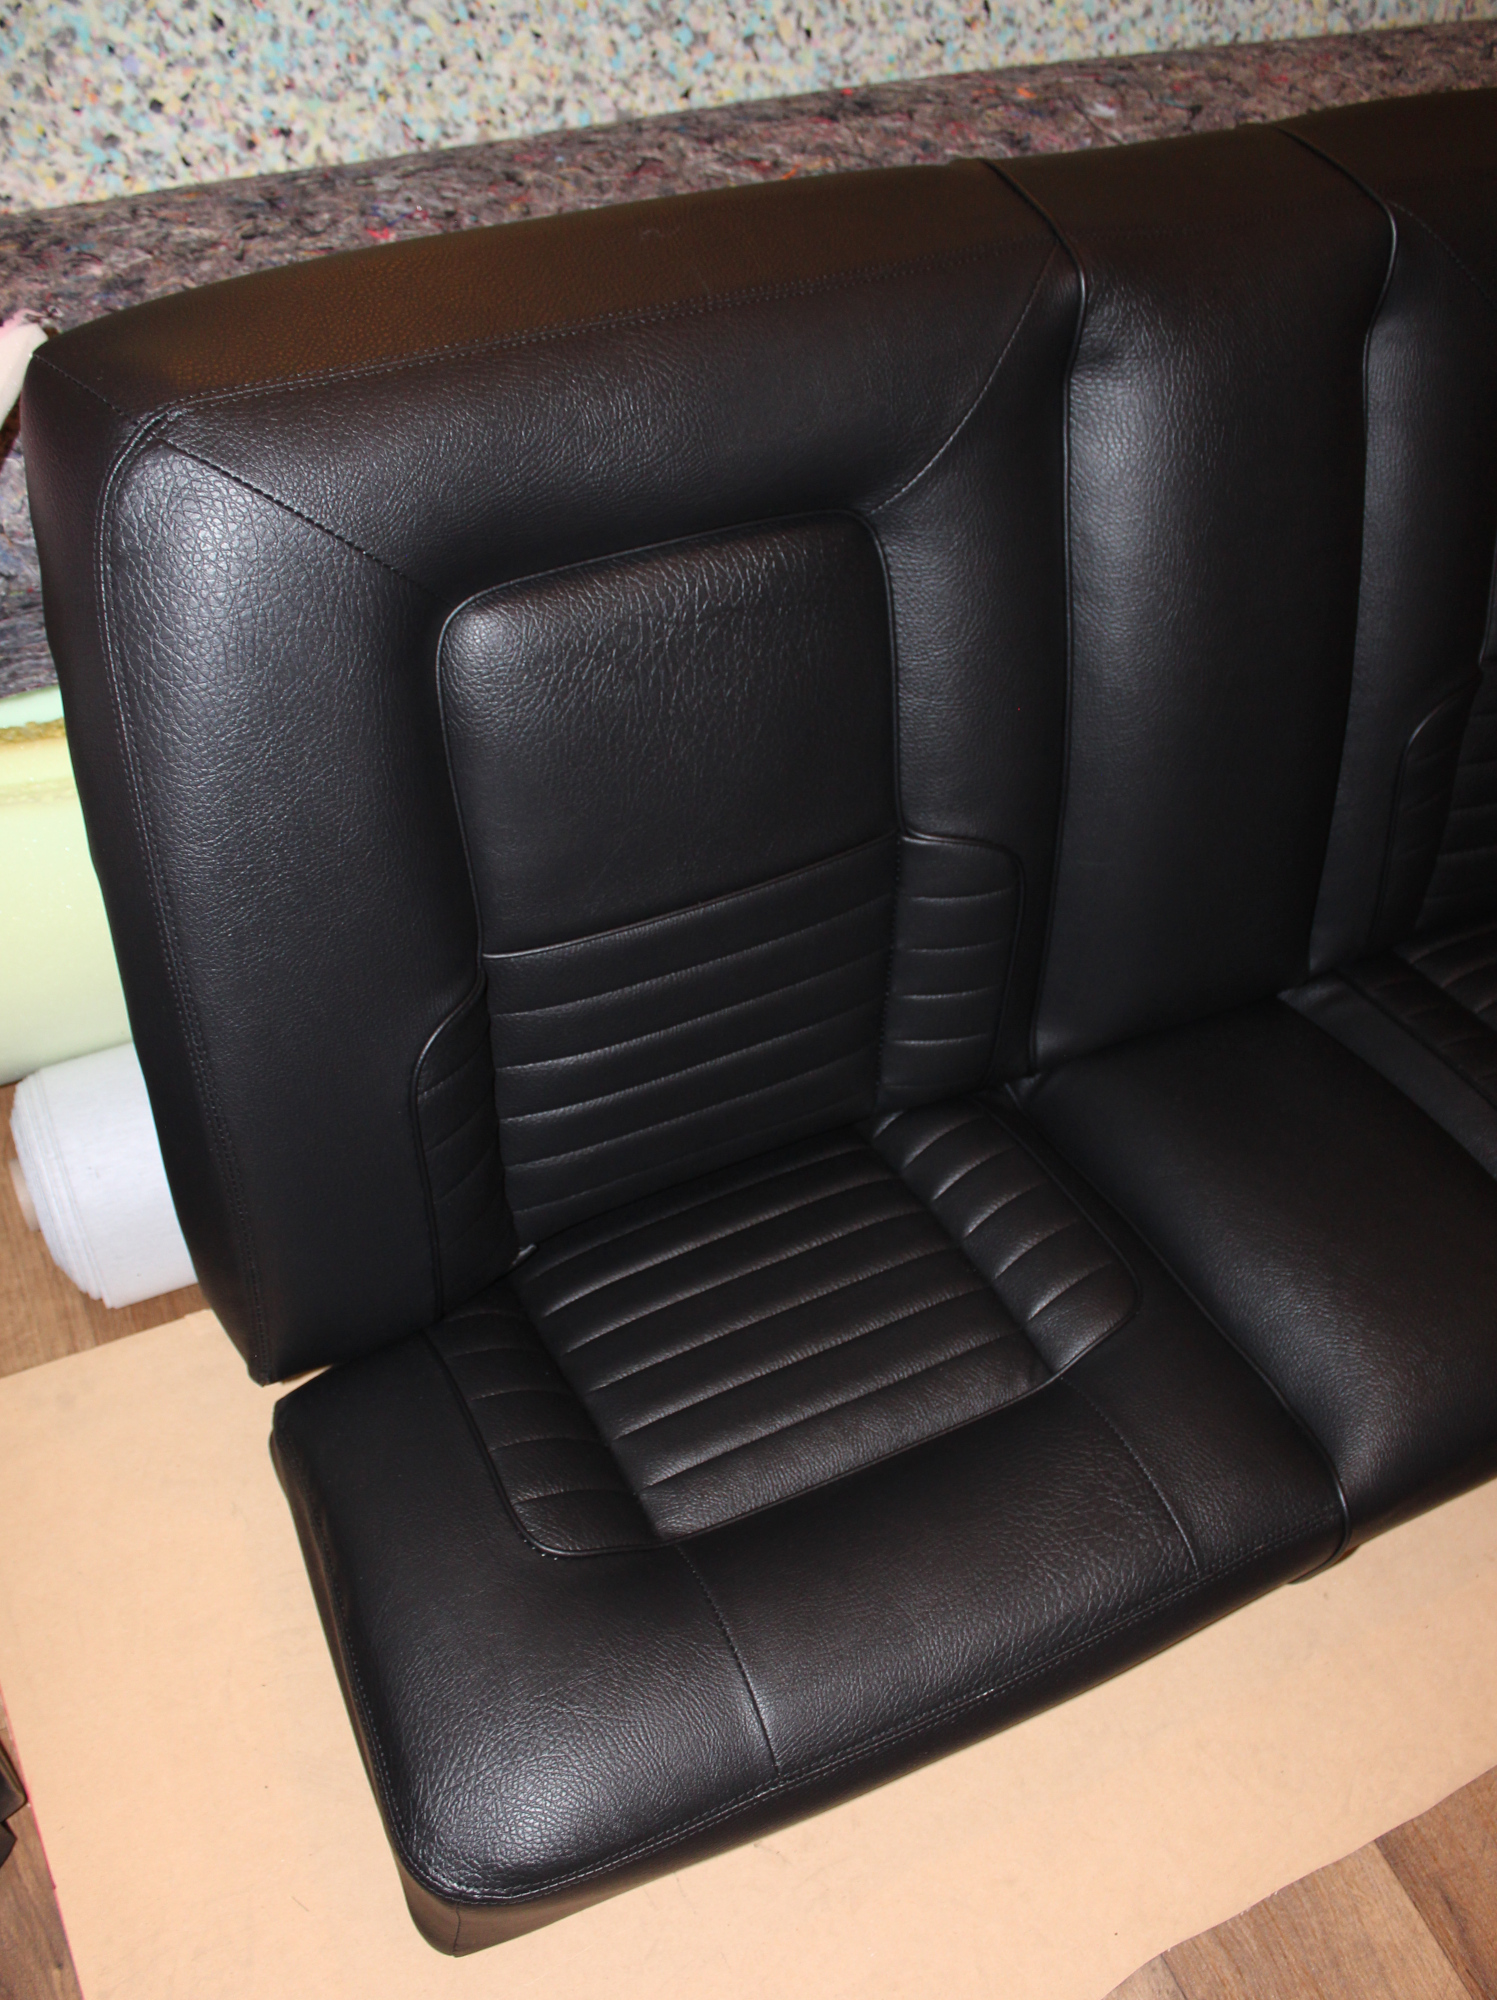
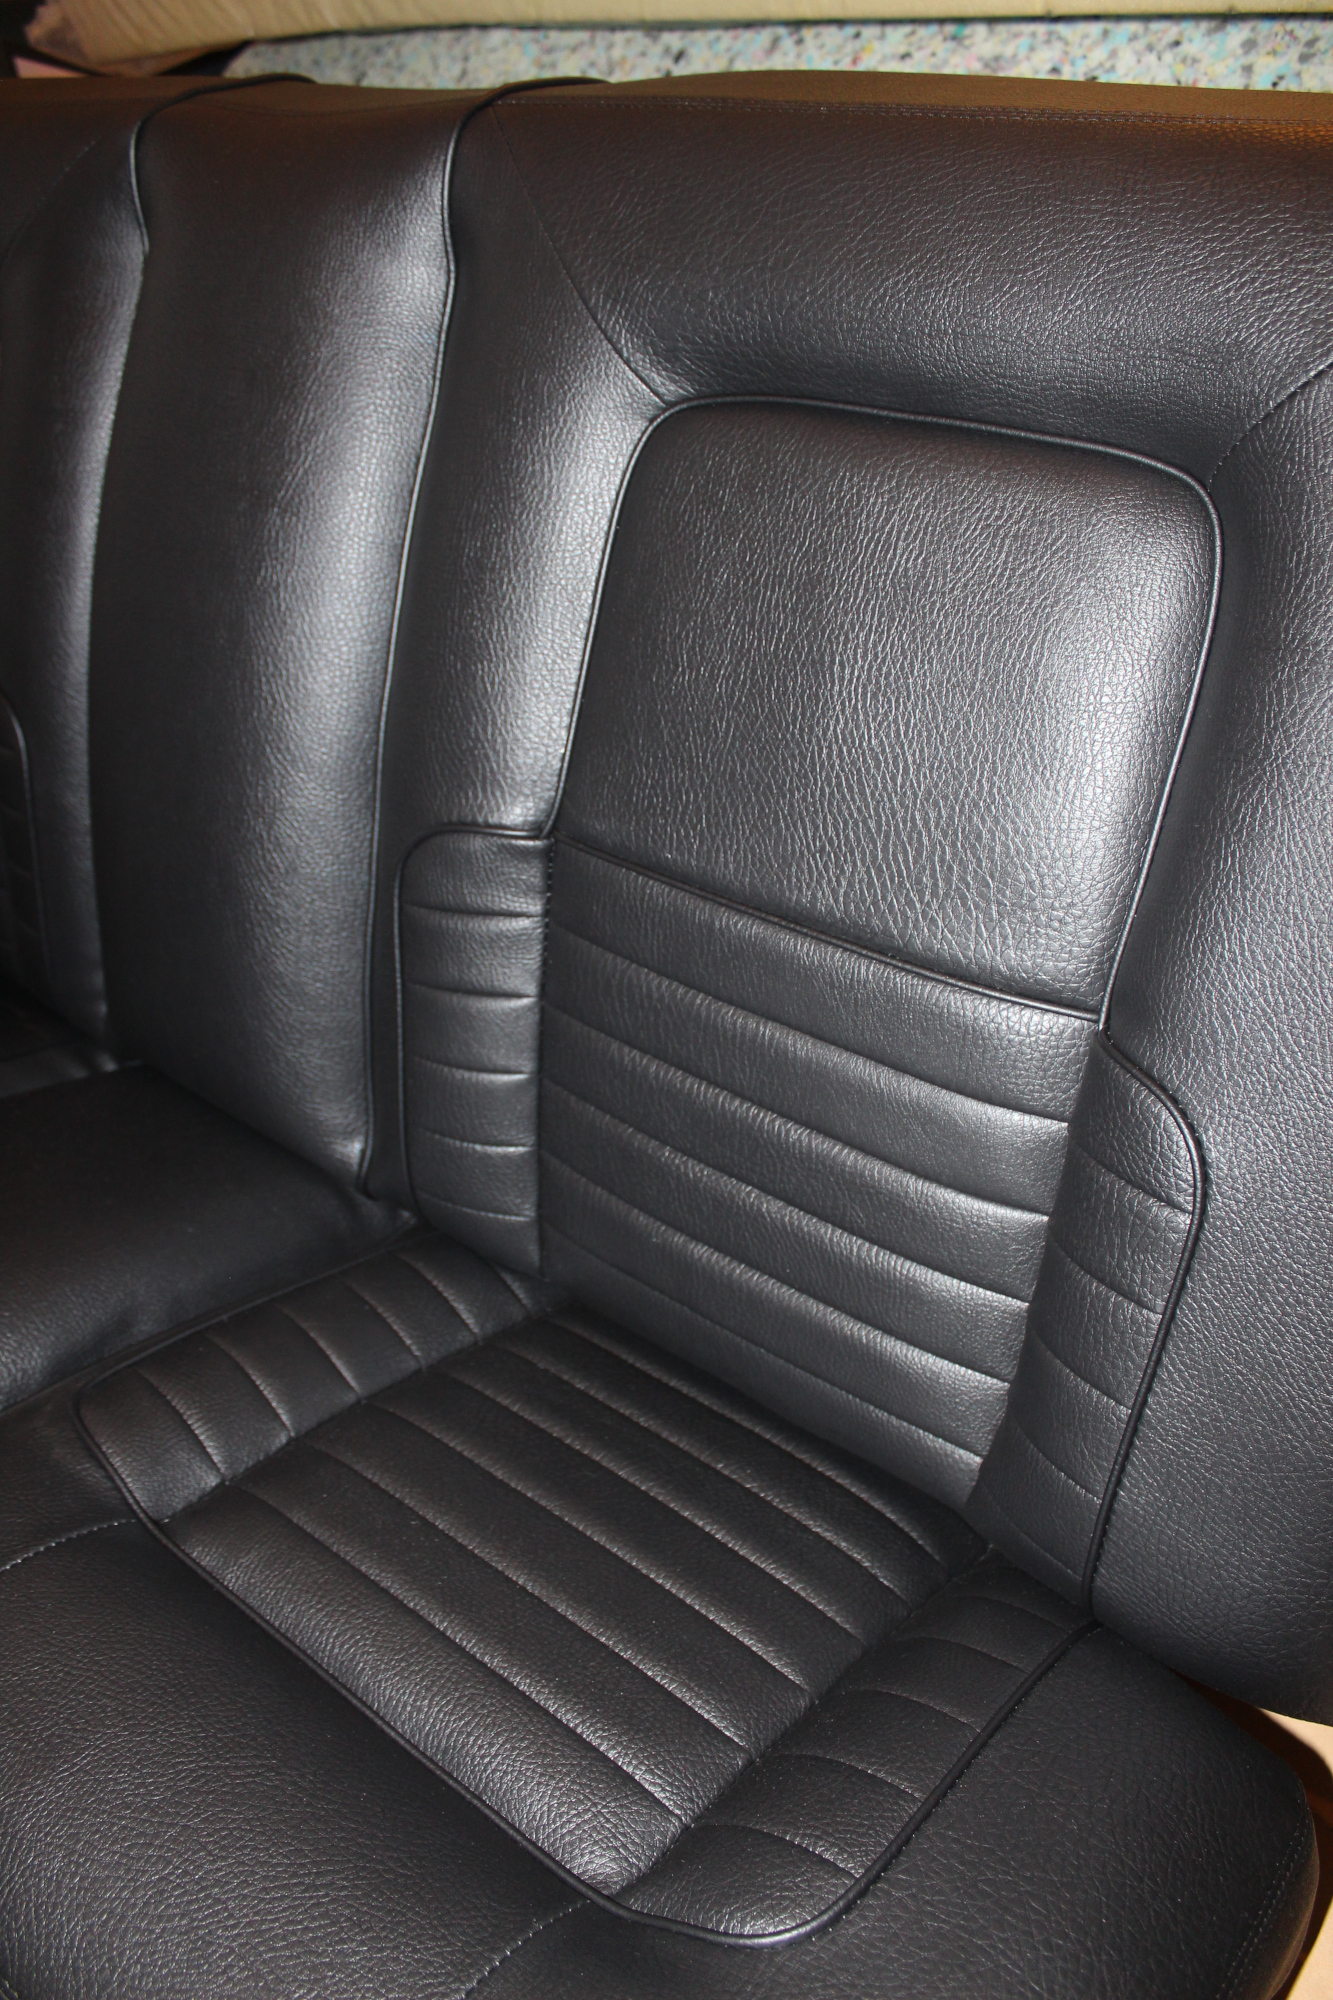
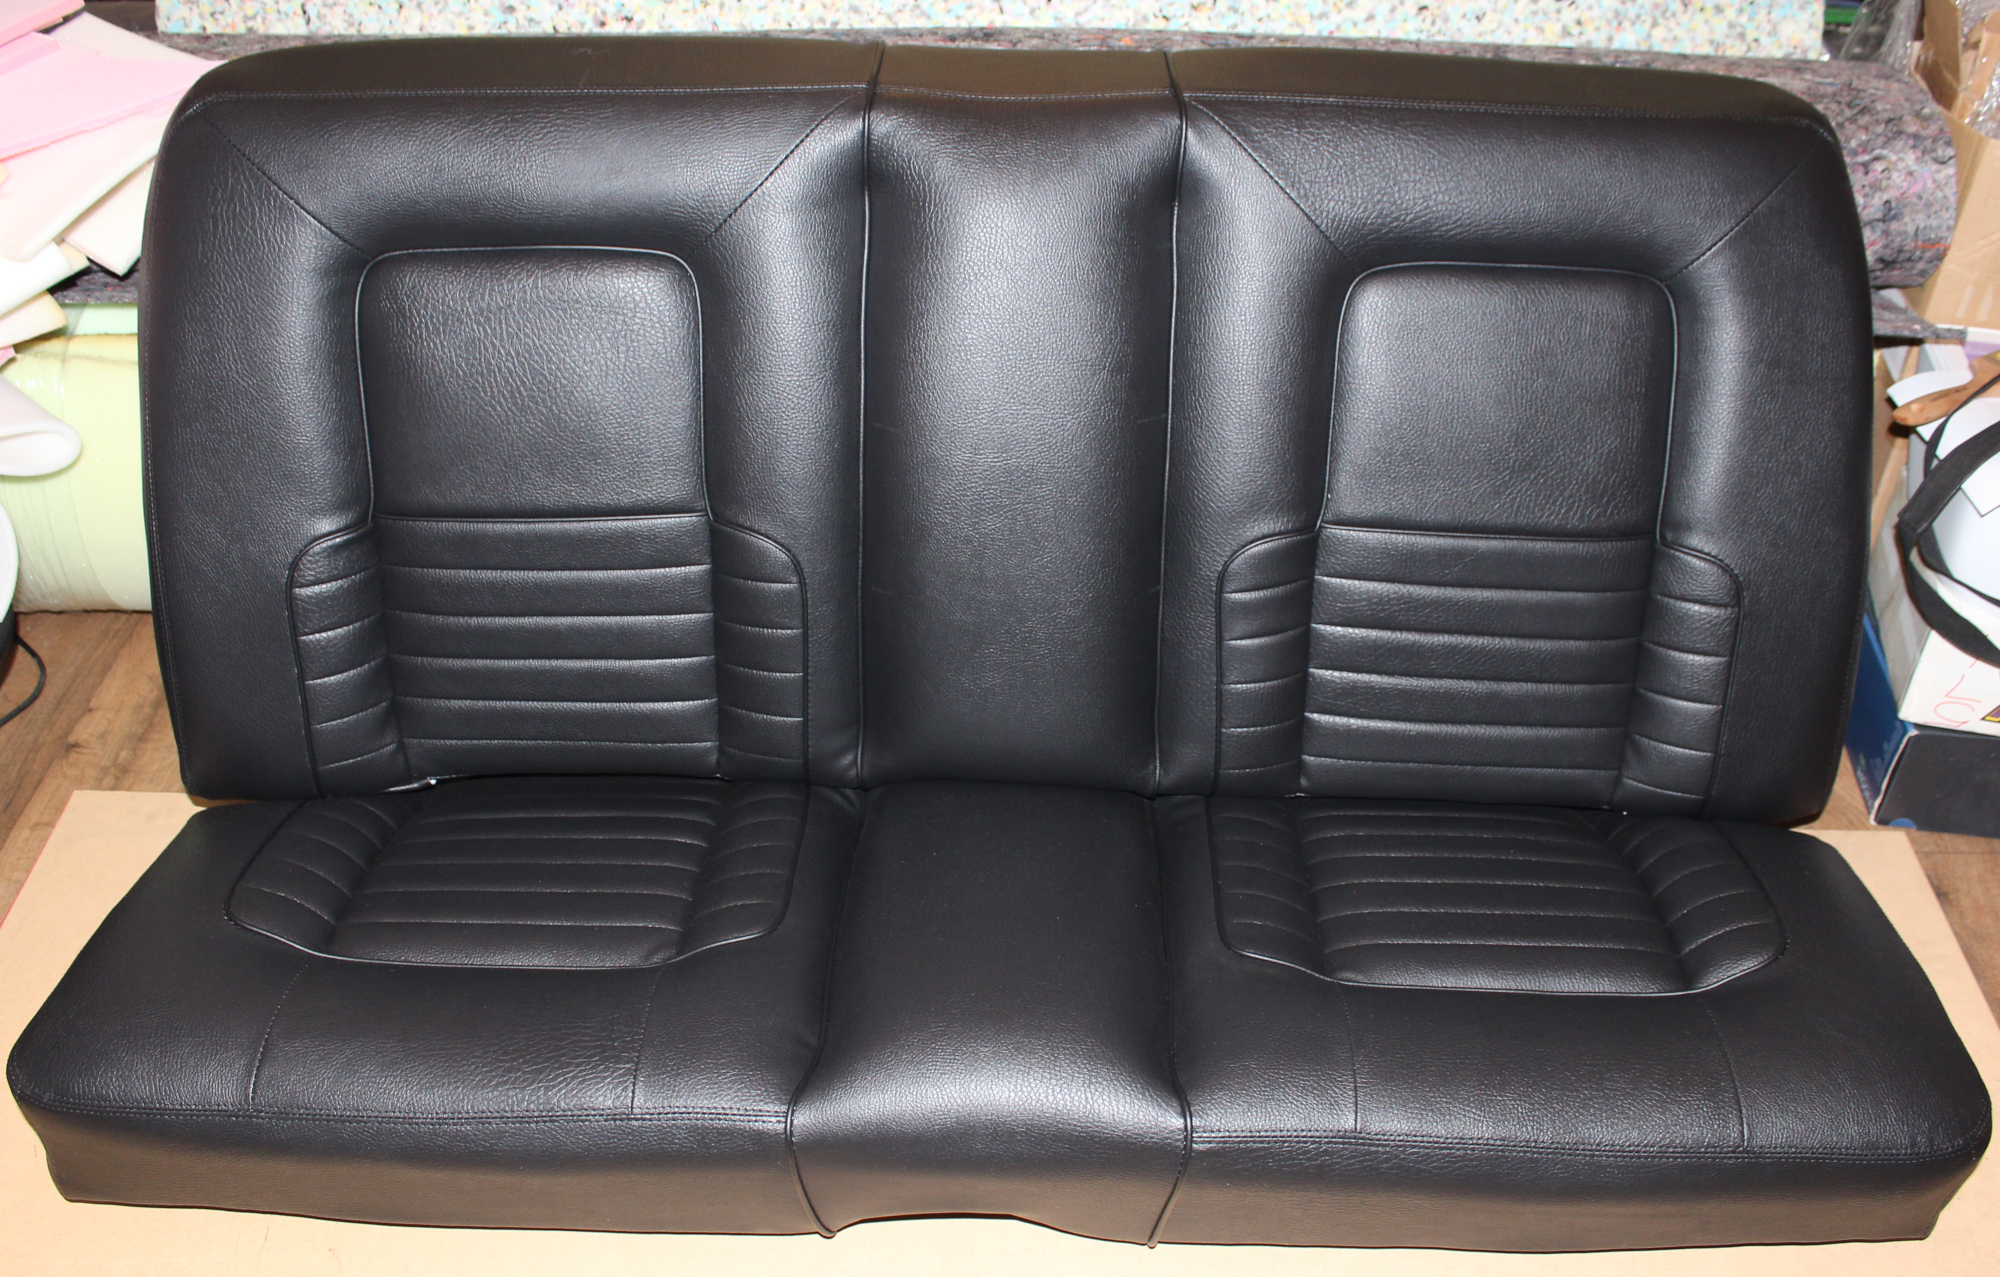
Our job is to also retrim the back seat to match. This is less straight forward as a new pattern will be required. The idea is to create a unique pattern that fits the Duster back seat, using patterns that look like the Australian VH Charger (big muscular bulges) as well as inserts that look like the Todd motors VH Charger to match the front seat trim.
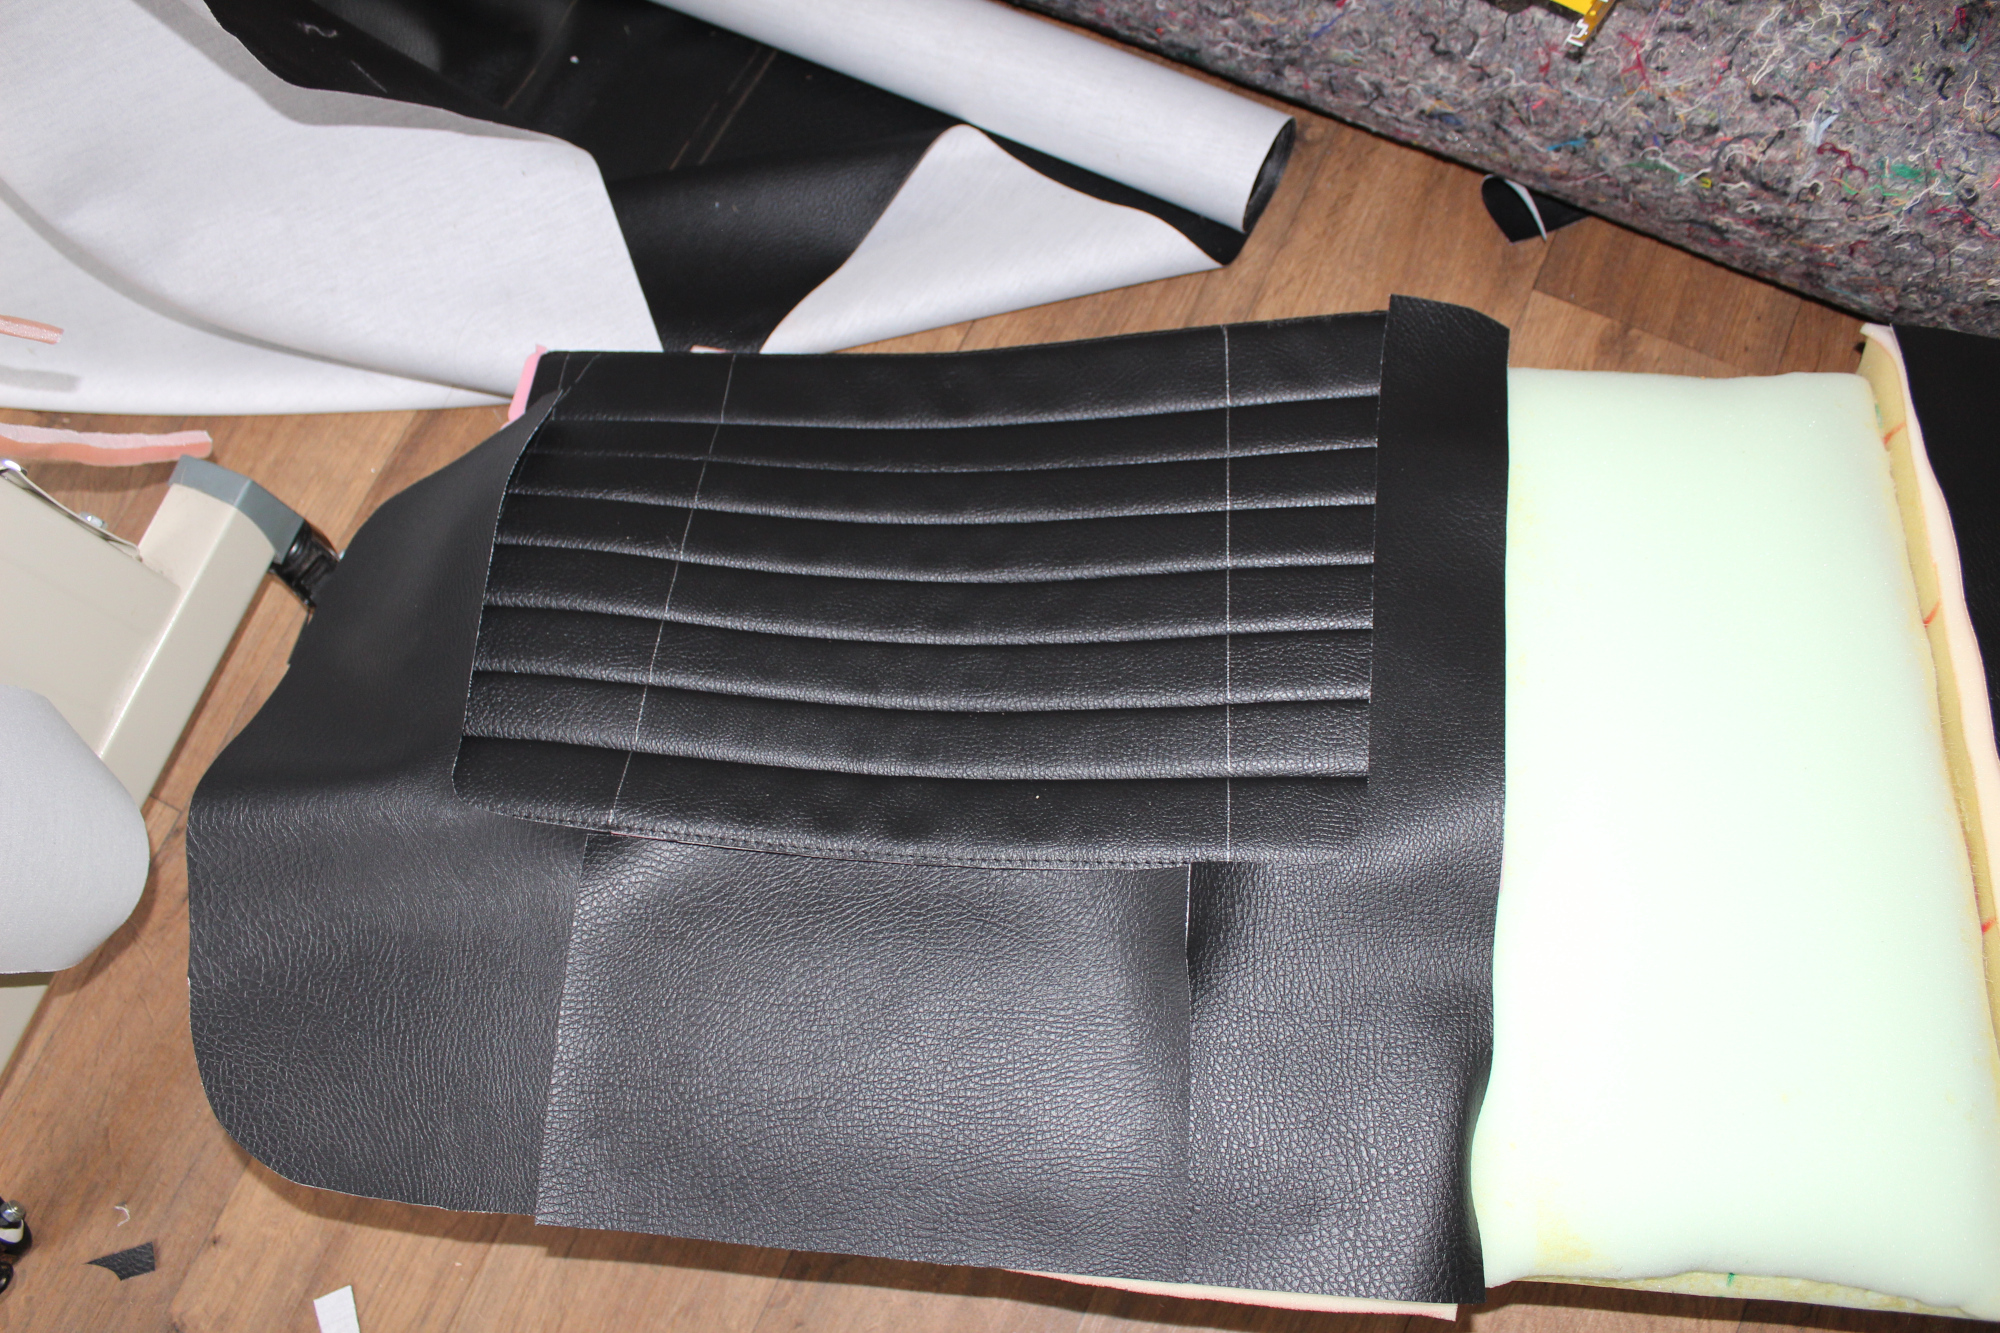
The patterning process:
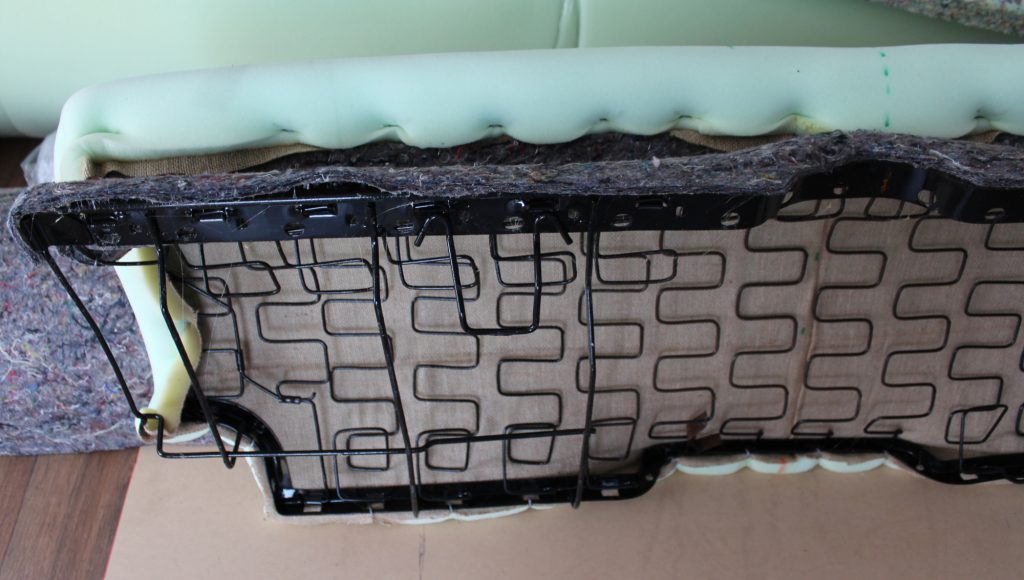
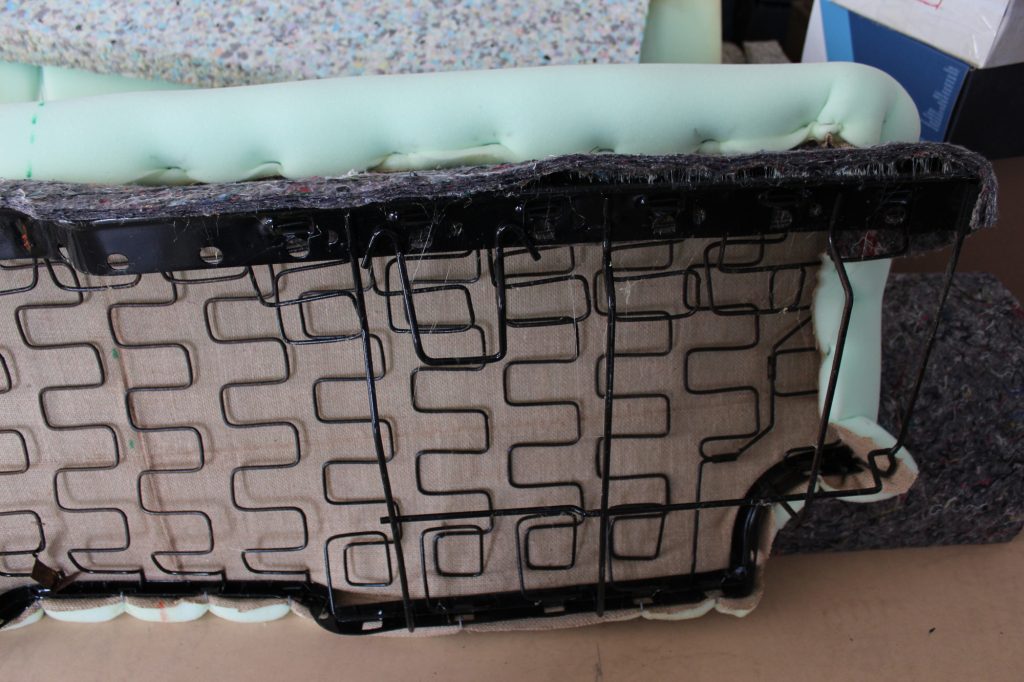
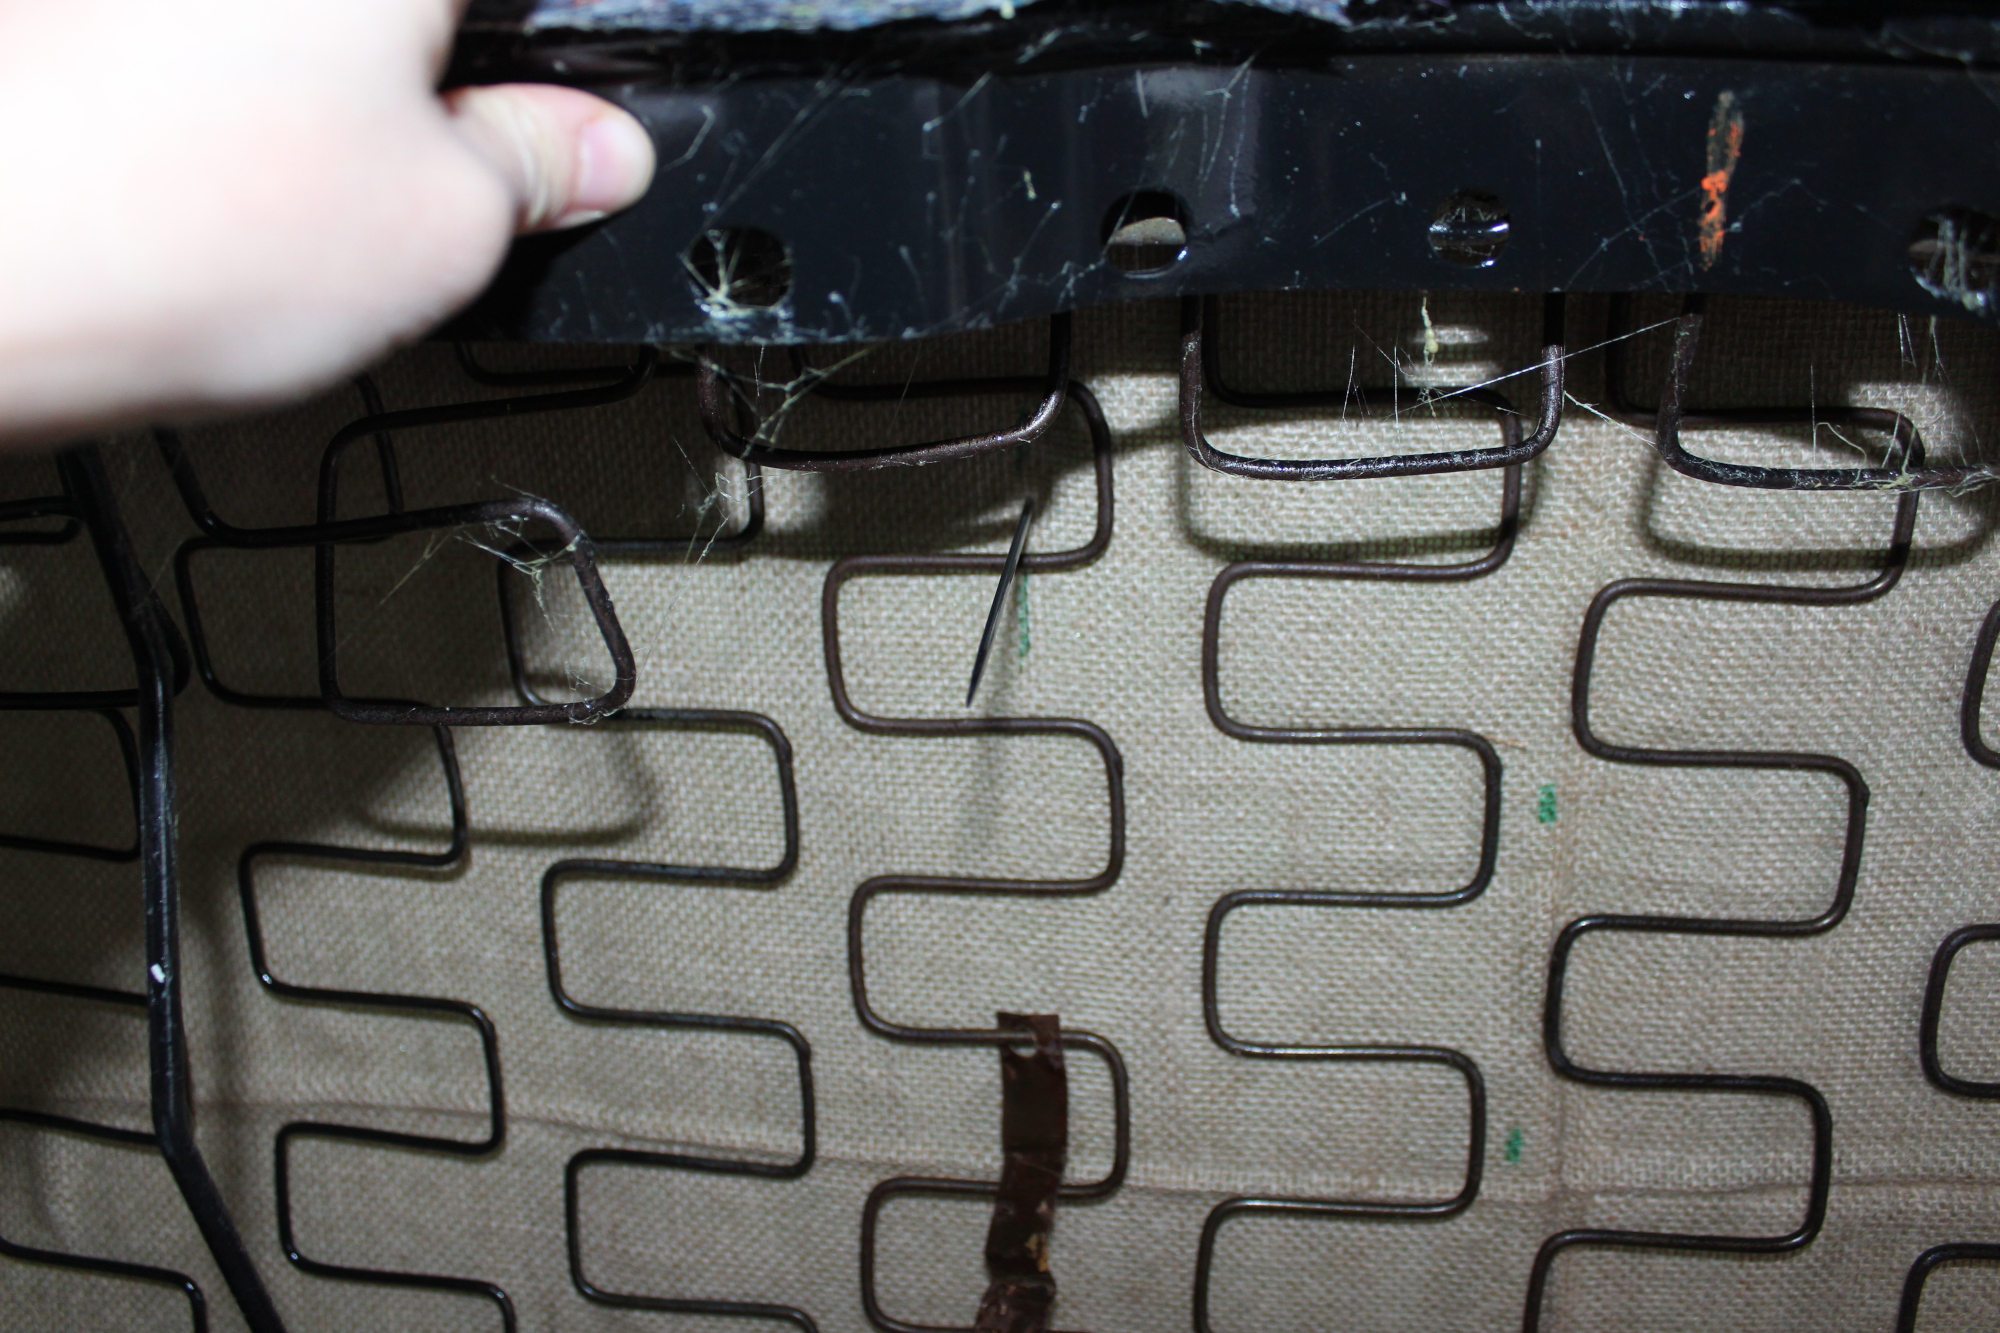
The back seat frames start out being blasted and painted. Luckily no broken metal or spring has been found!
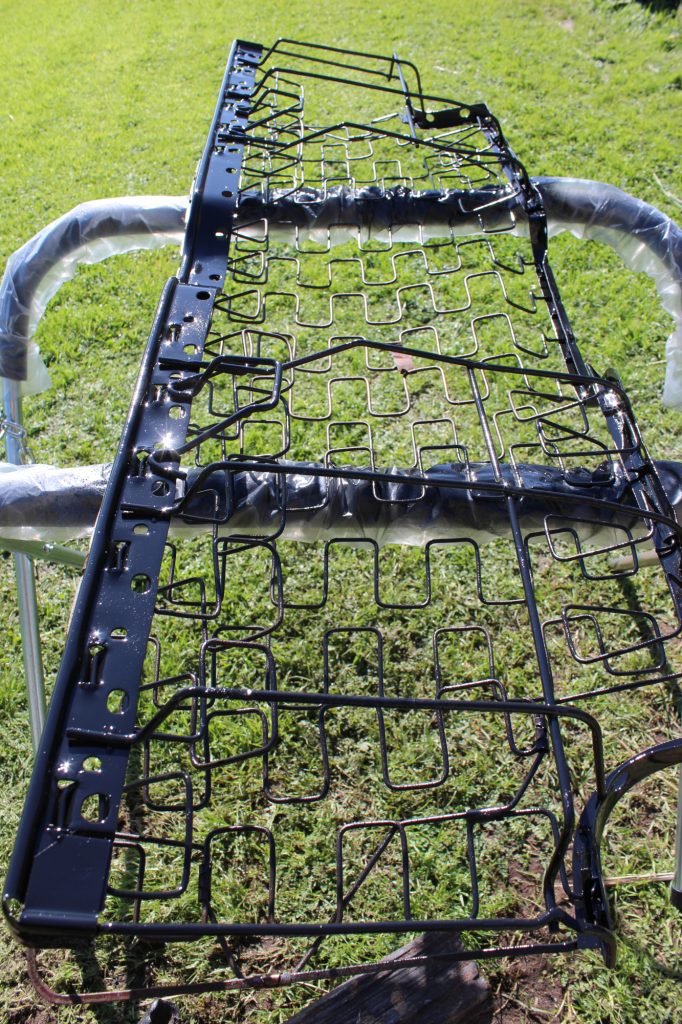
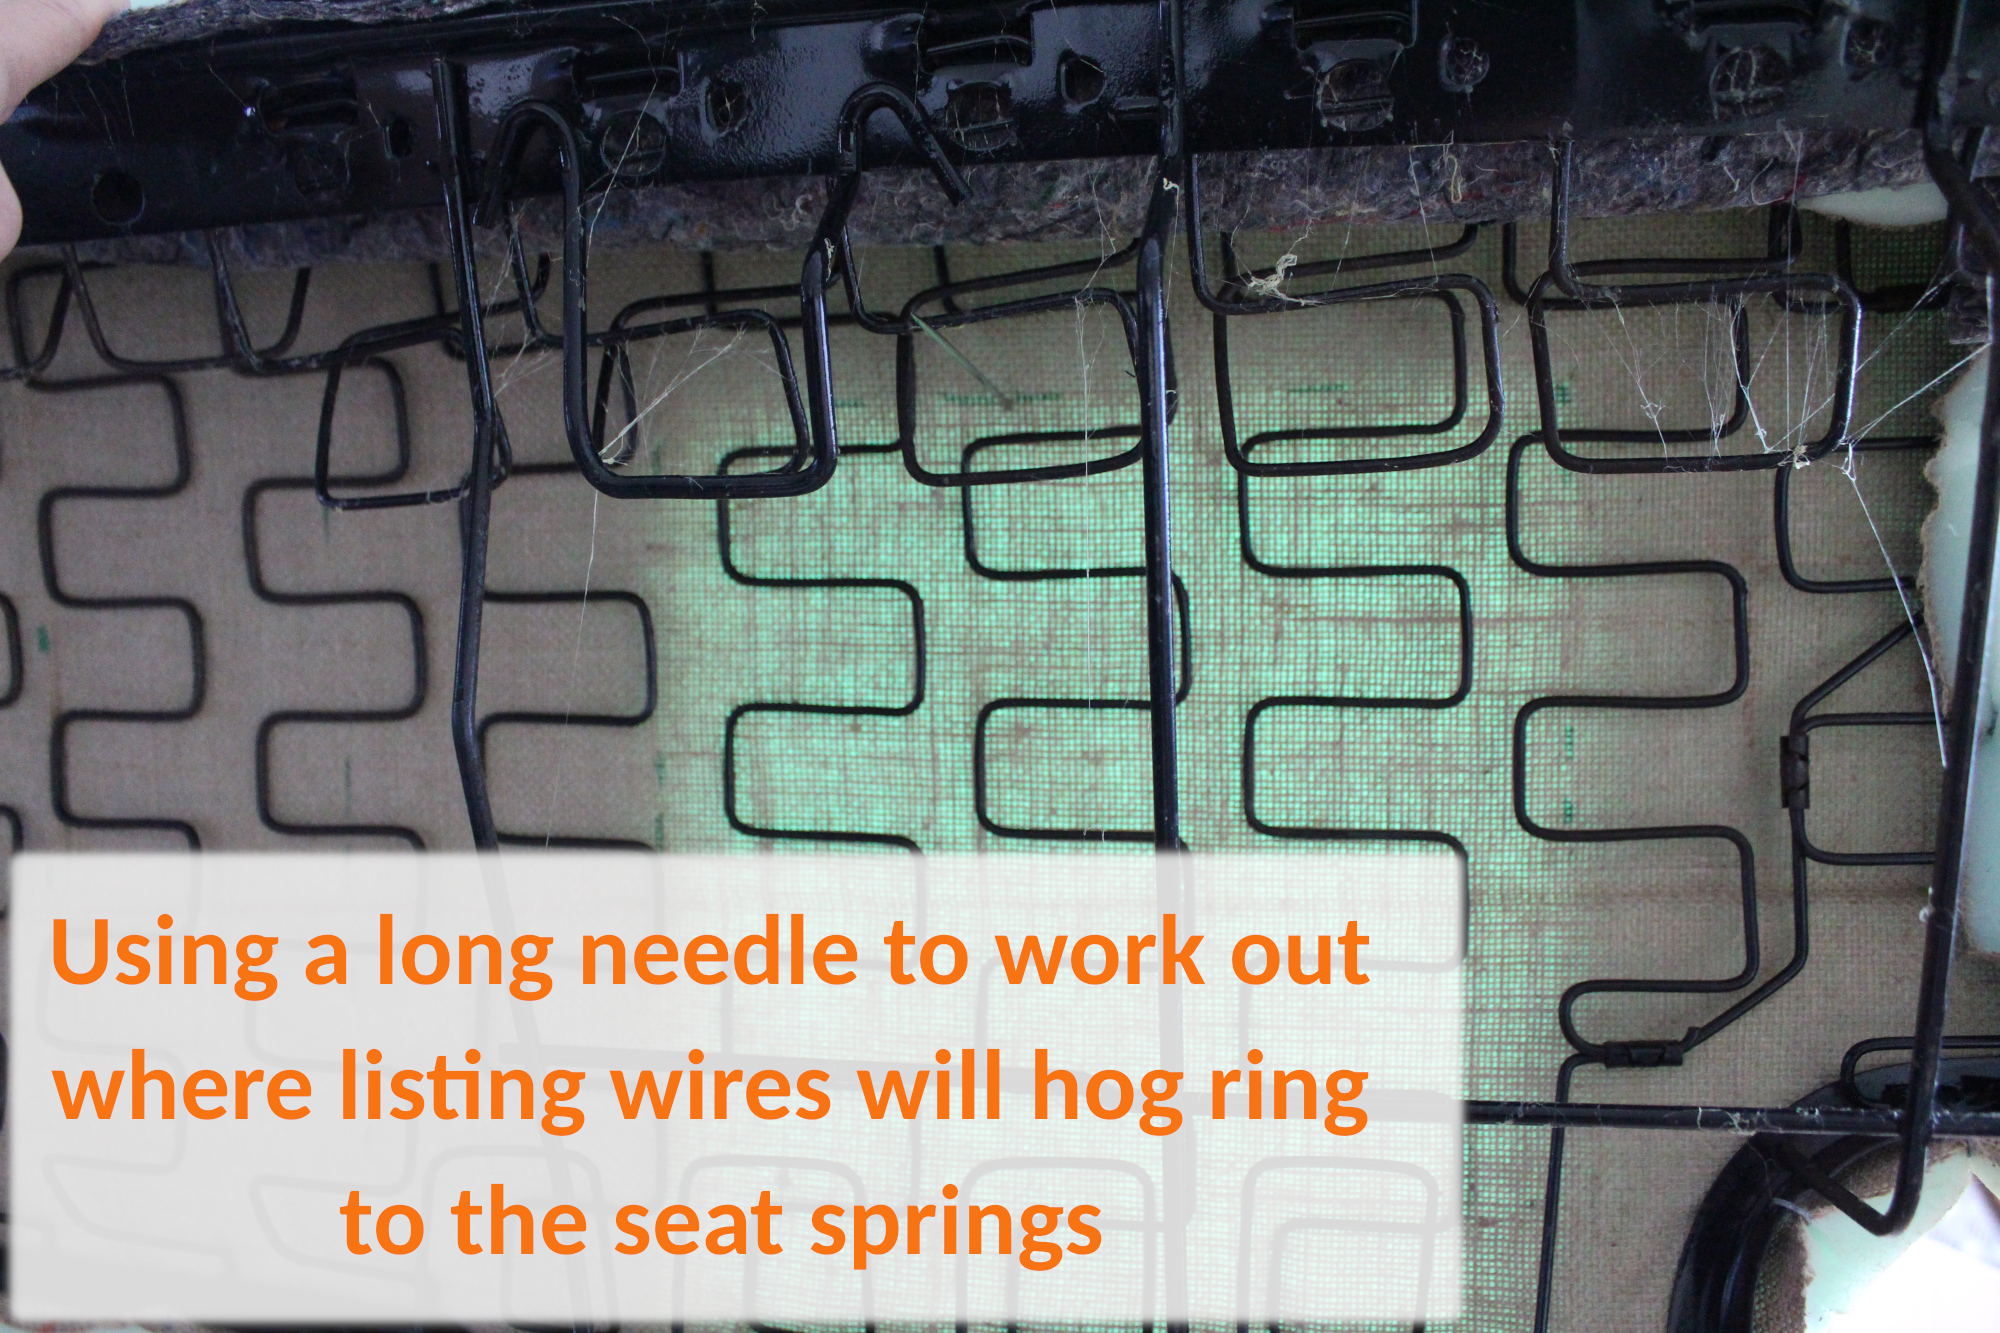
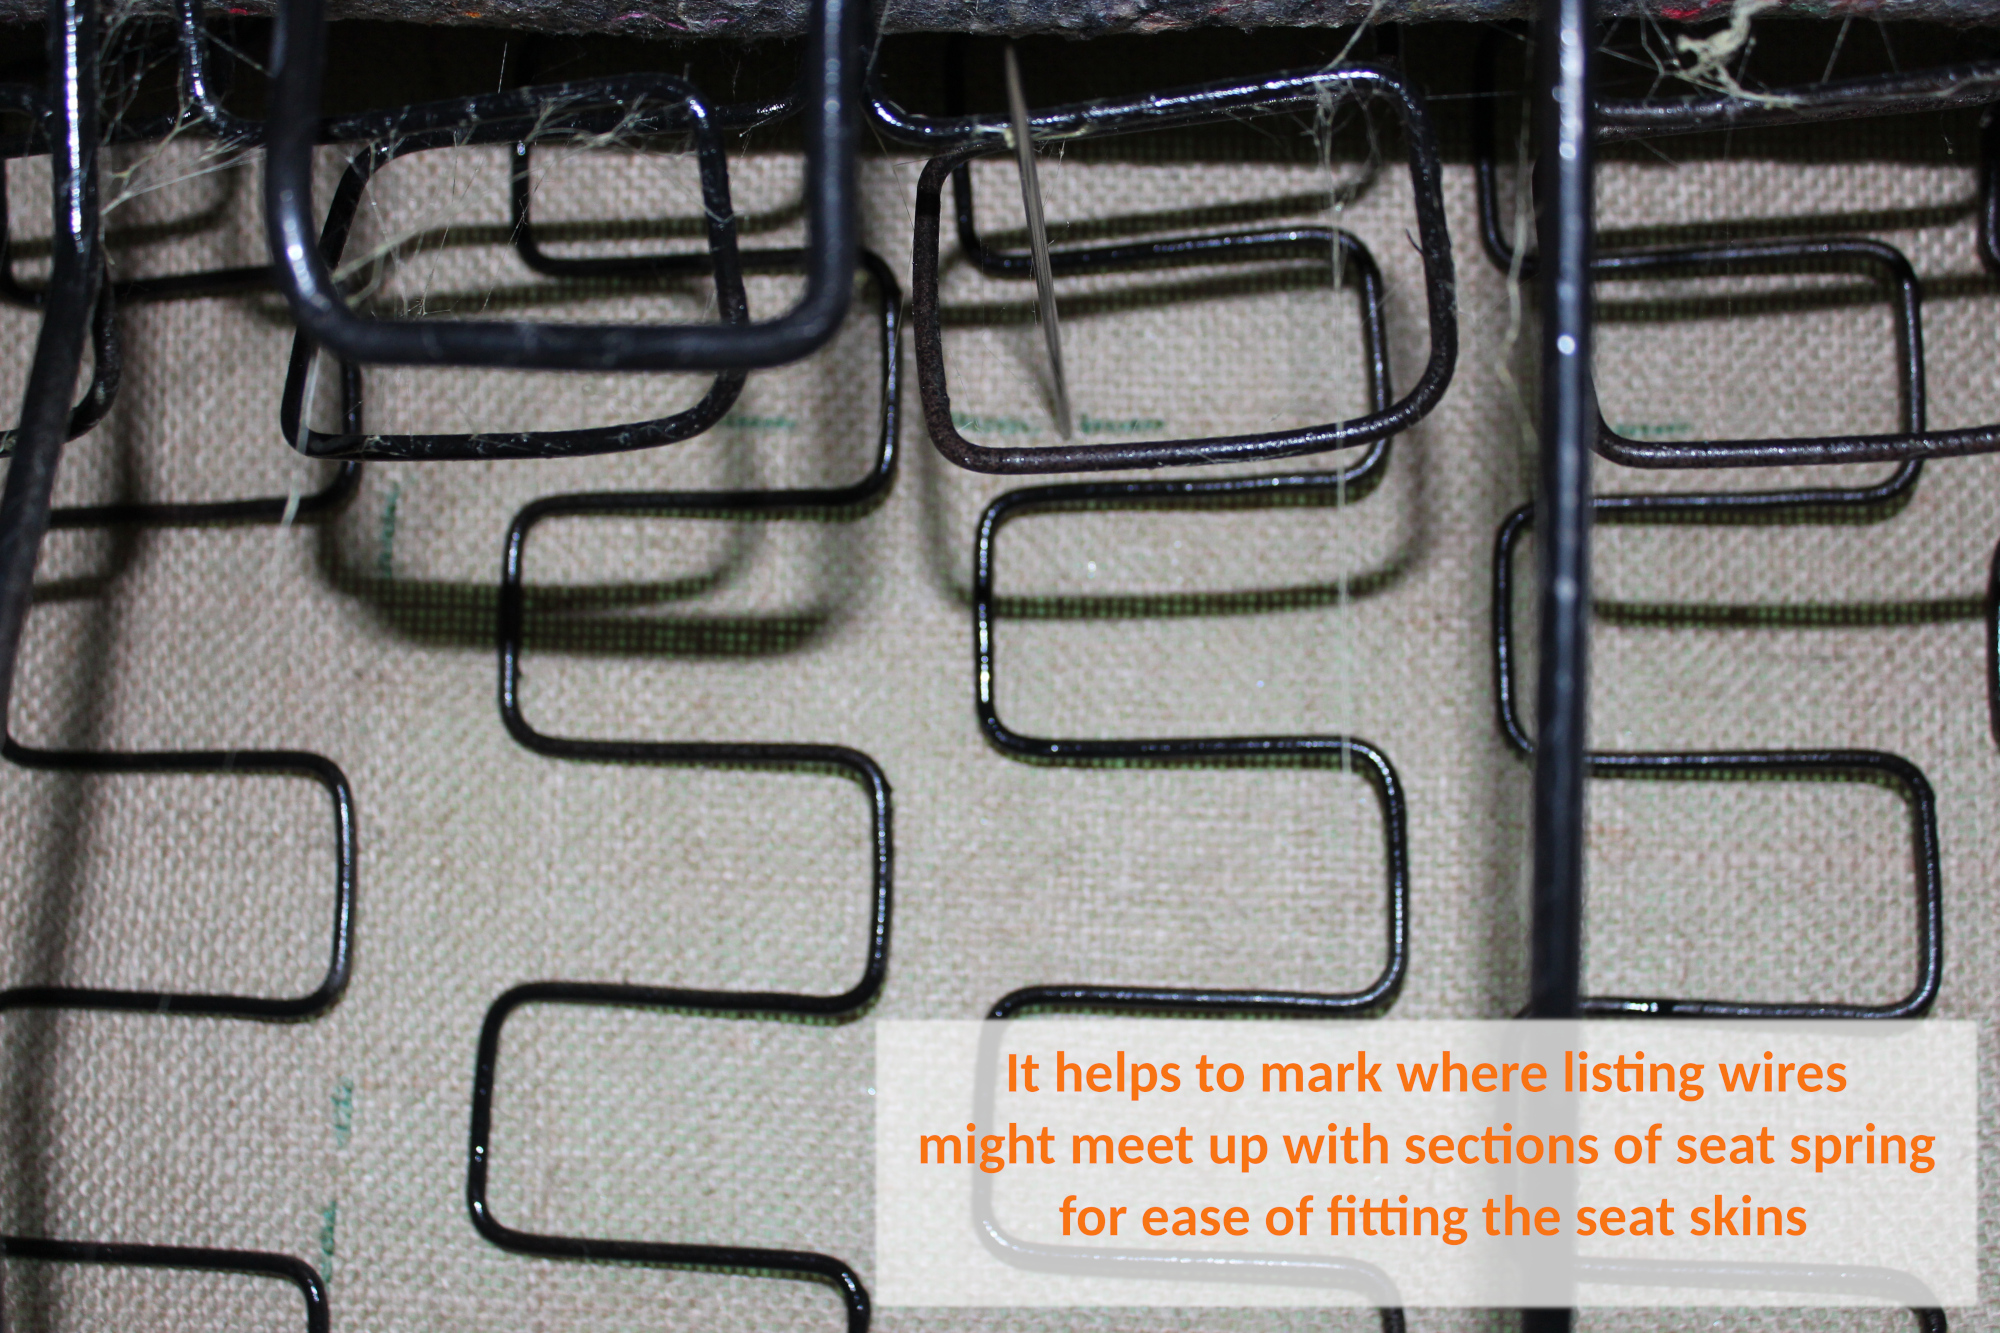
Then it’s time to prep the frames. A new calico pocket is made for housing the two wires and this gets hog ringed to the top of the back rest frame. A strip of underlay felt is glued to the bottom frame so to protect the new seat skin.
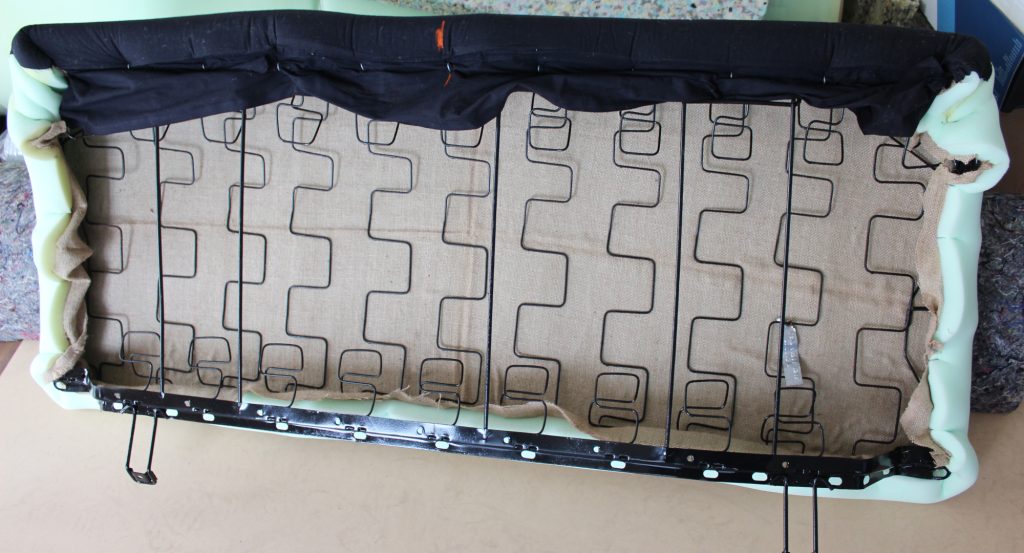
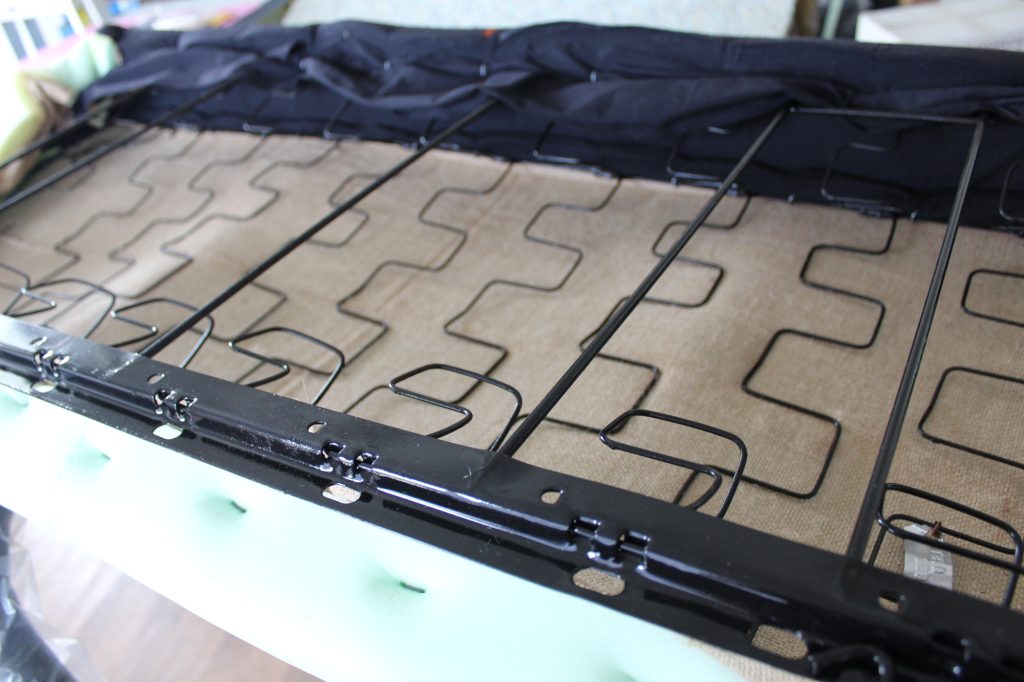
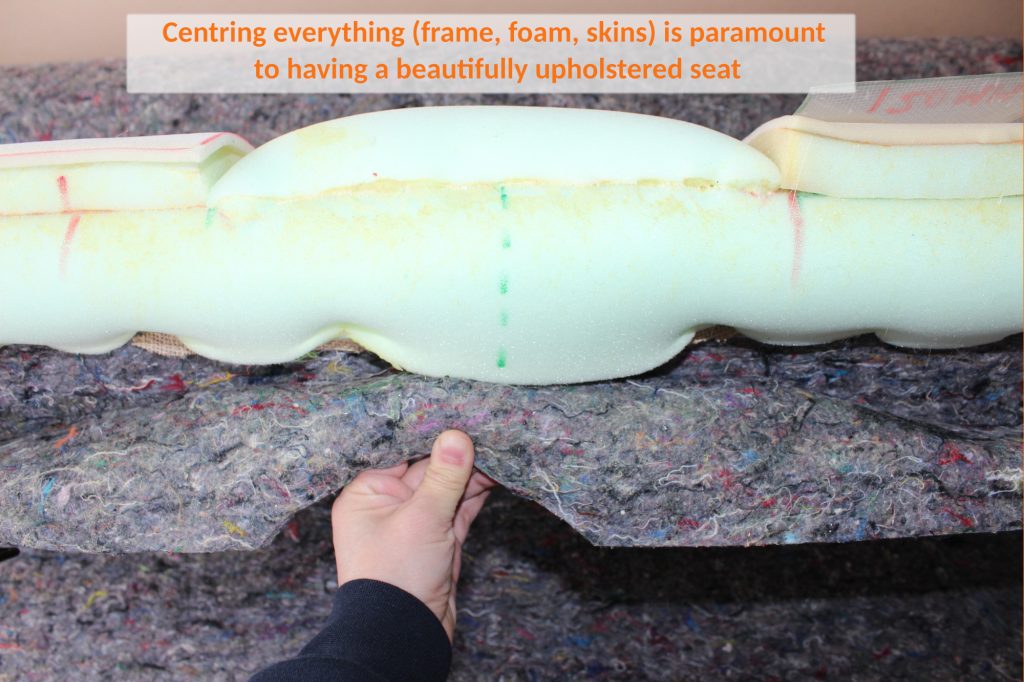
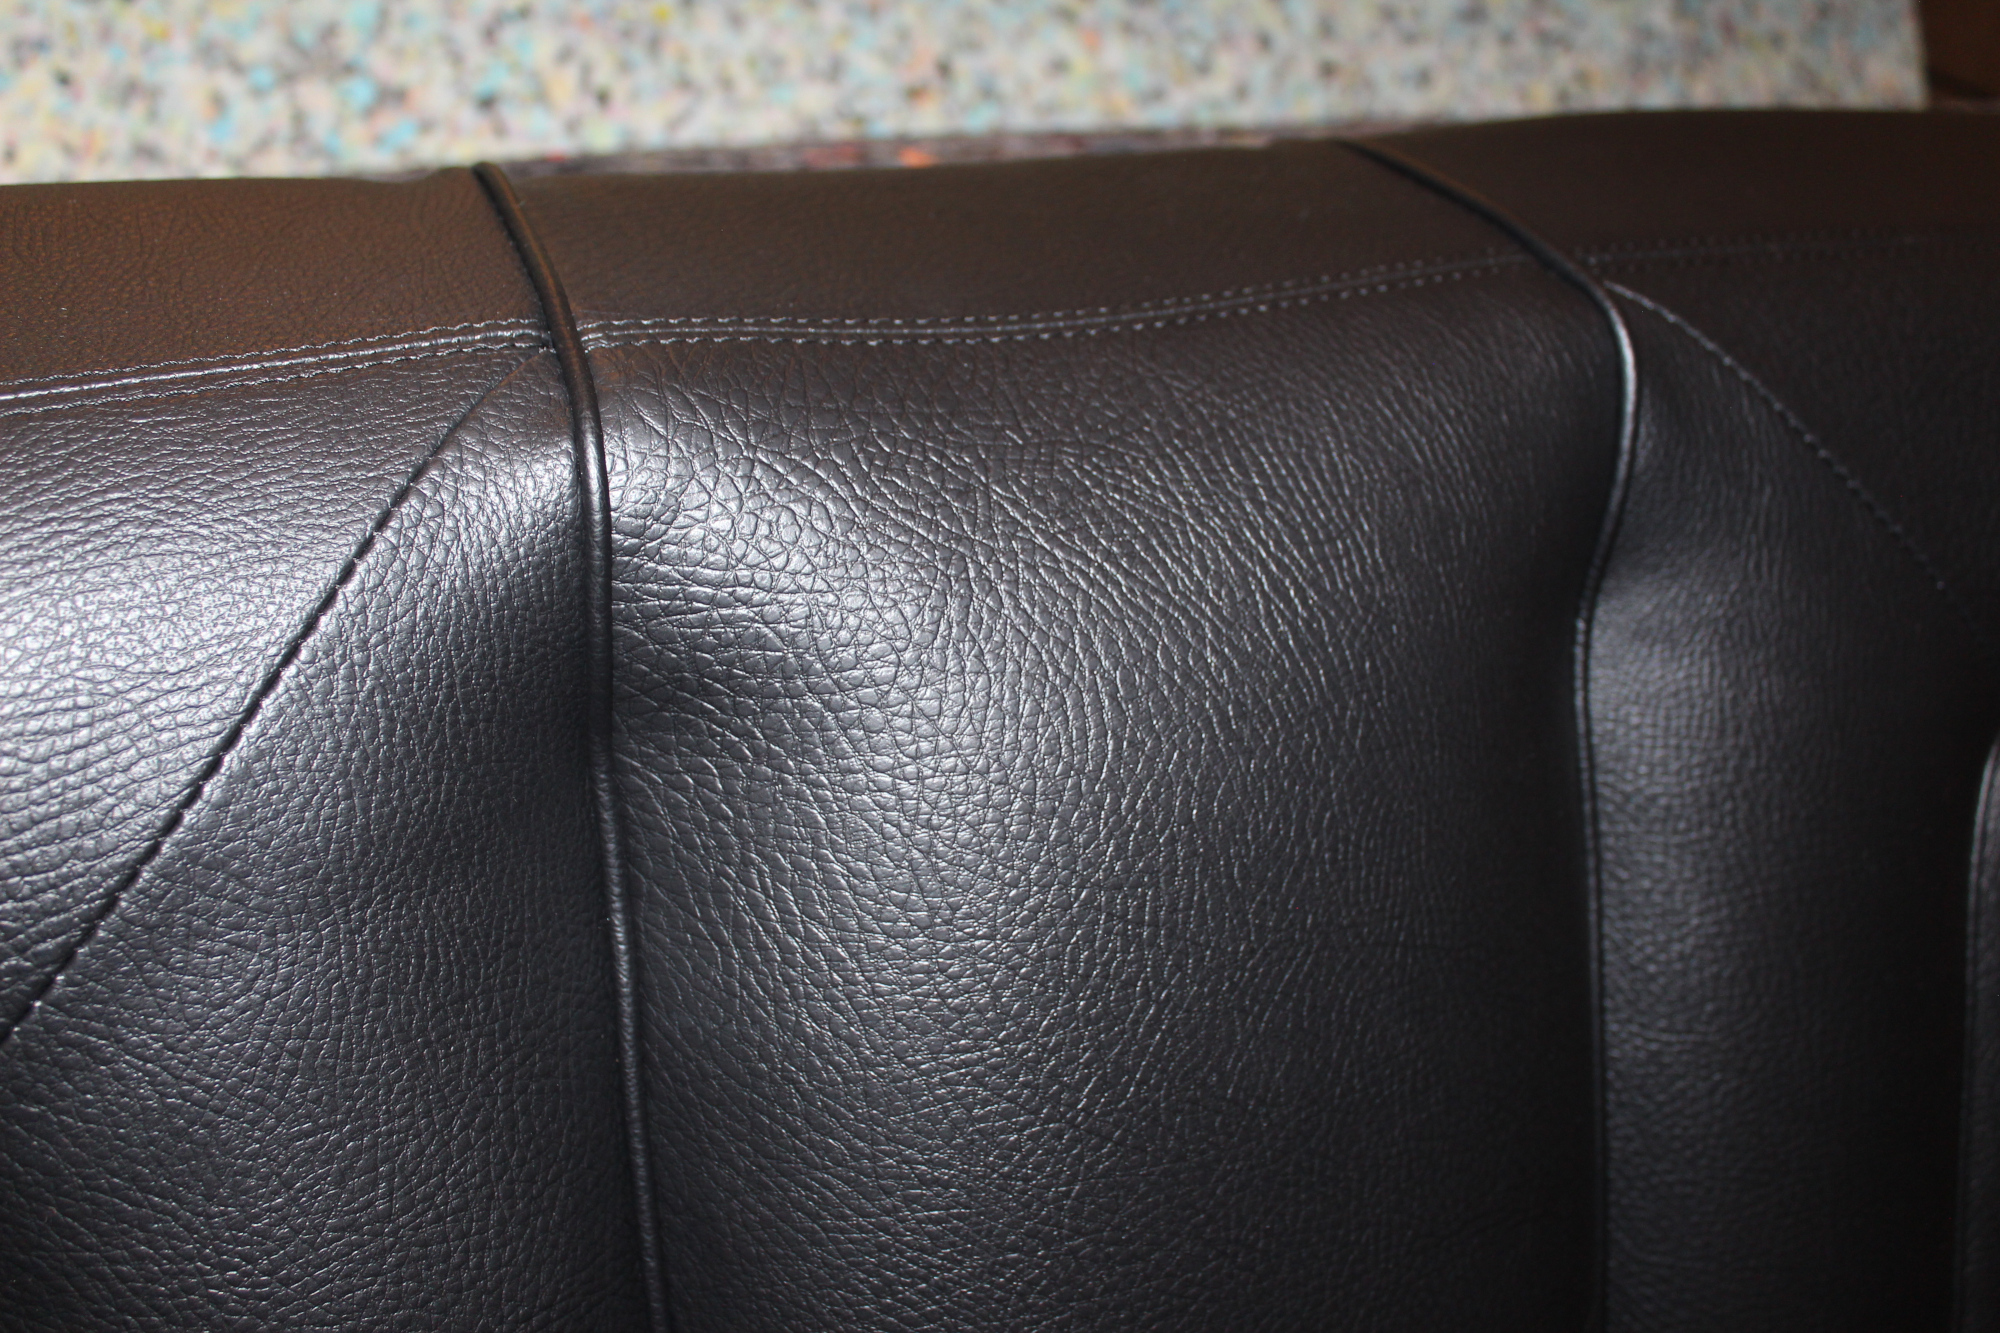
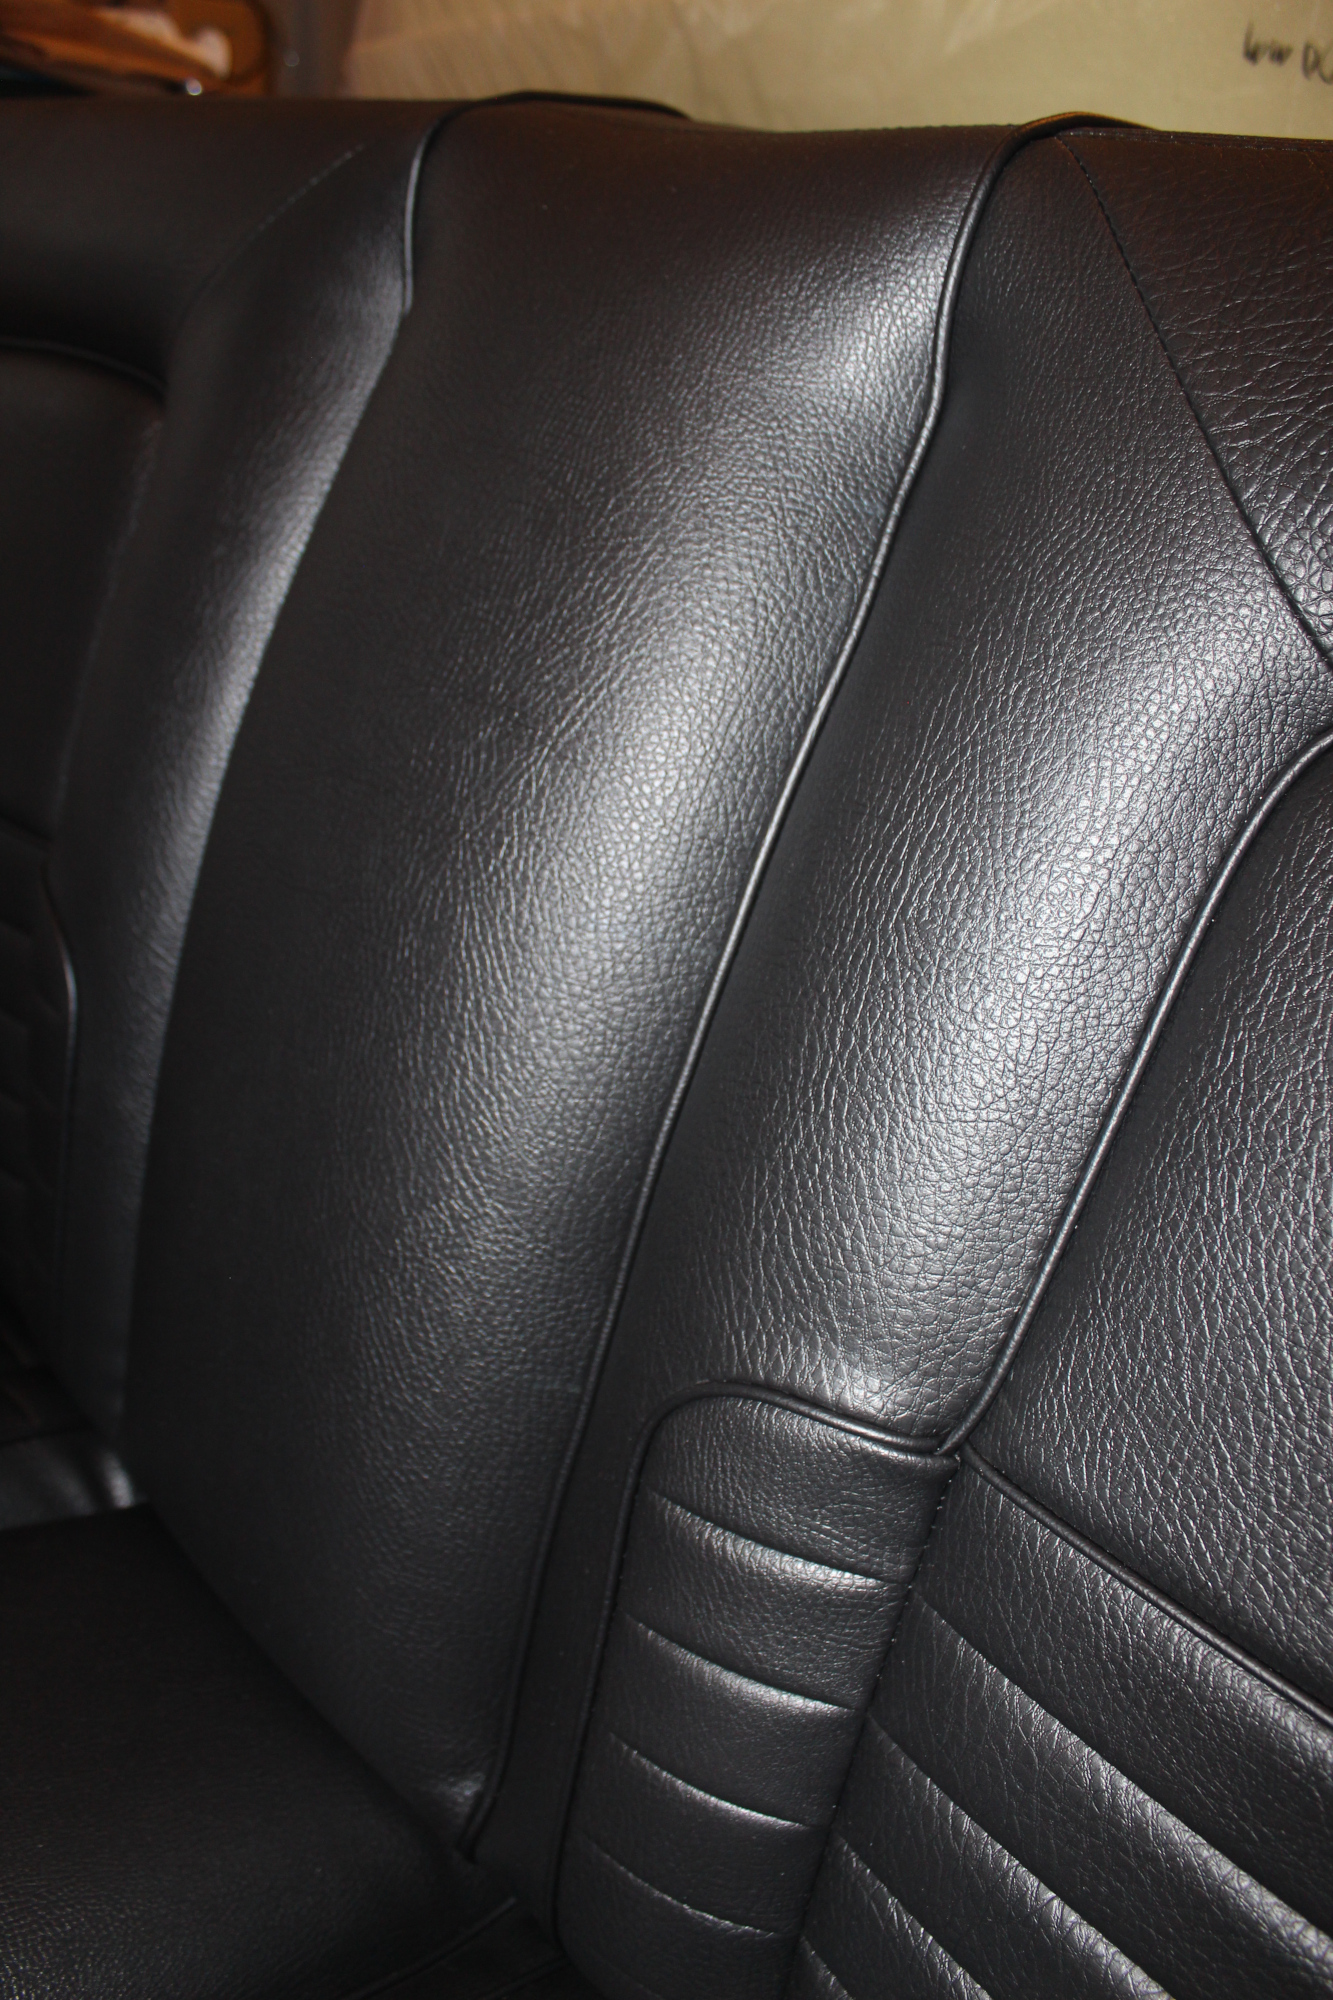
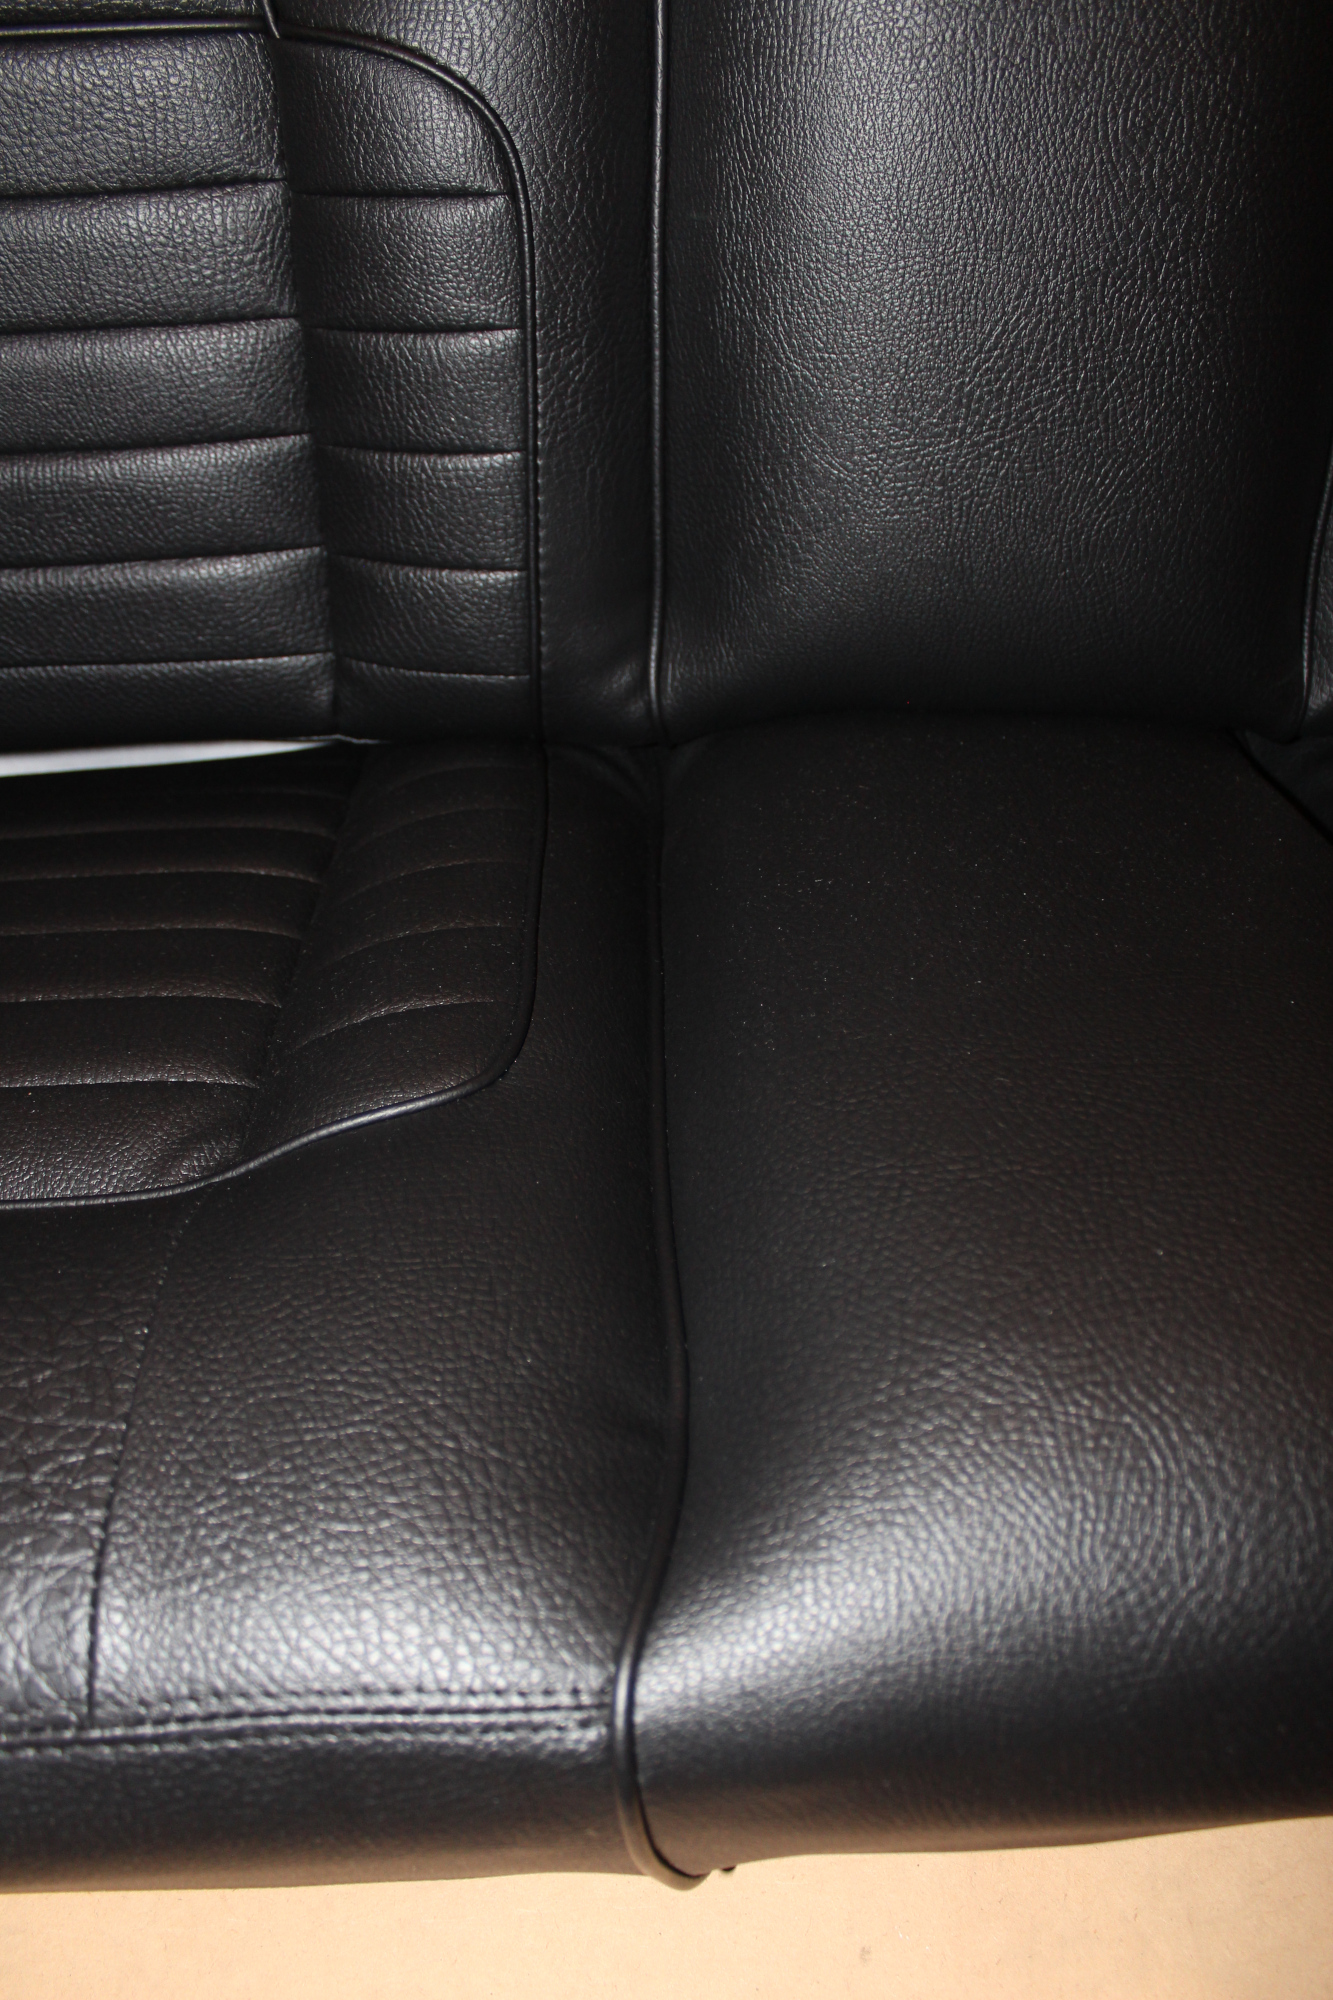
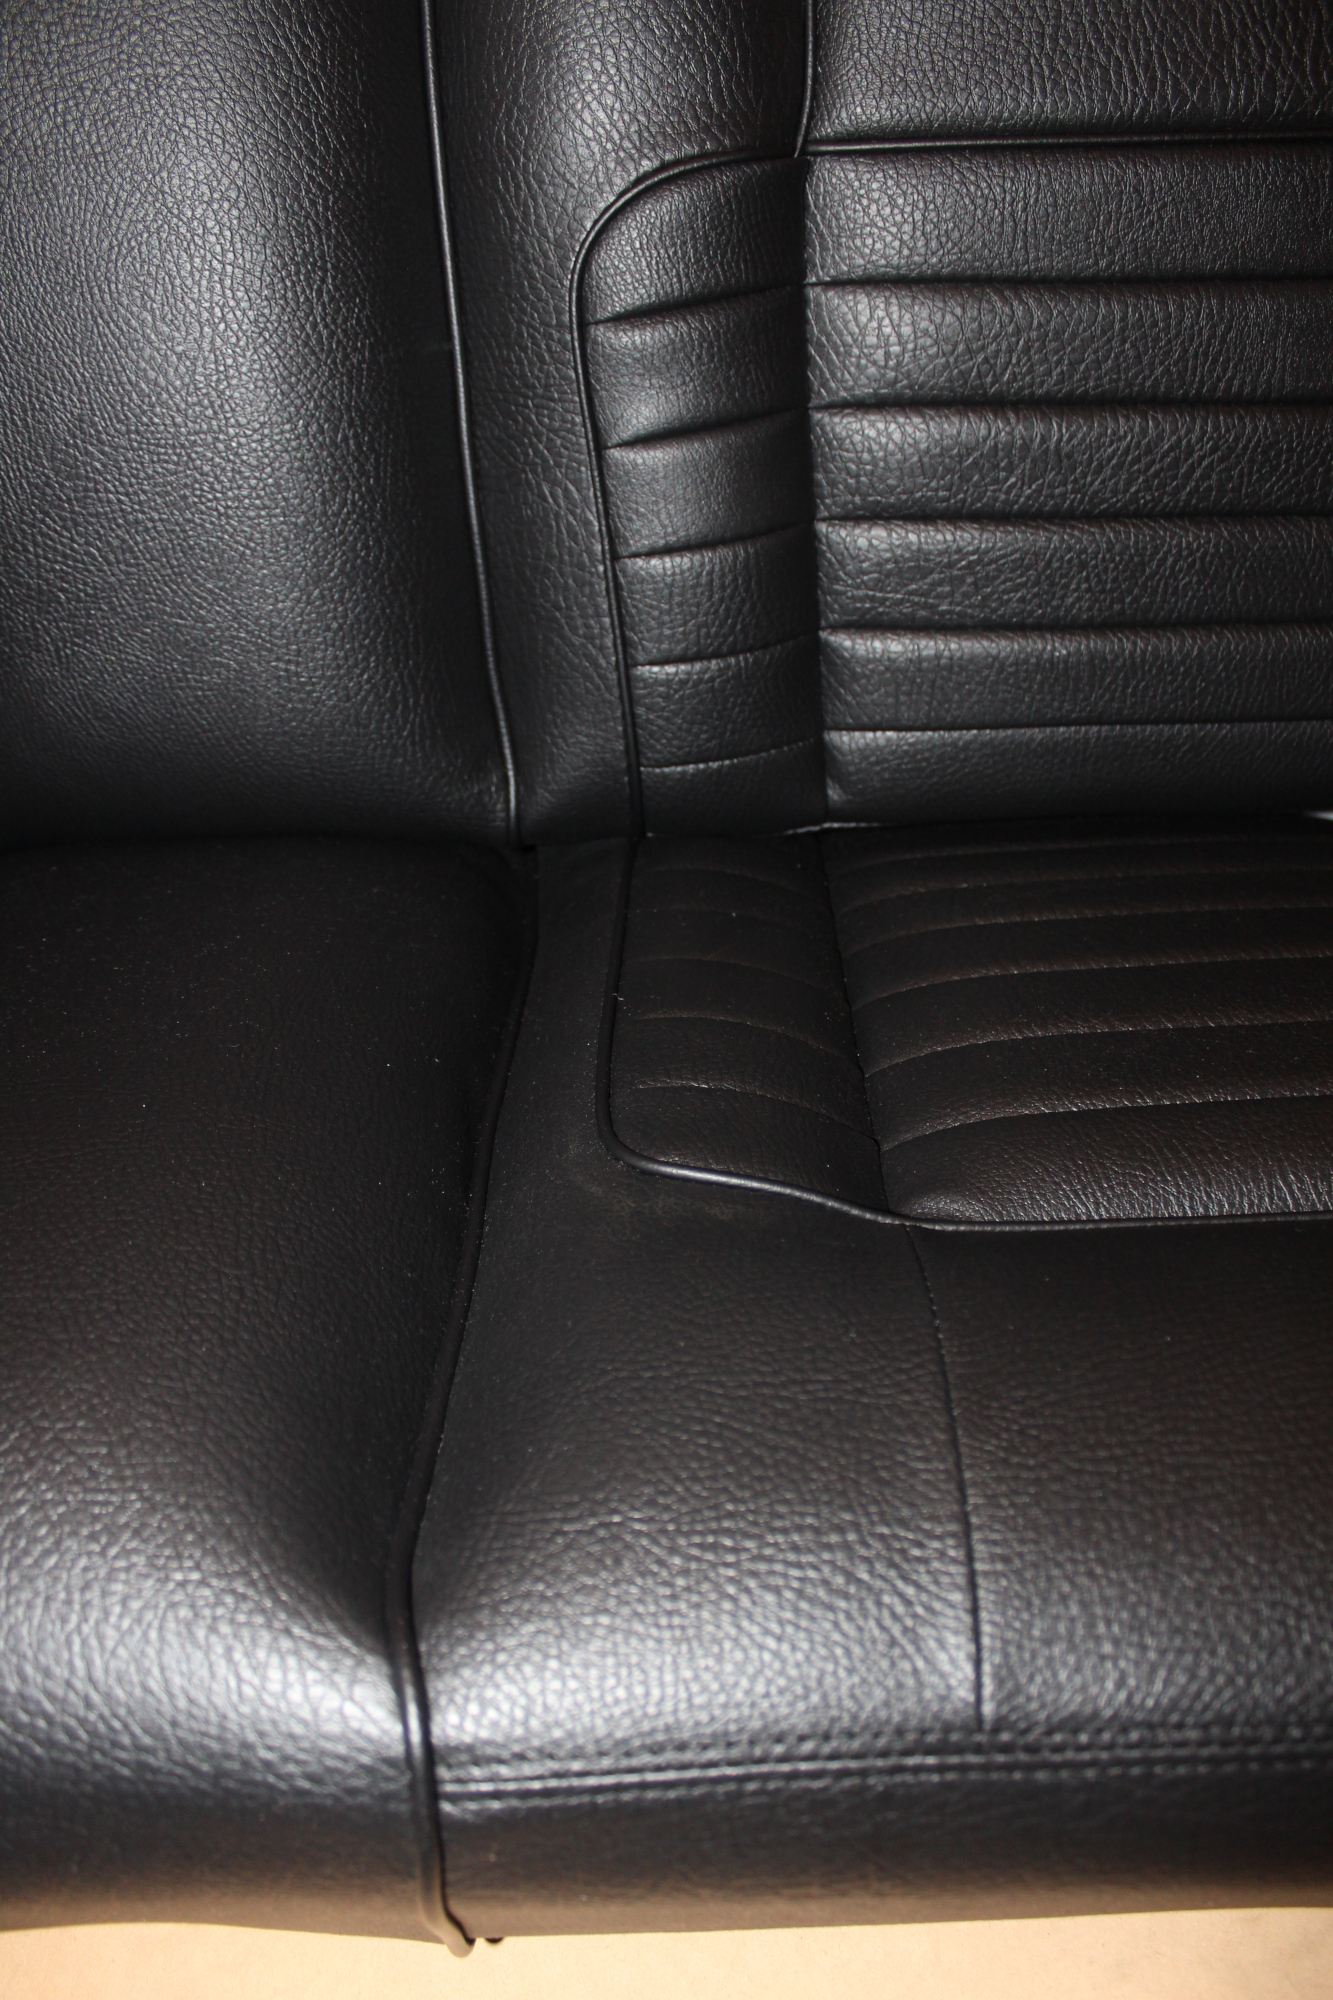
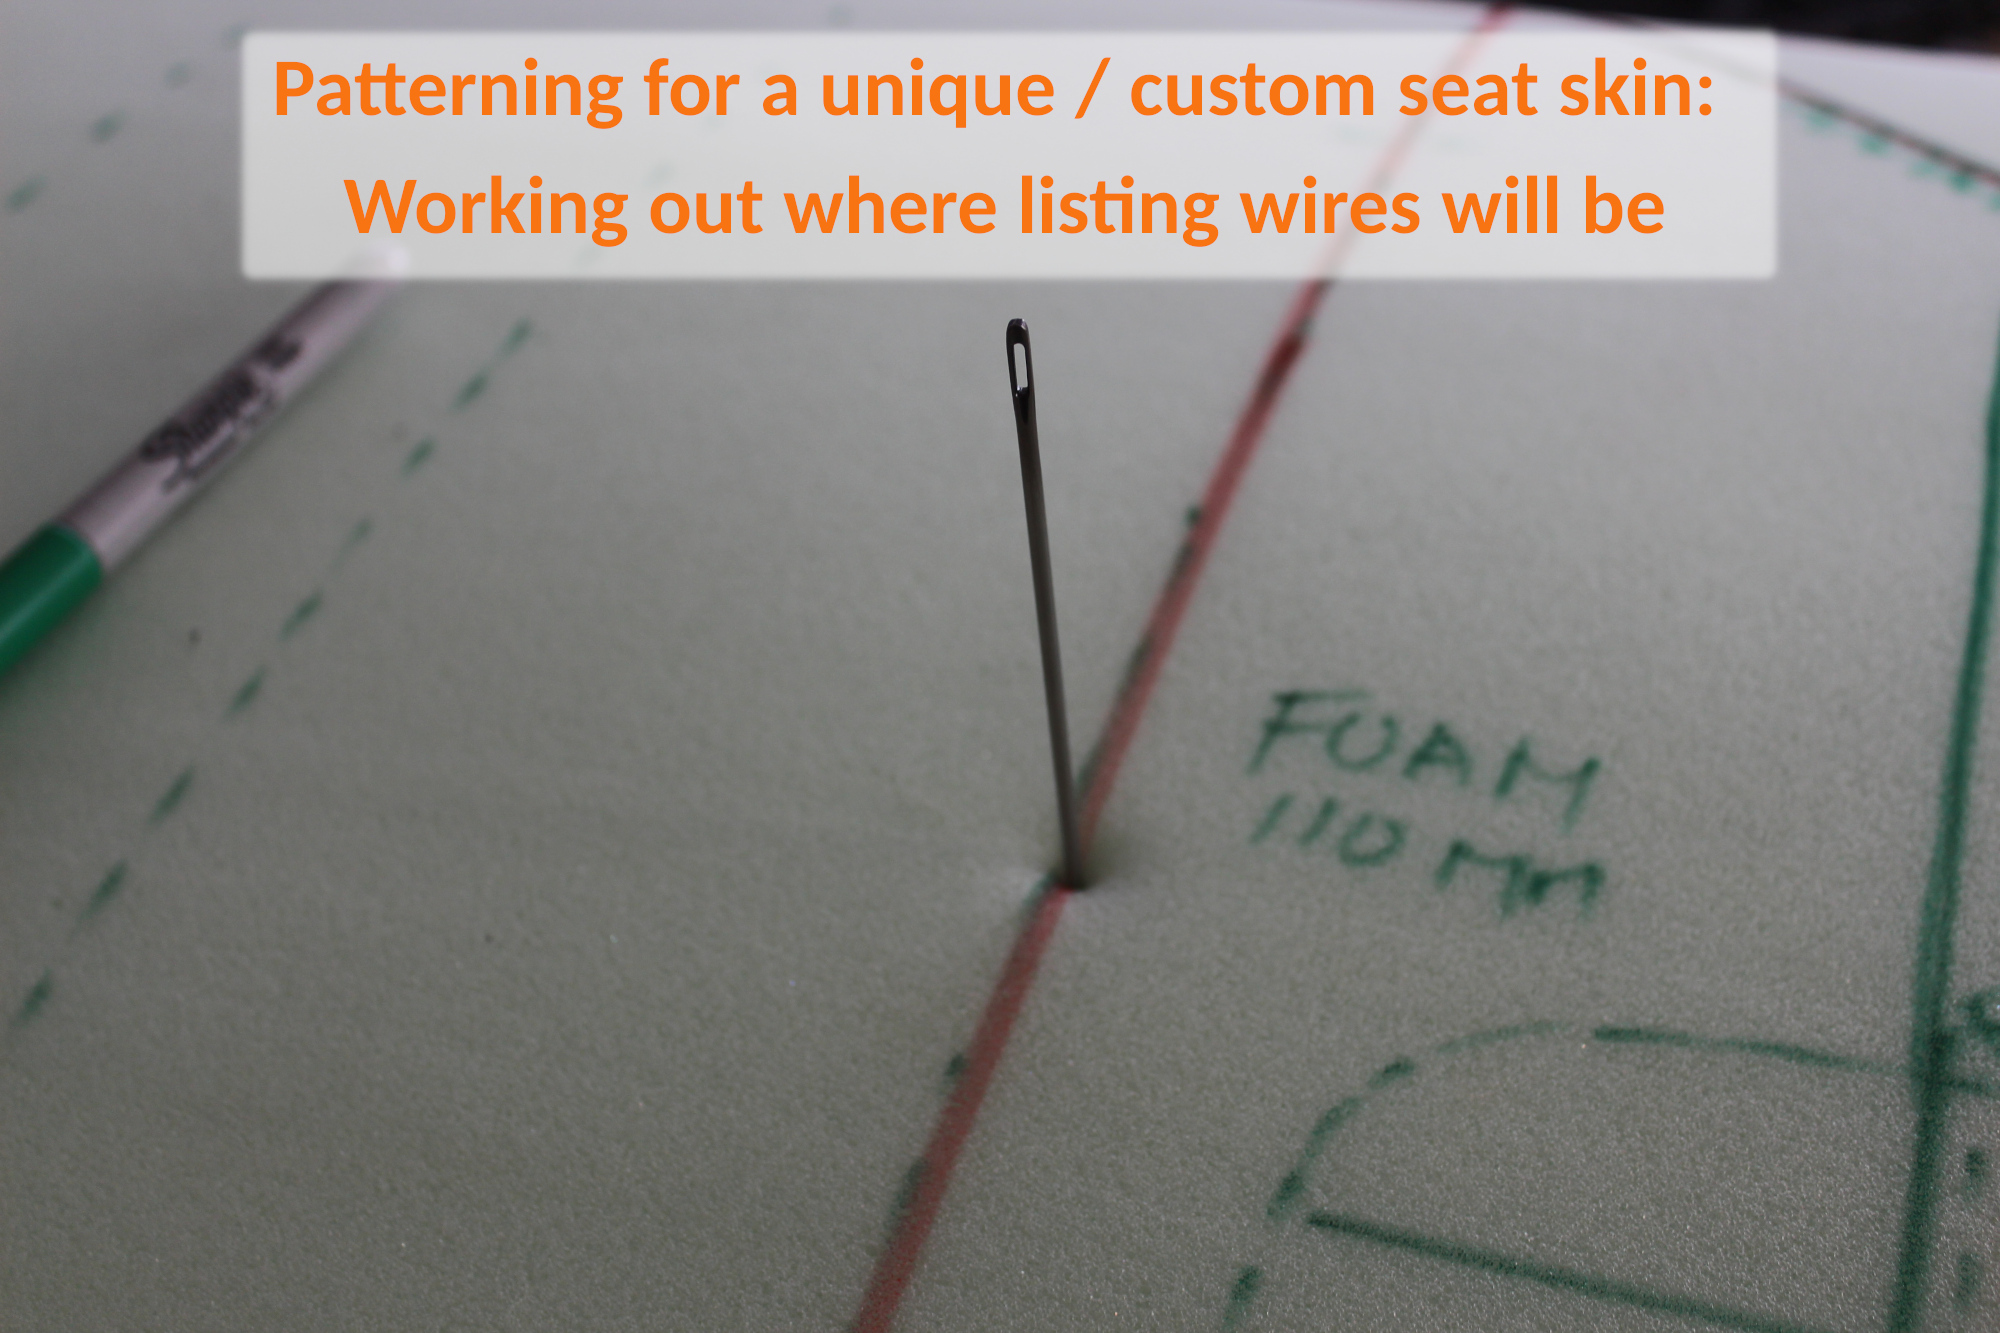
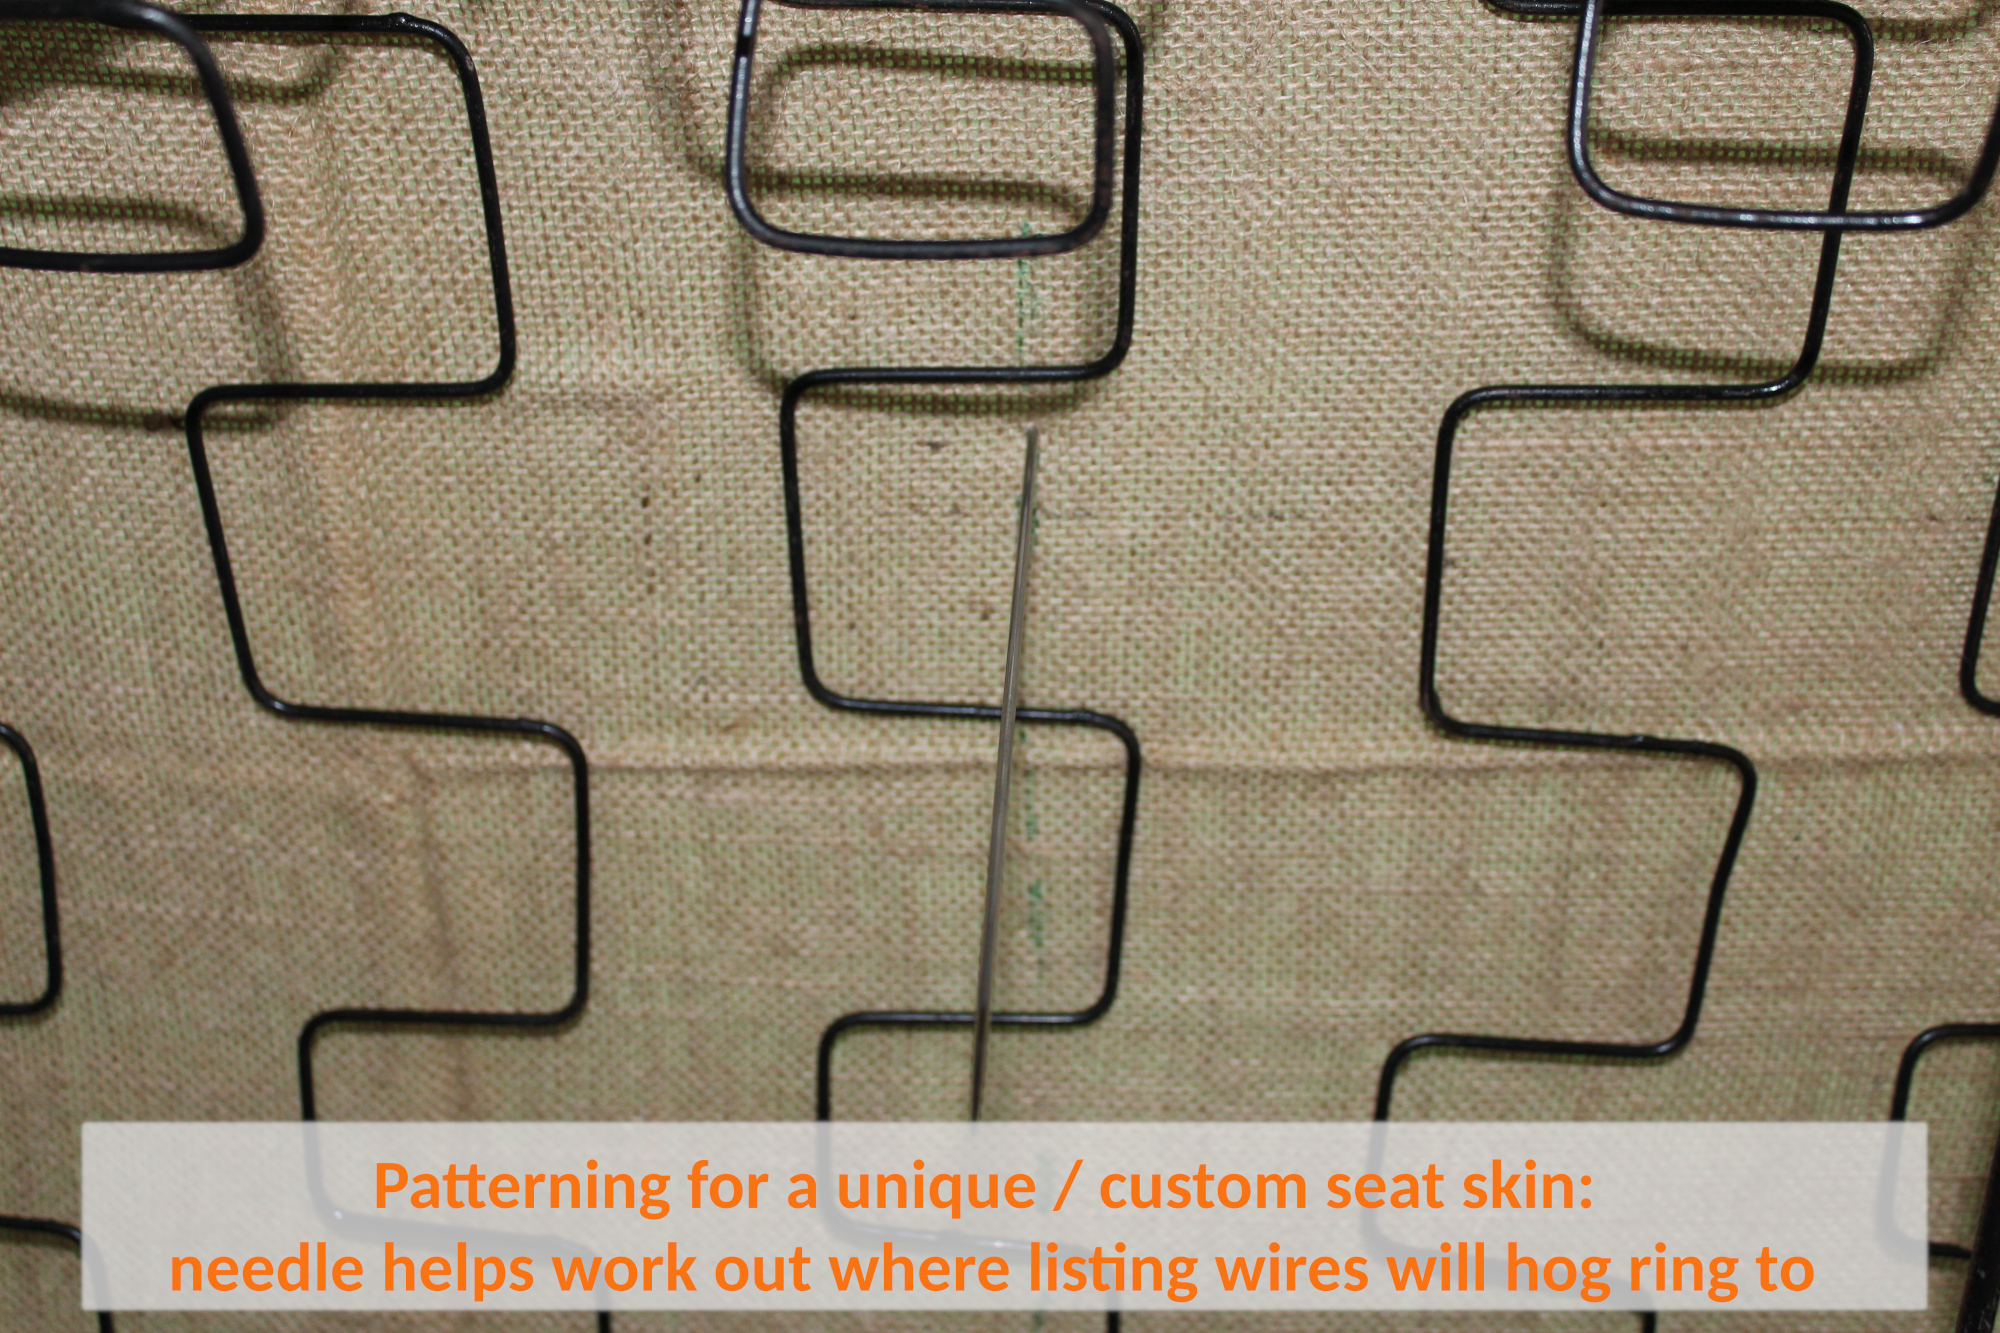
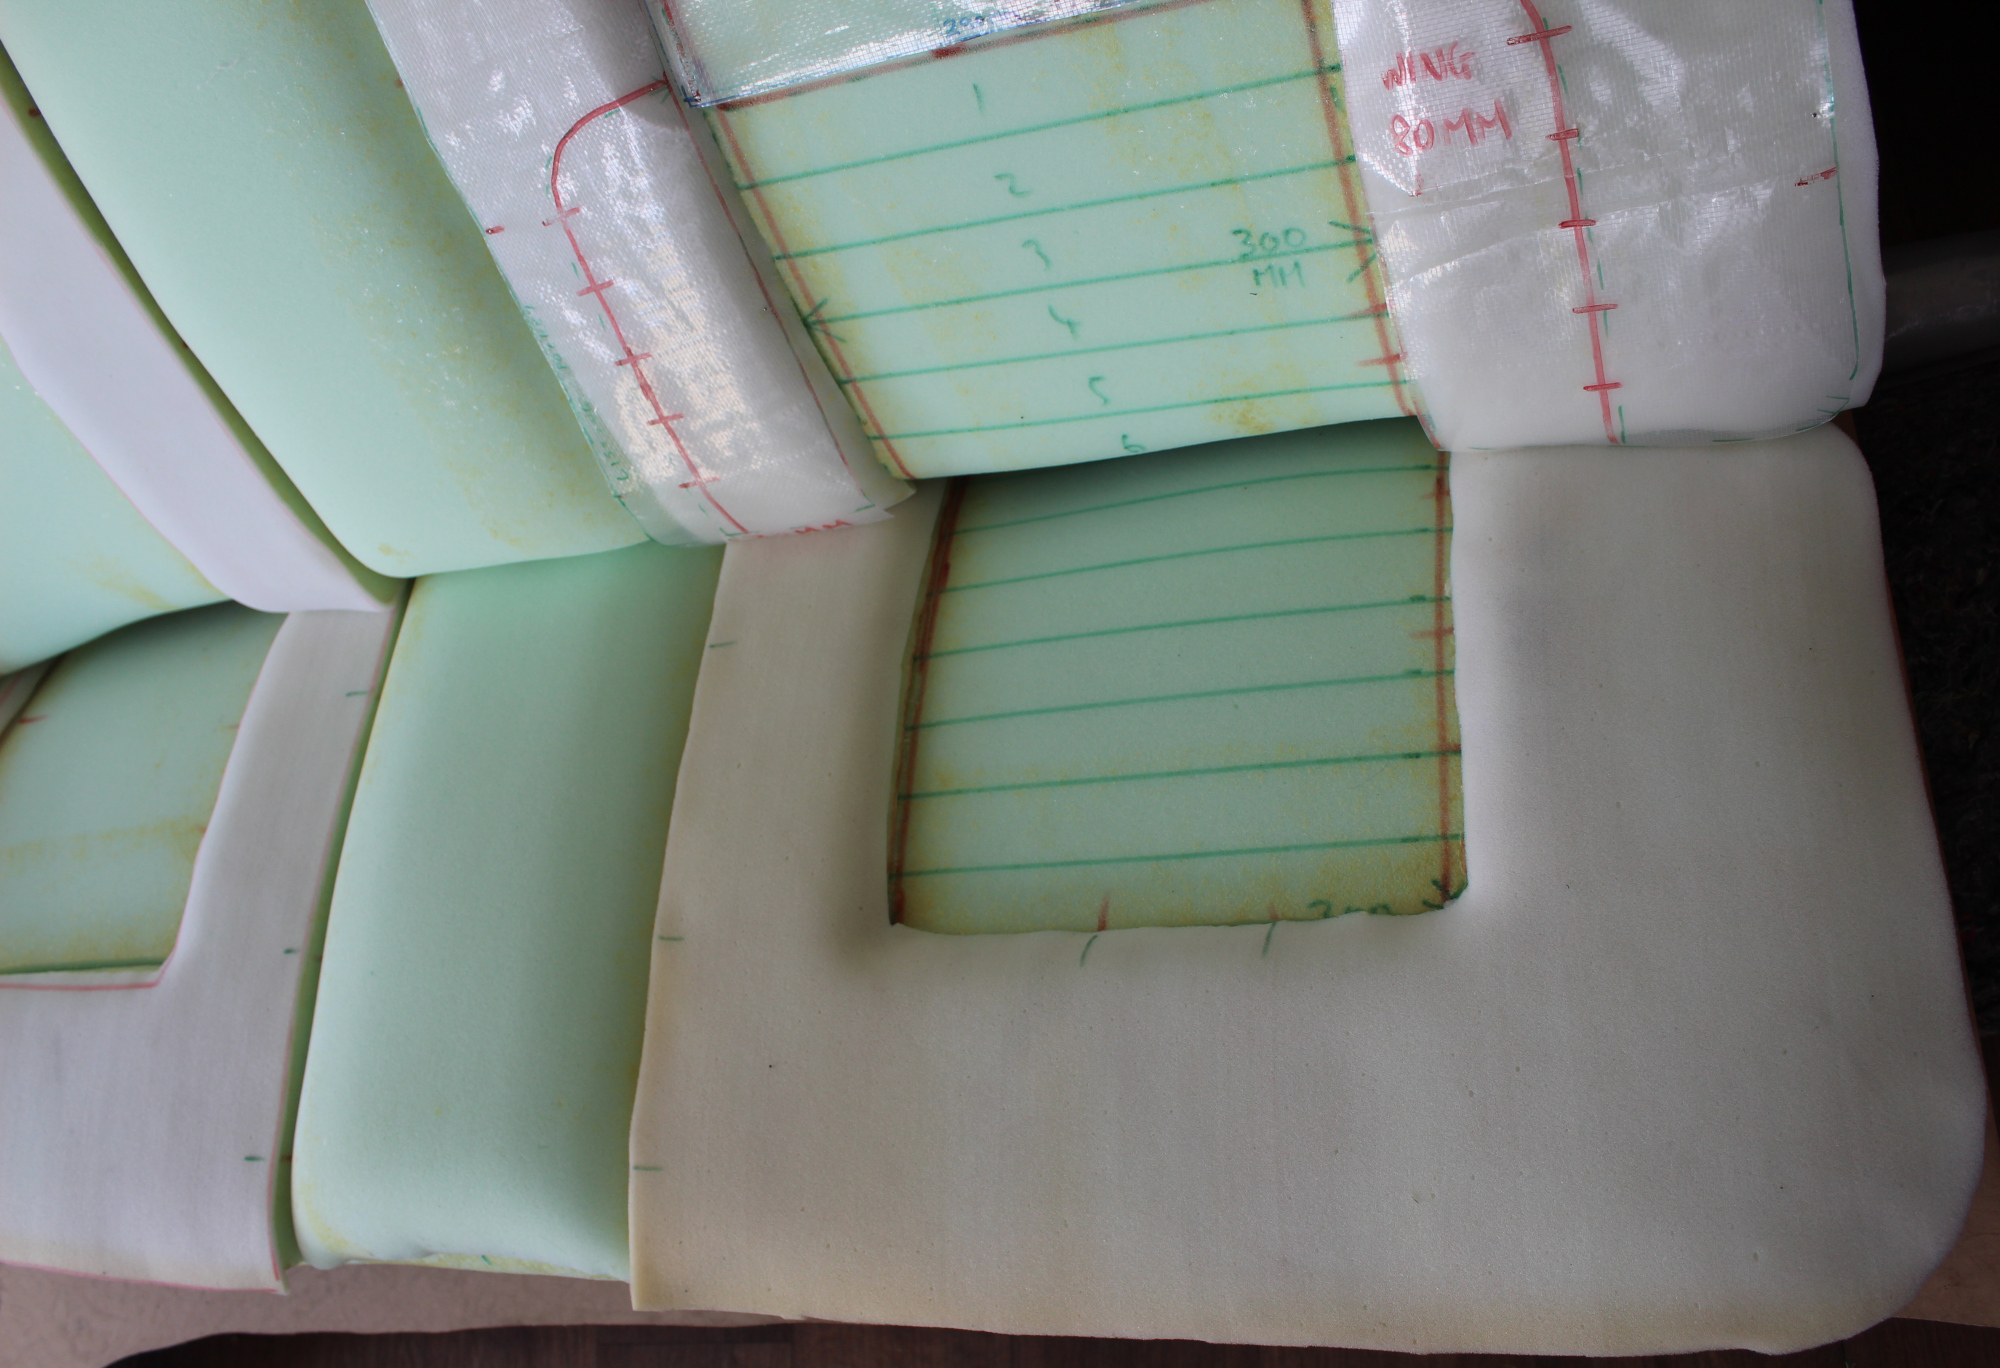
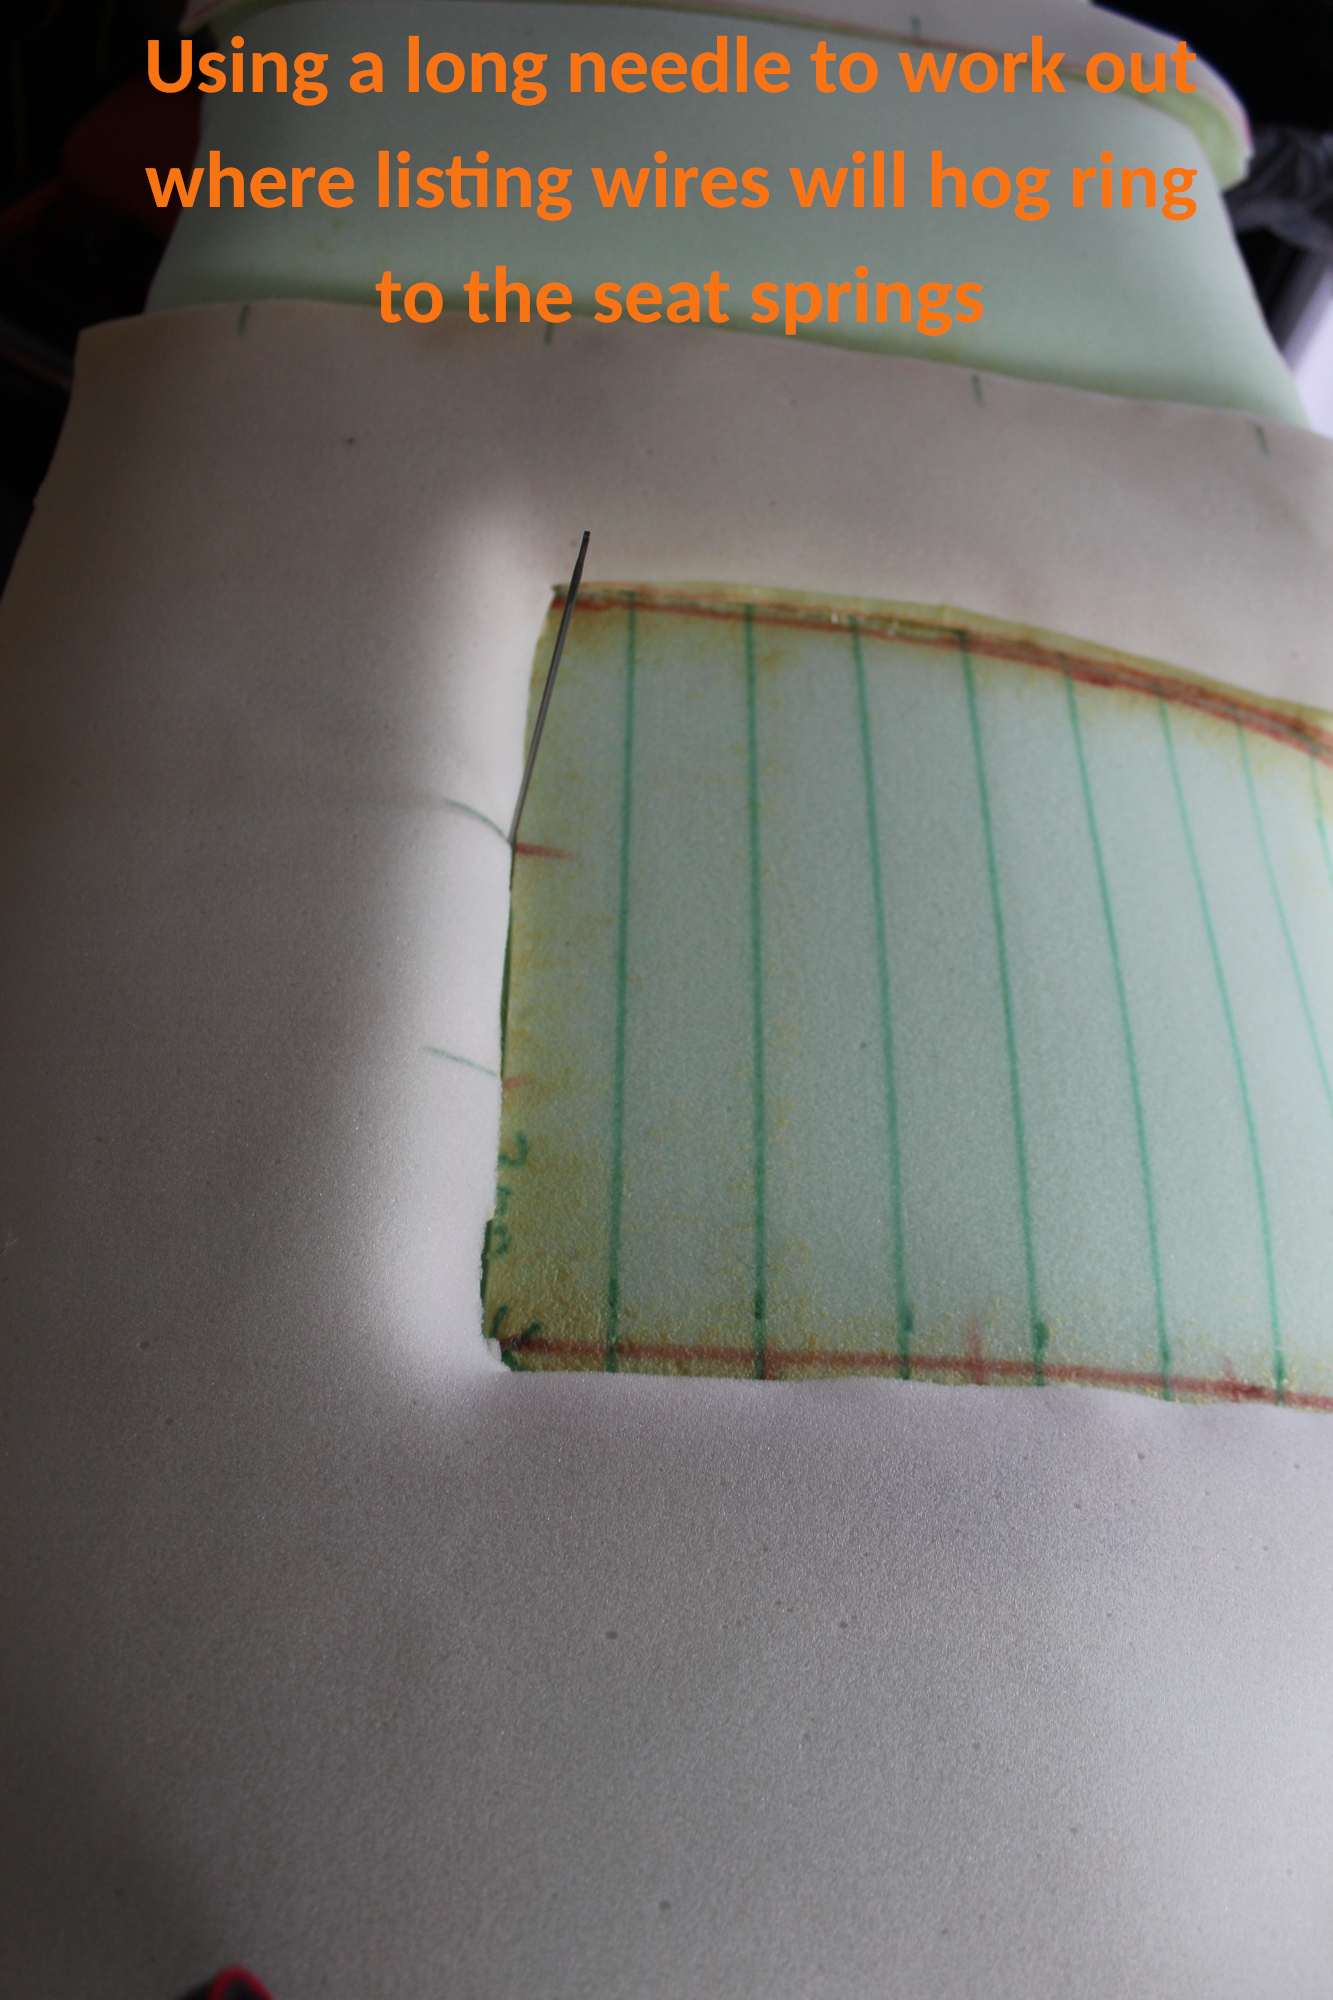
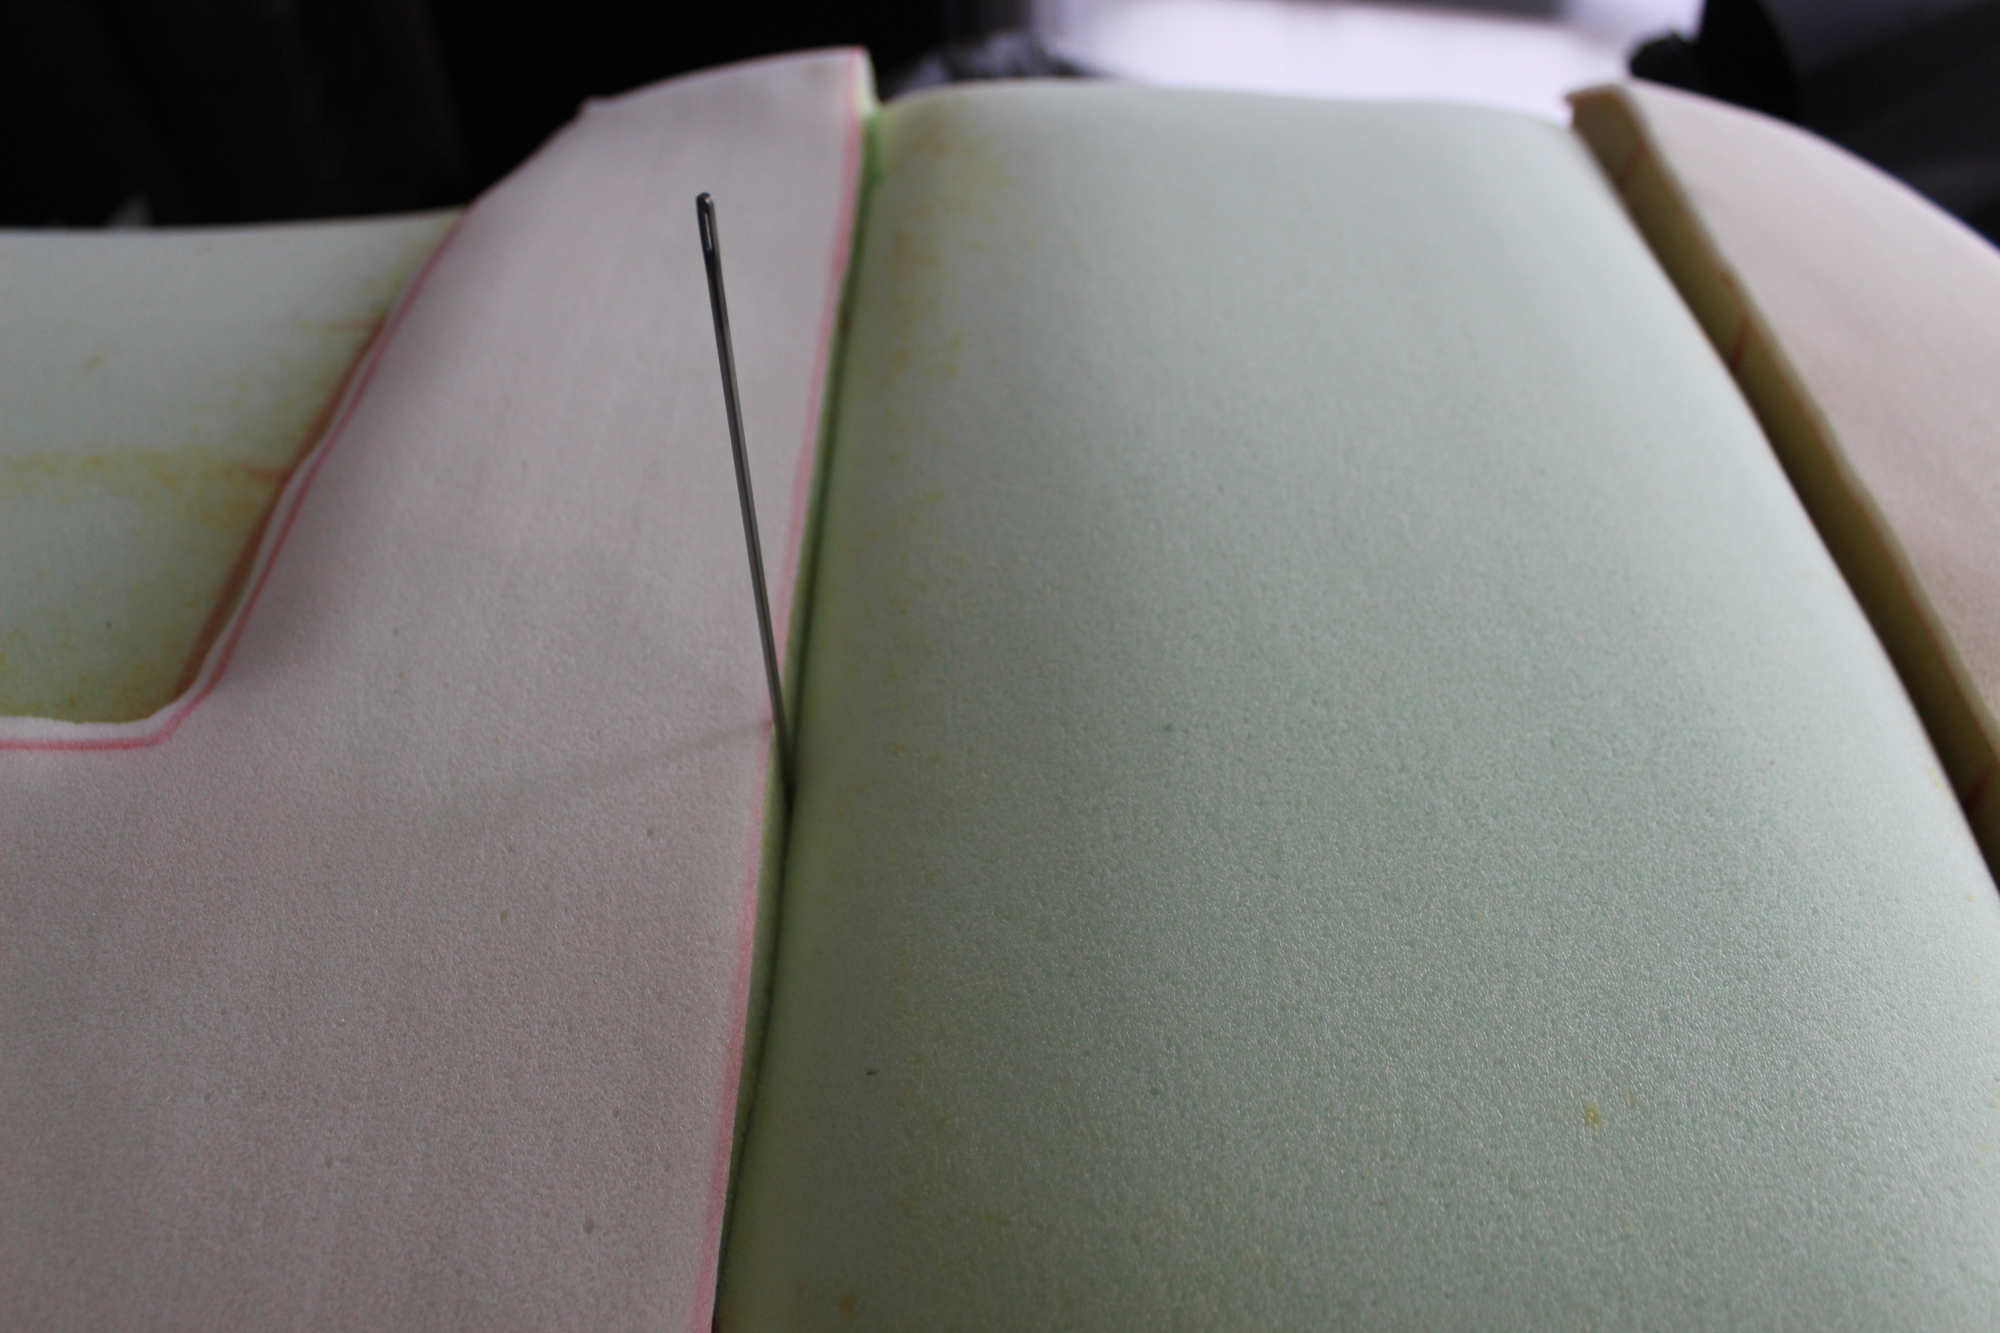
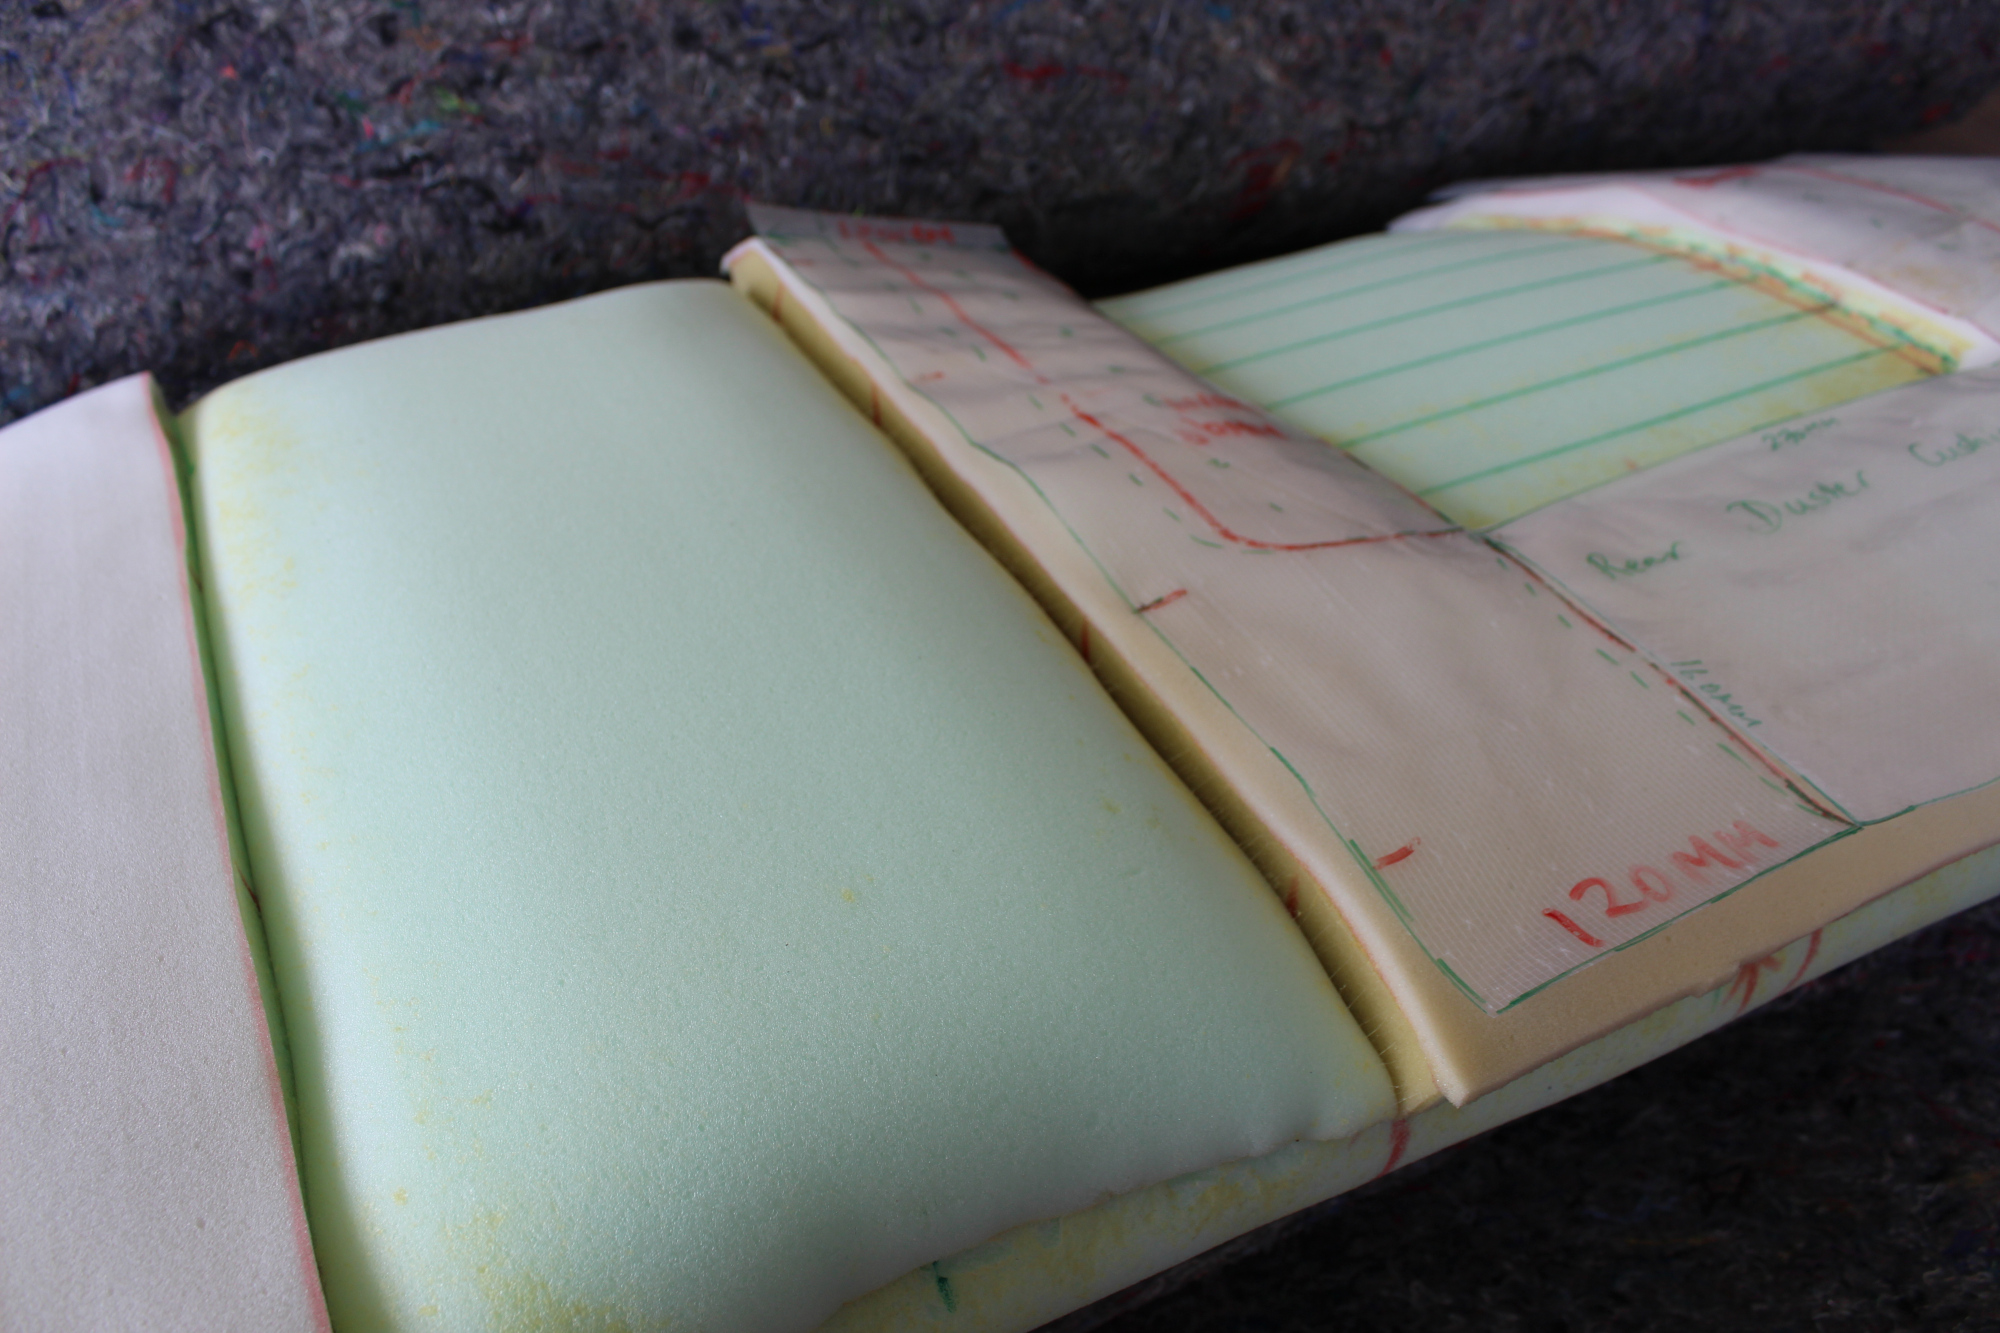
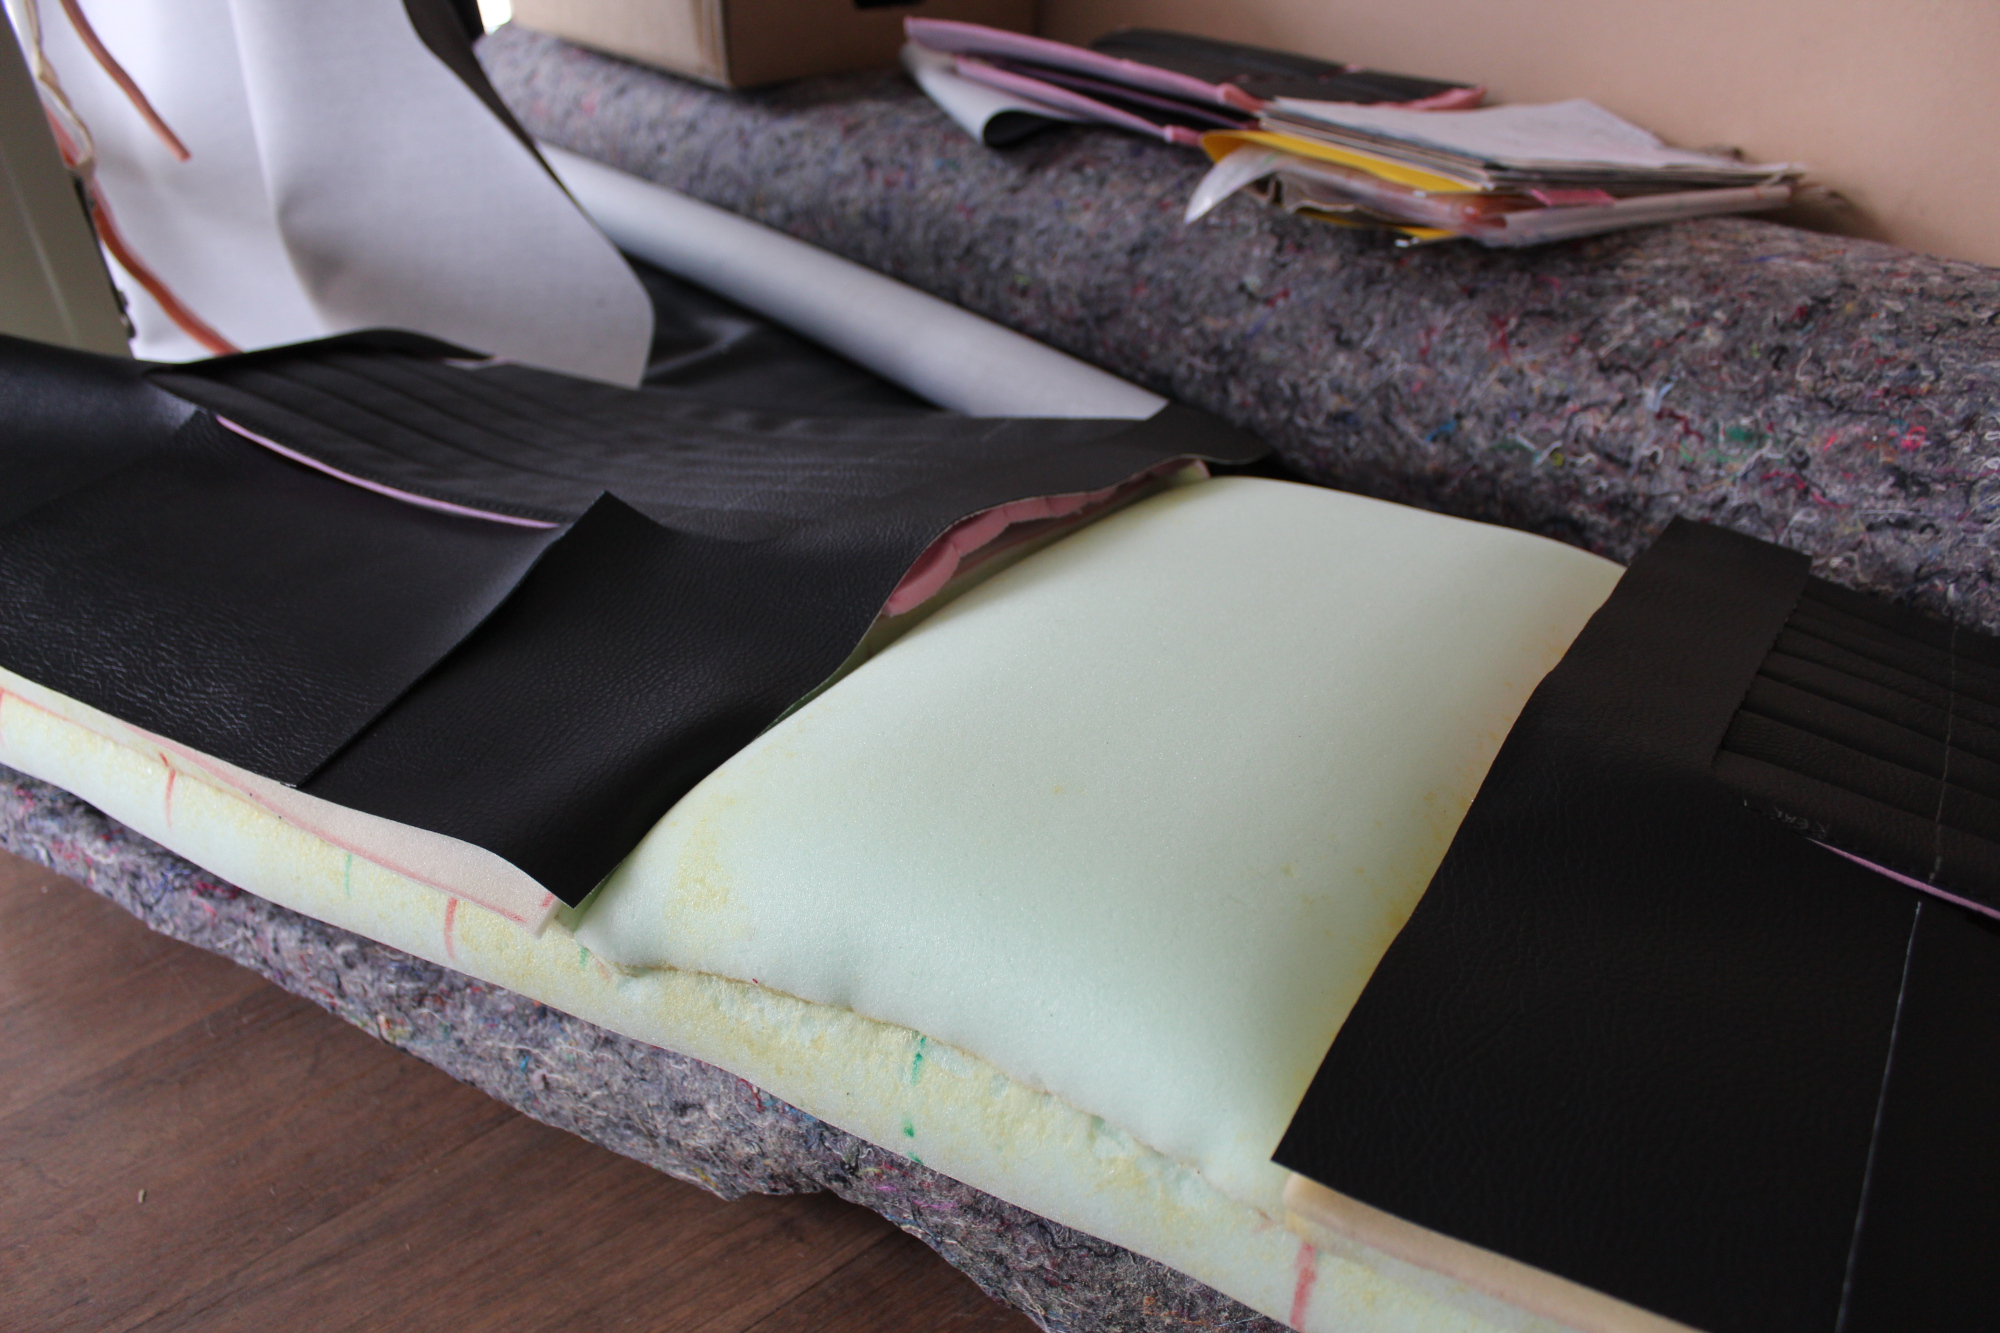
Now is patterning time. A base layer foam with hessian backing is our blank canvas. But we want this cute little Duster seat to resemble the muscular look of the VH Charger. So extra foam bolsters and humps are added to bulk up the seat. We then create a new, unique pattern using patterning tarp and work out where the added listing wires will need to go using a needle.
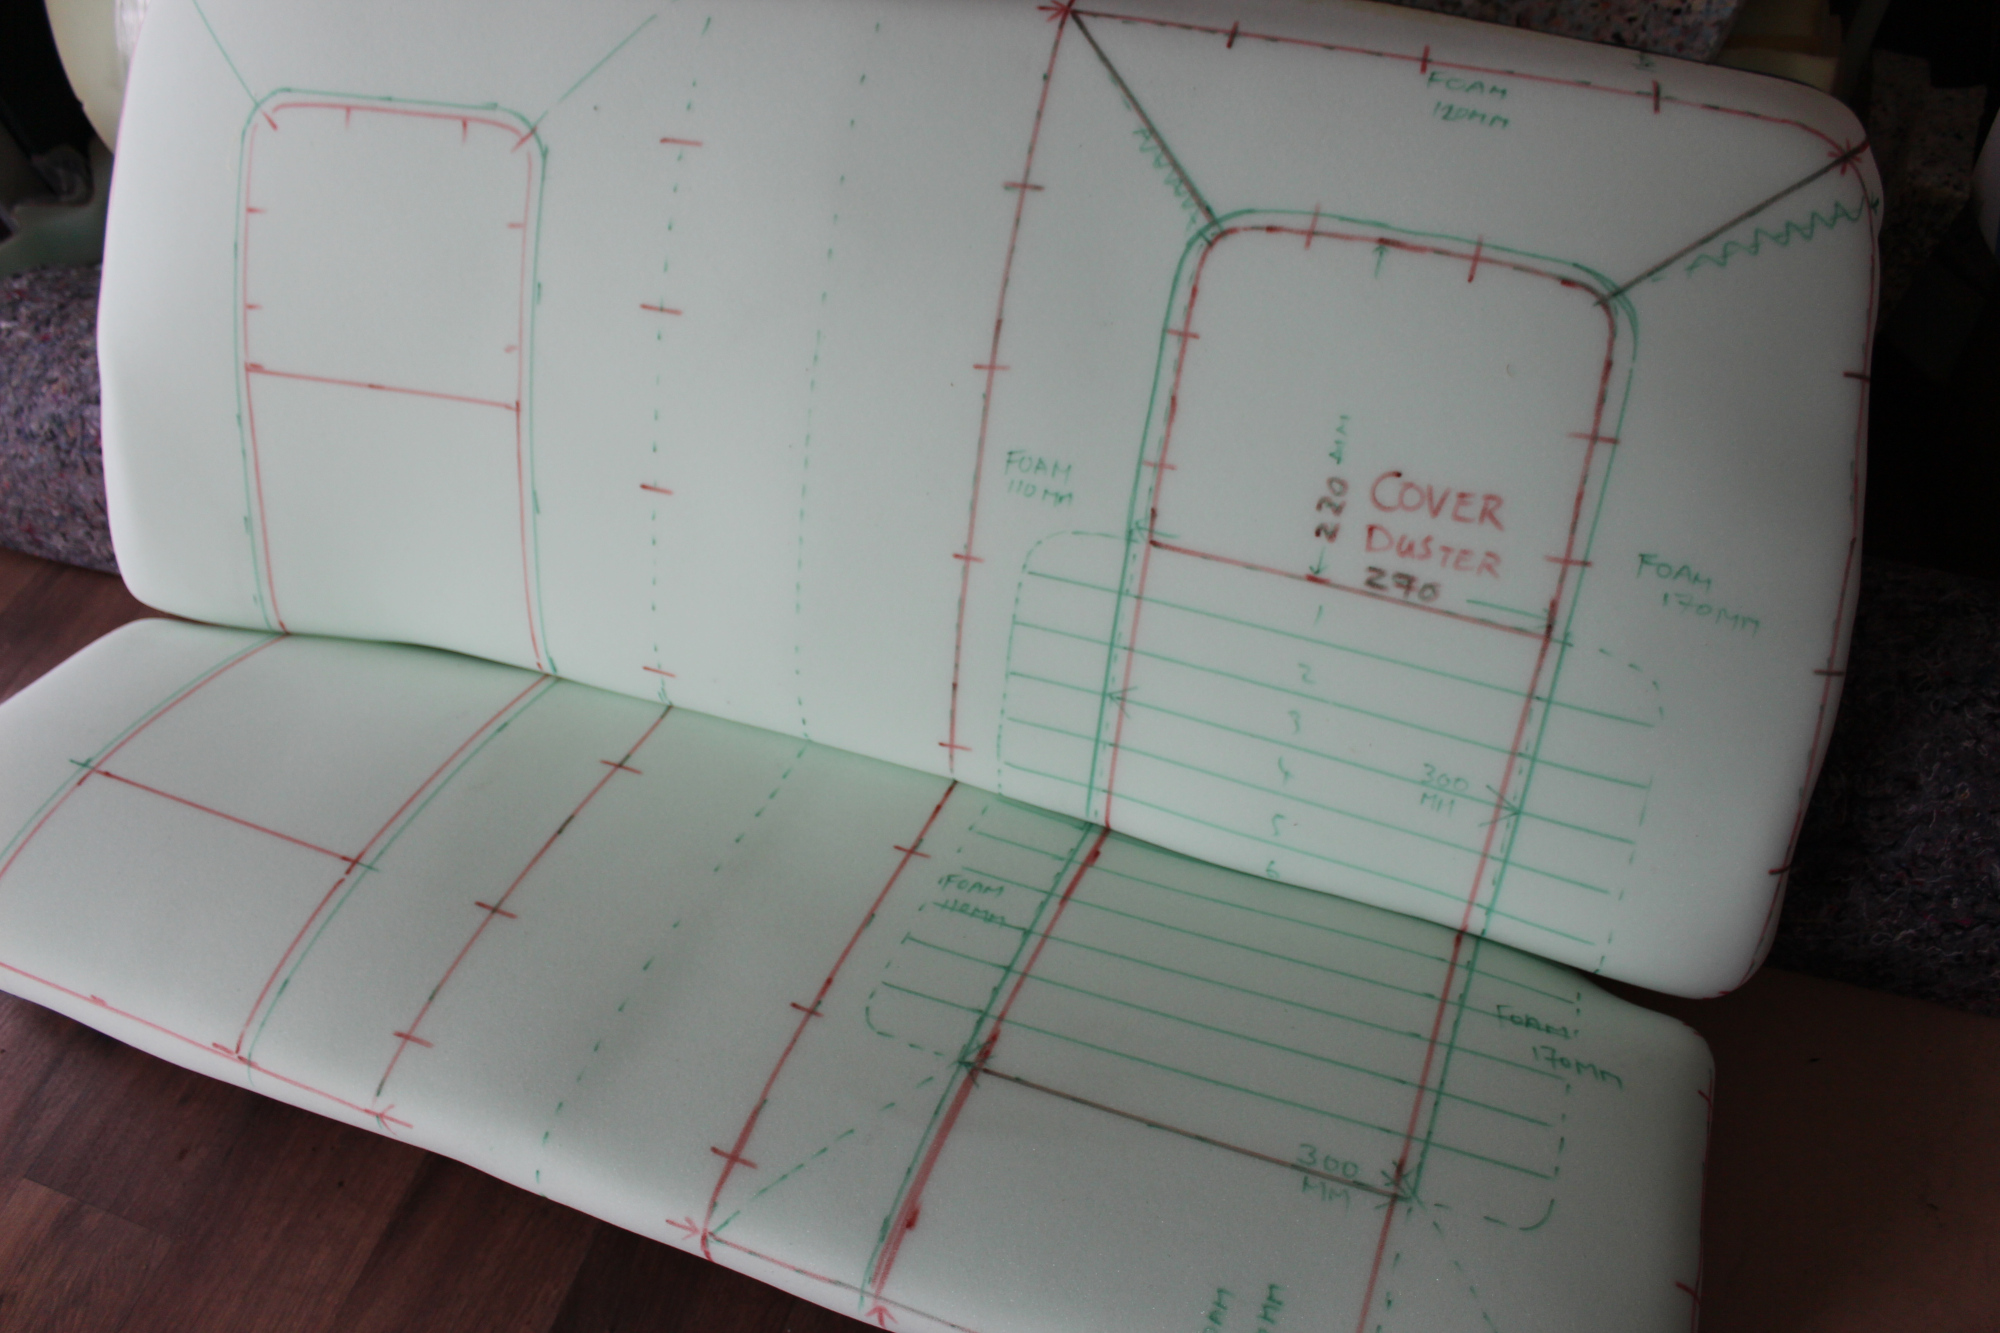
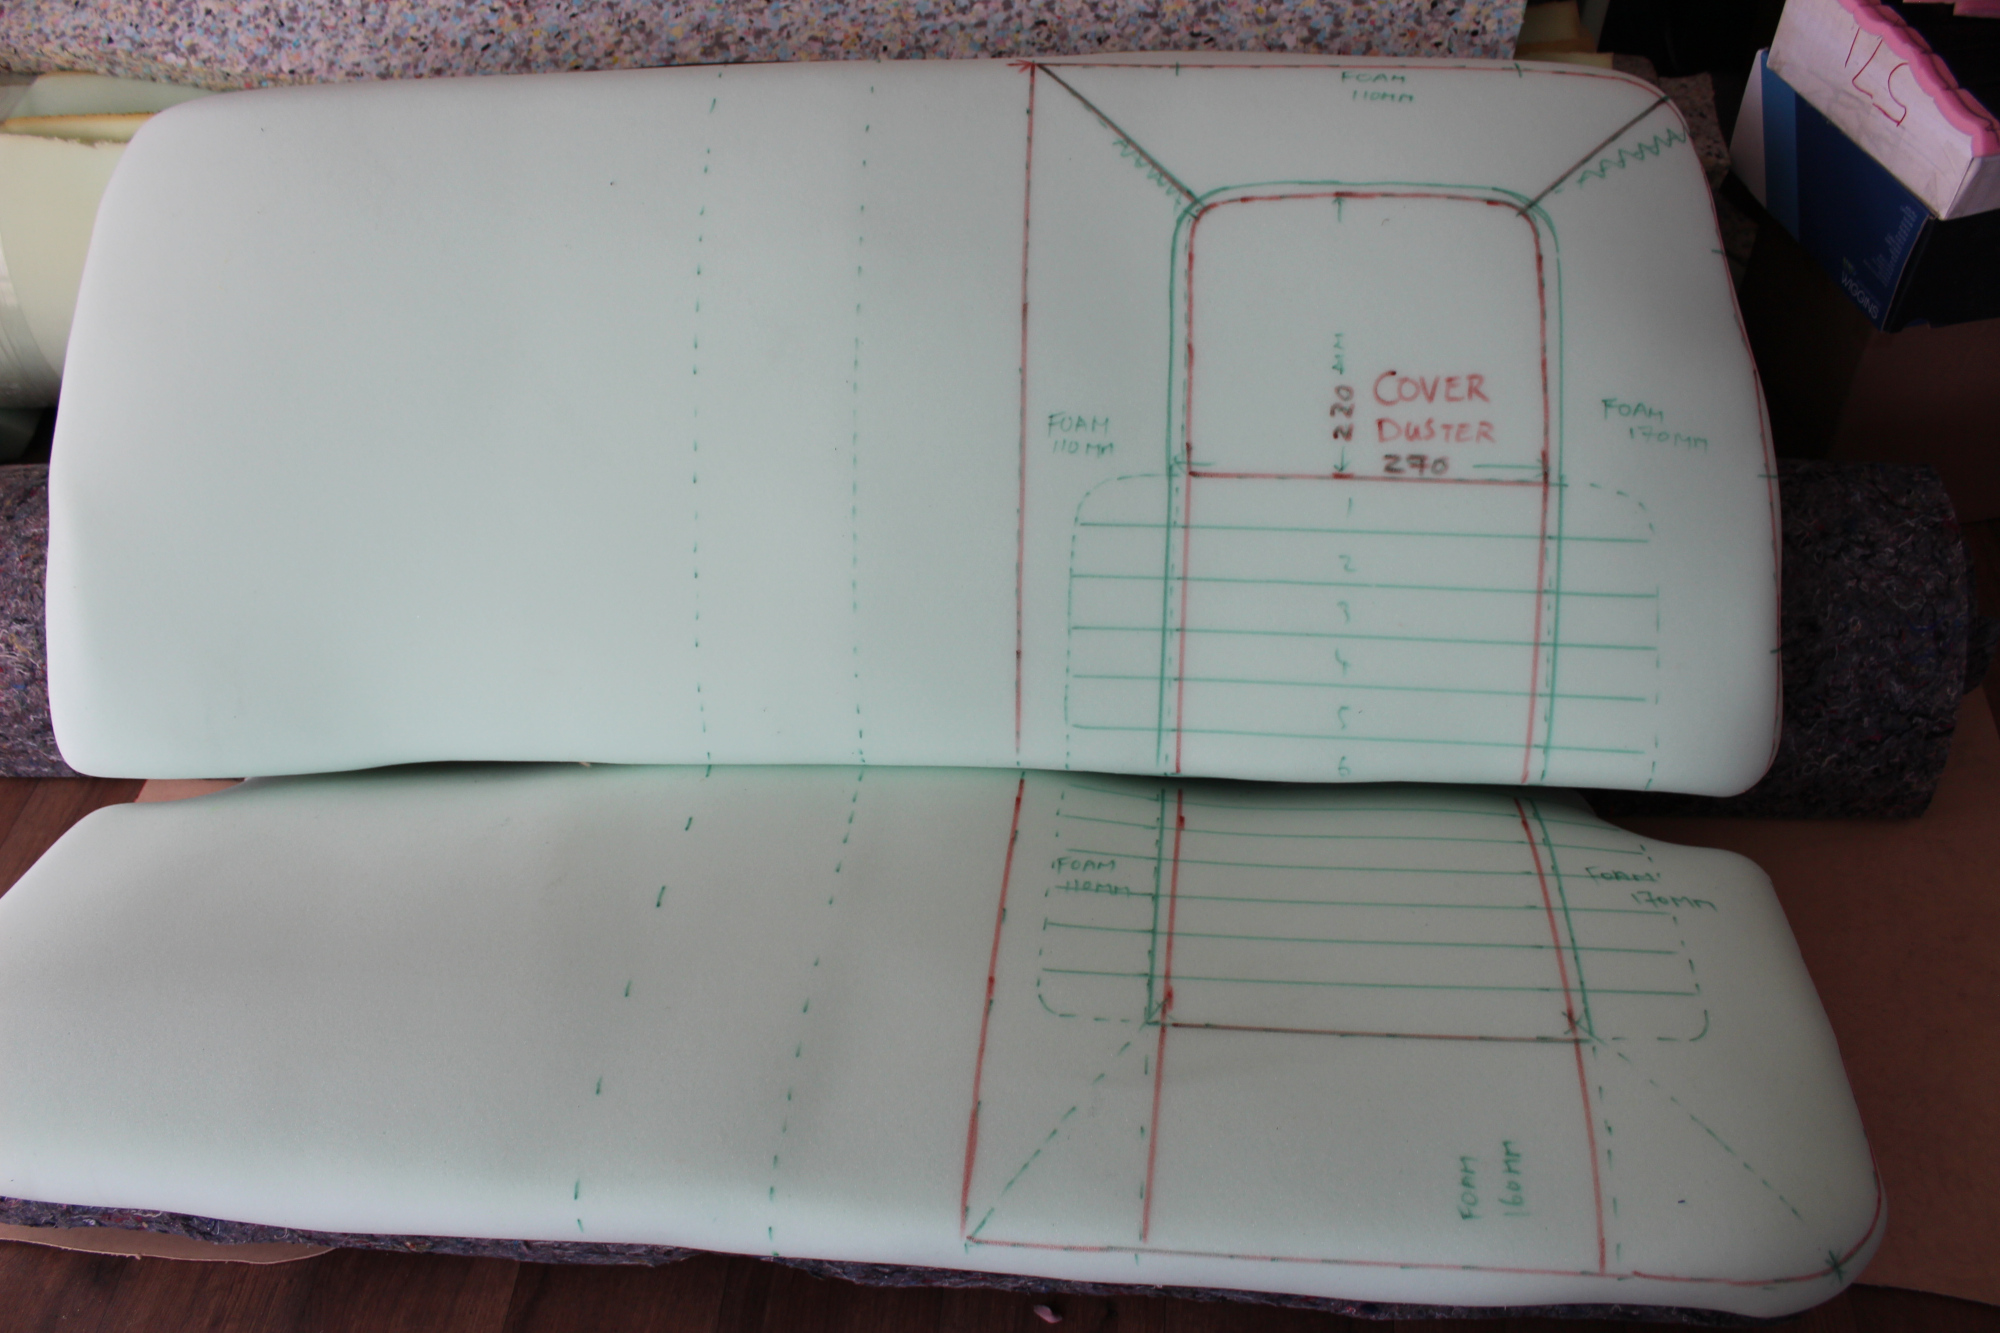

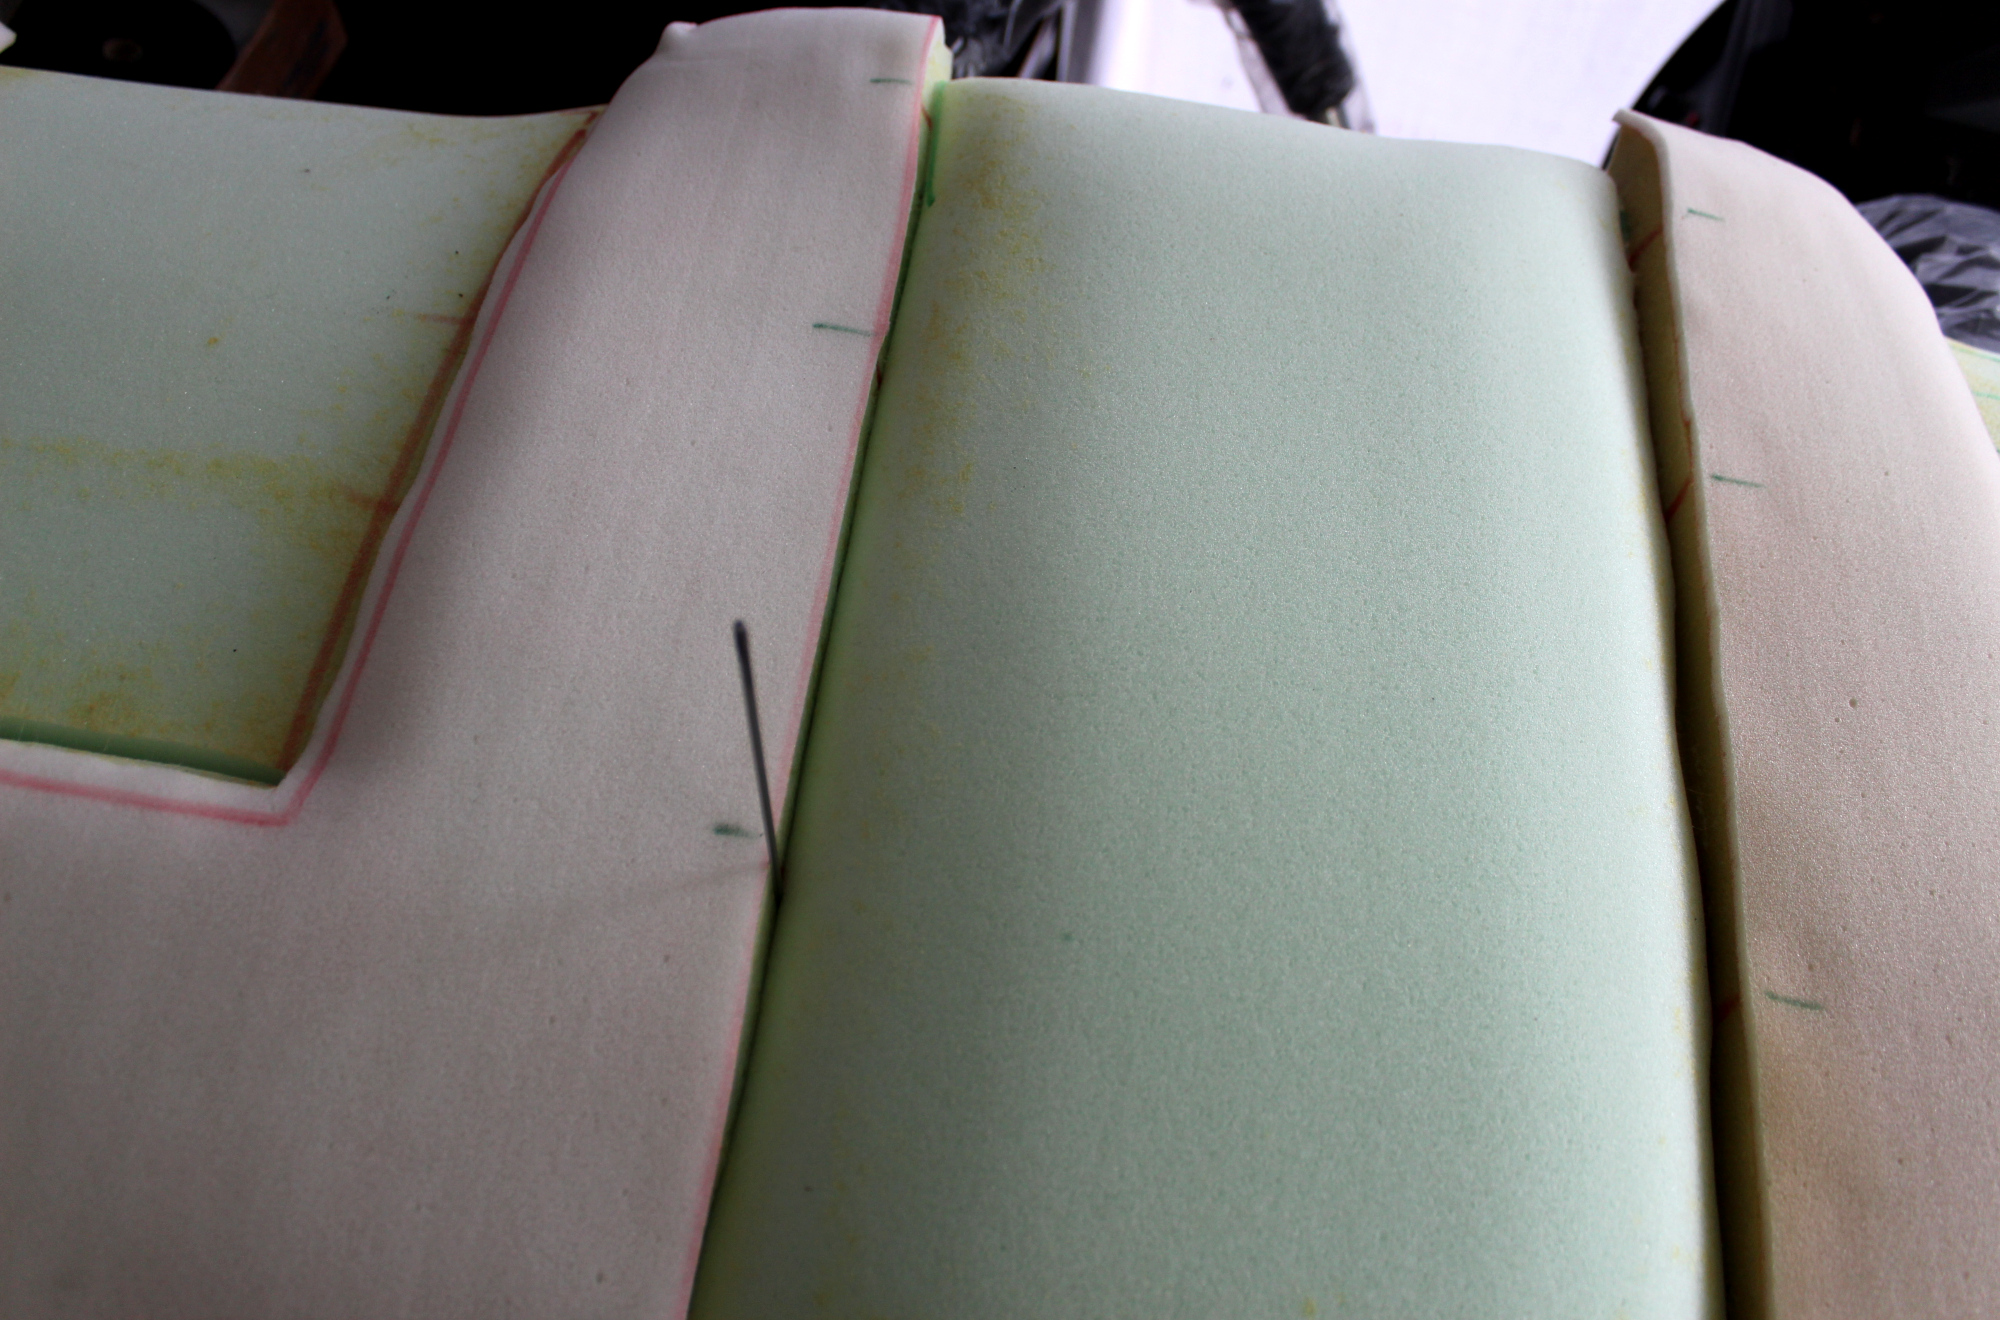

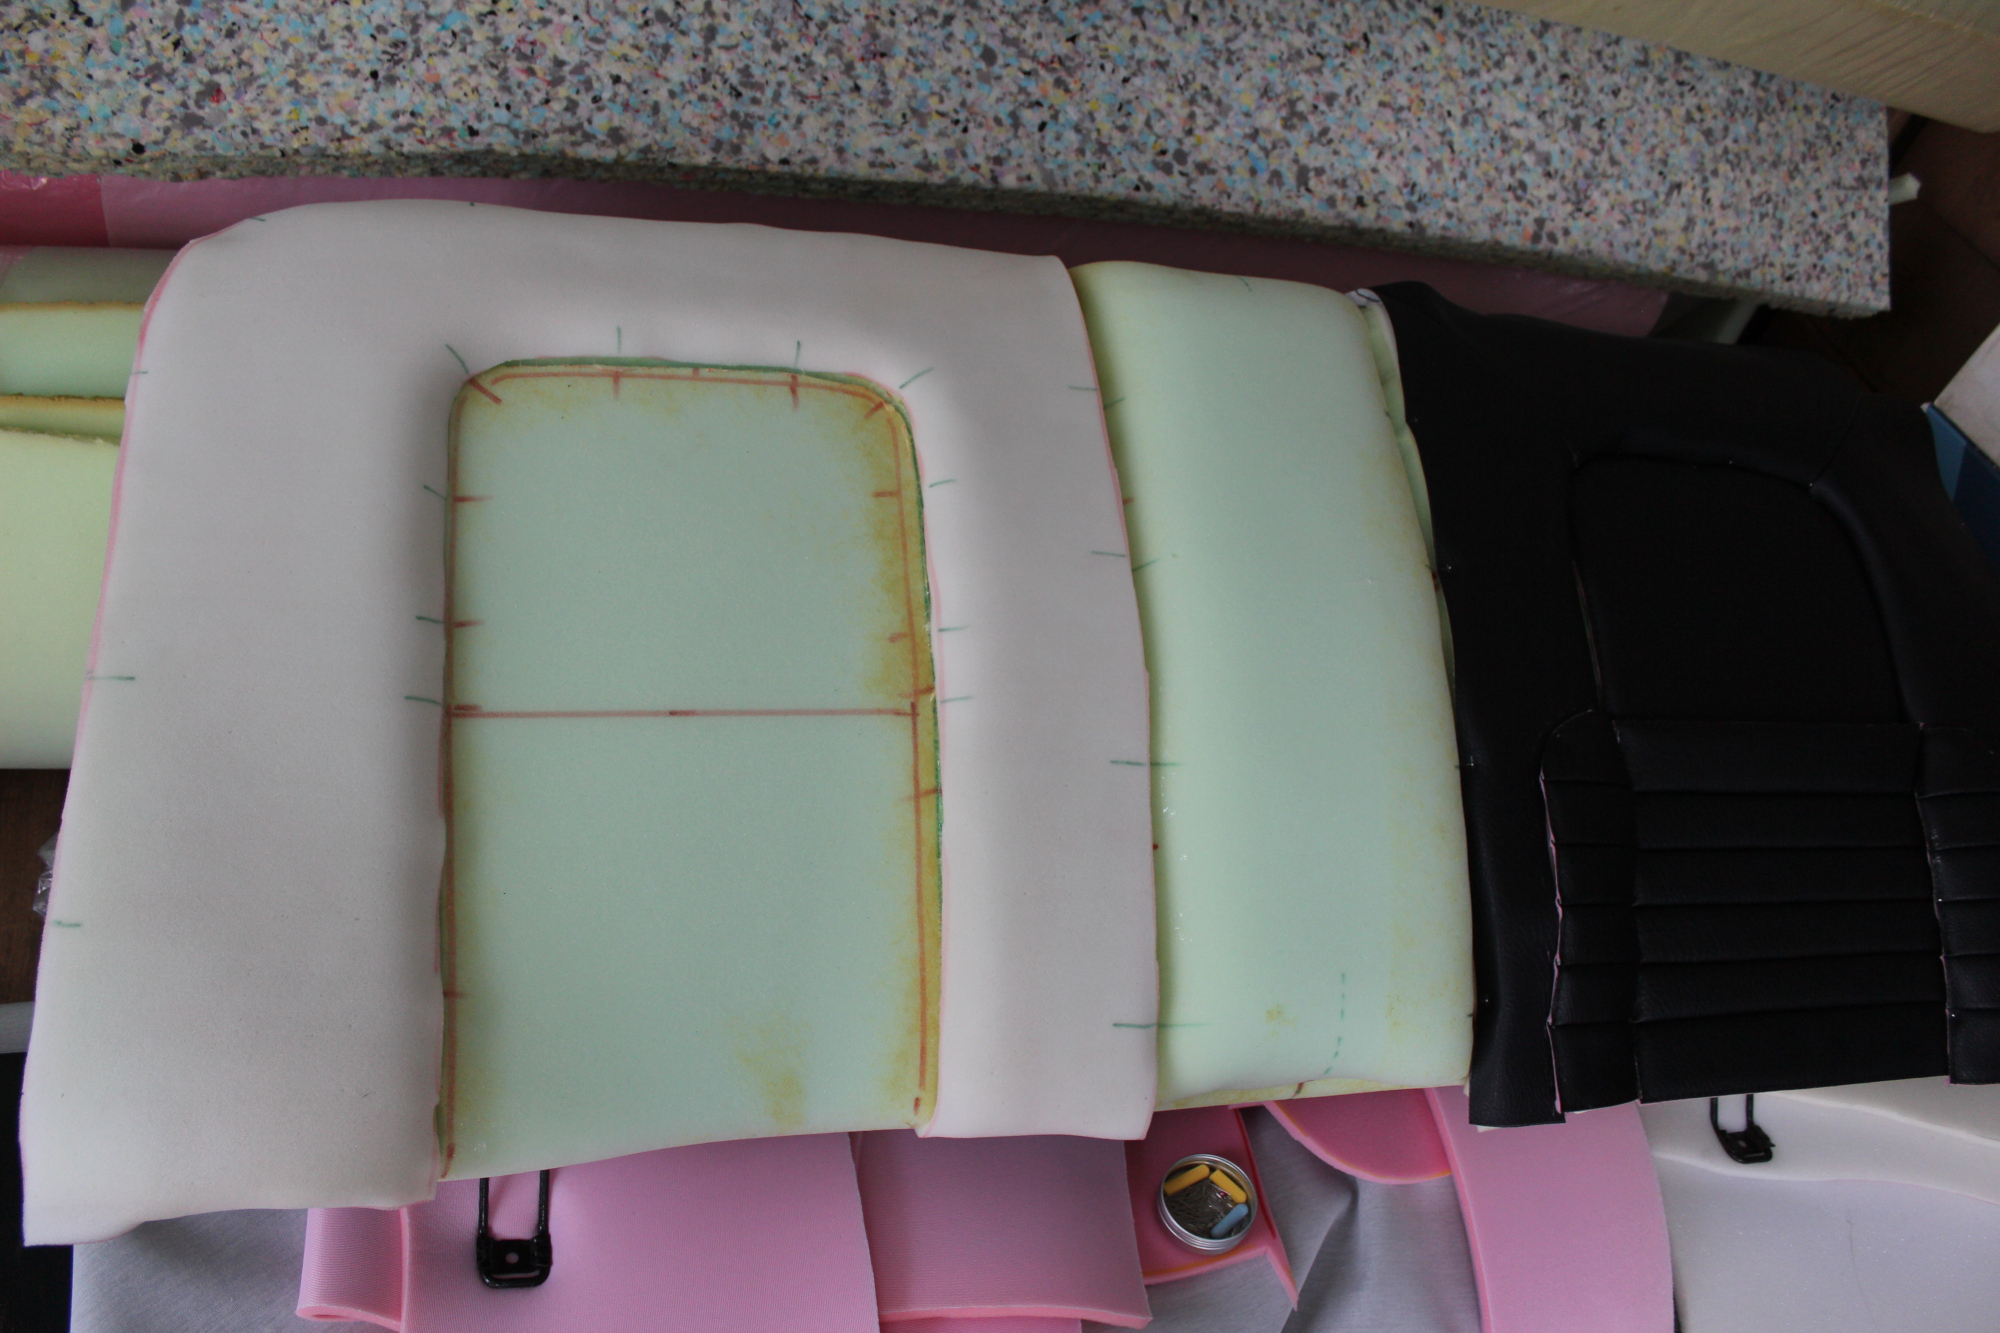
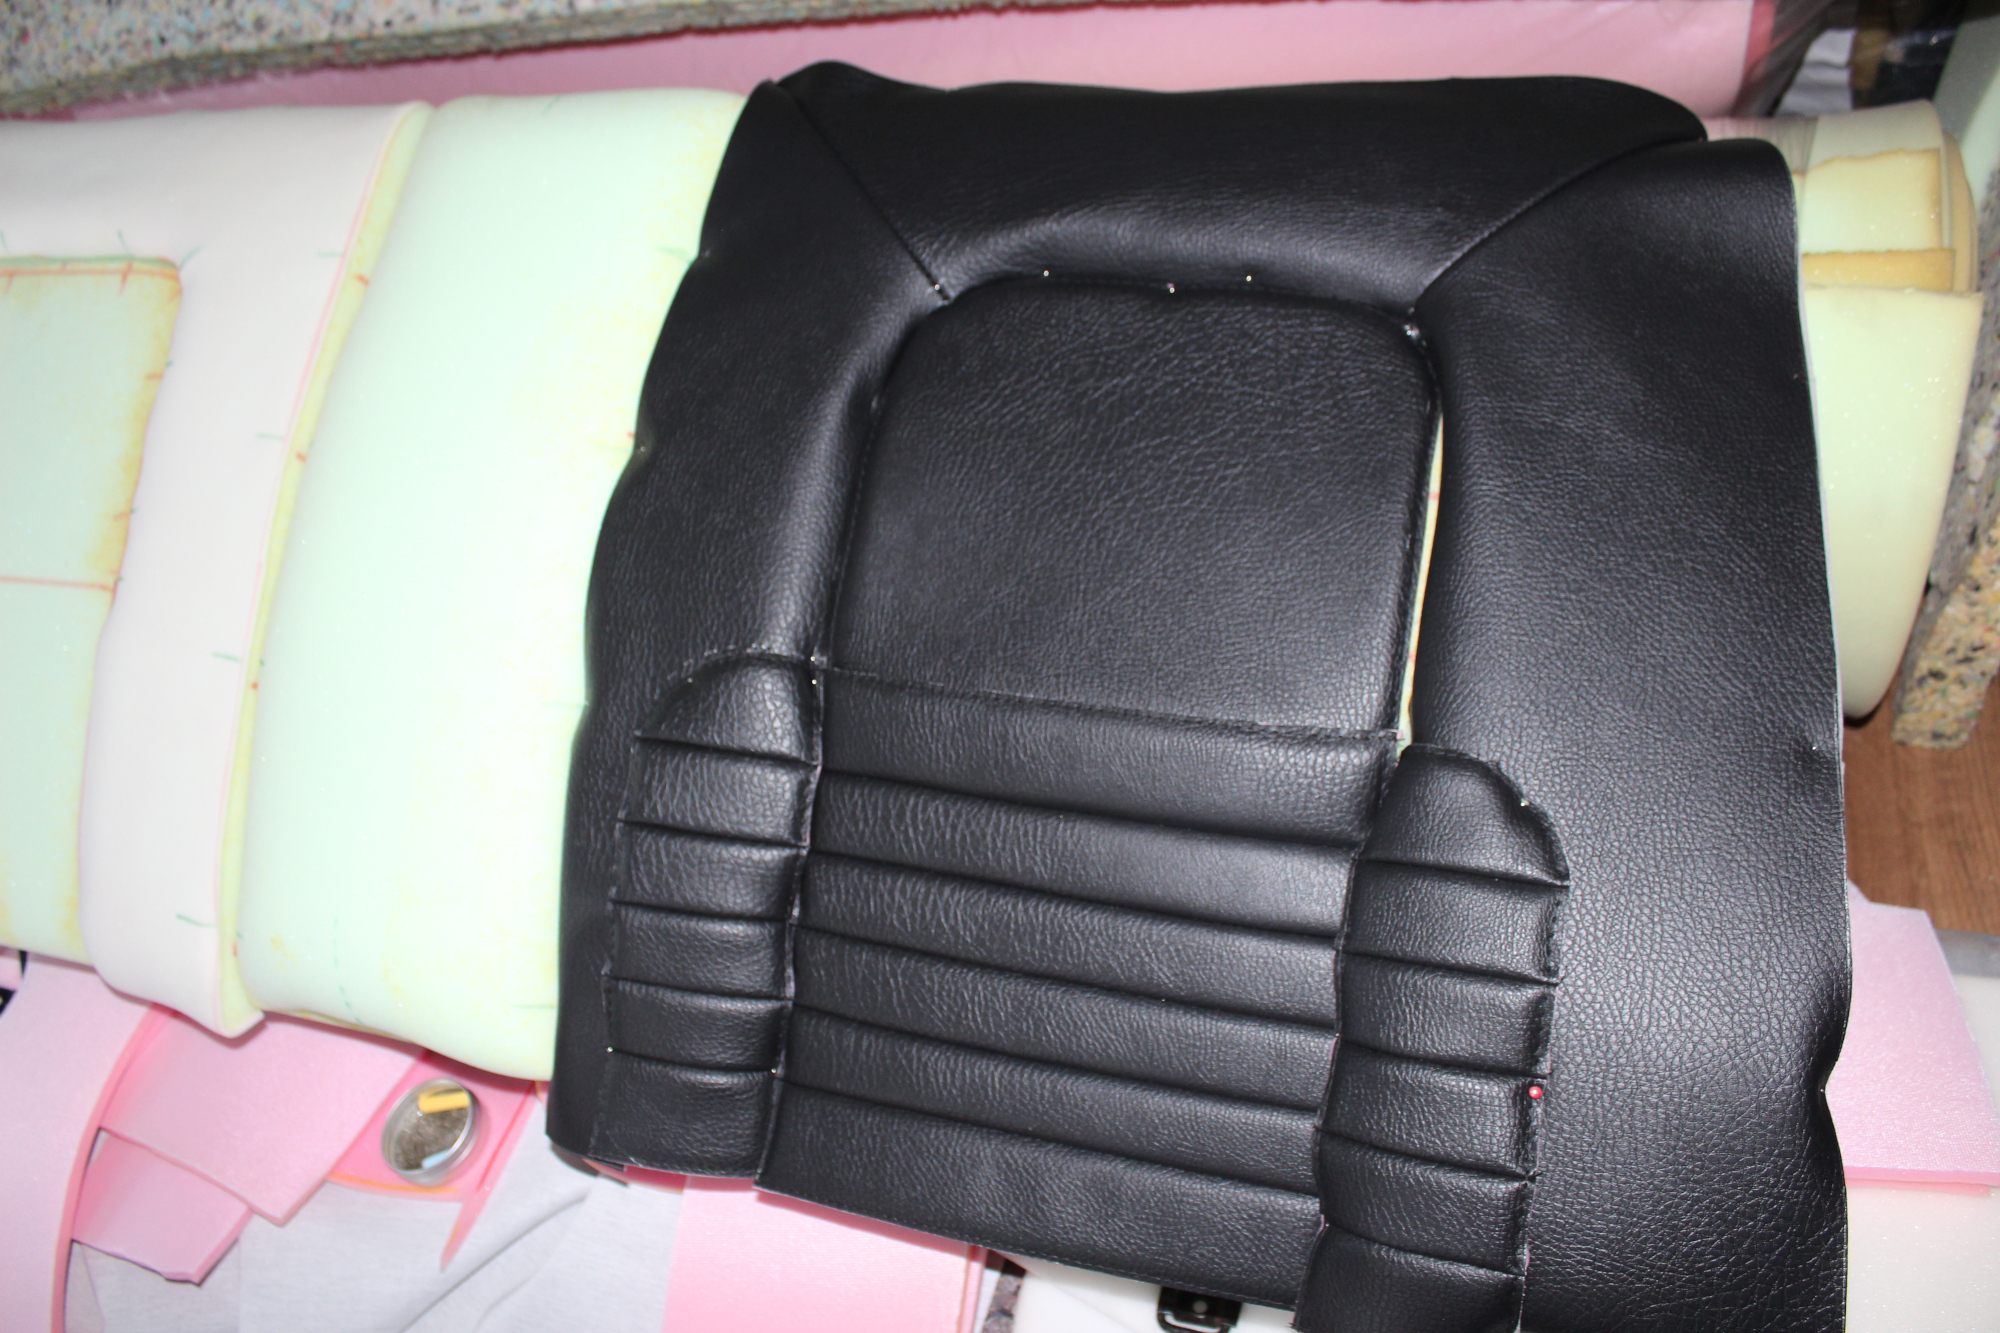
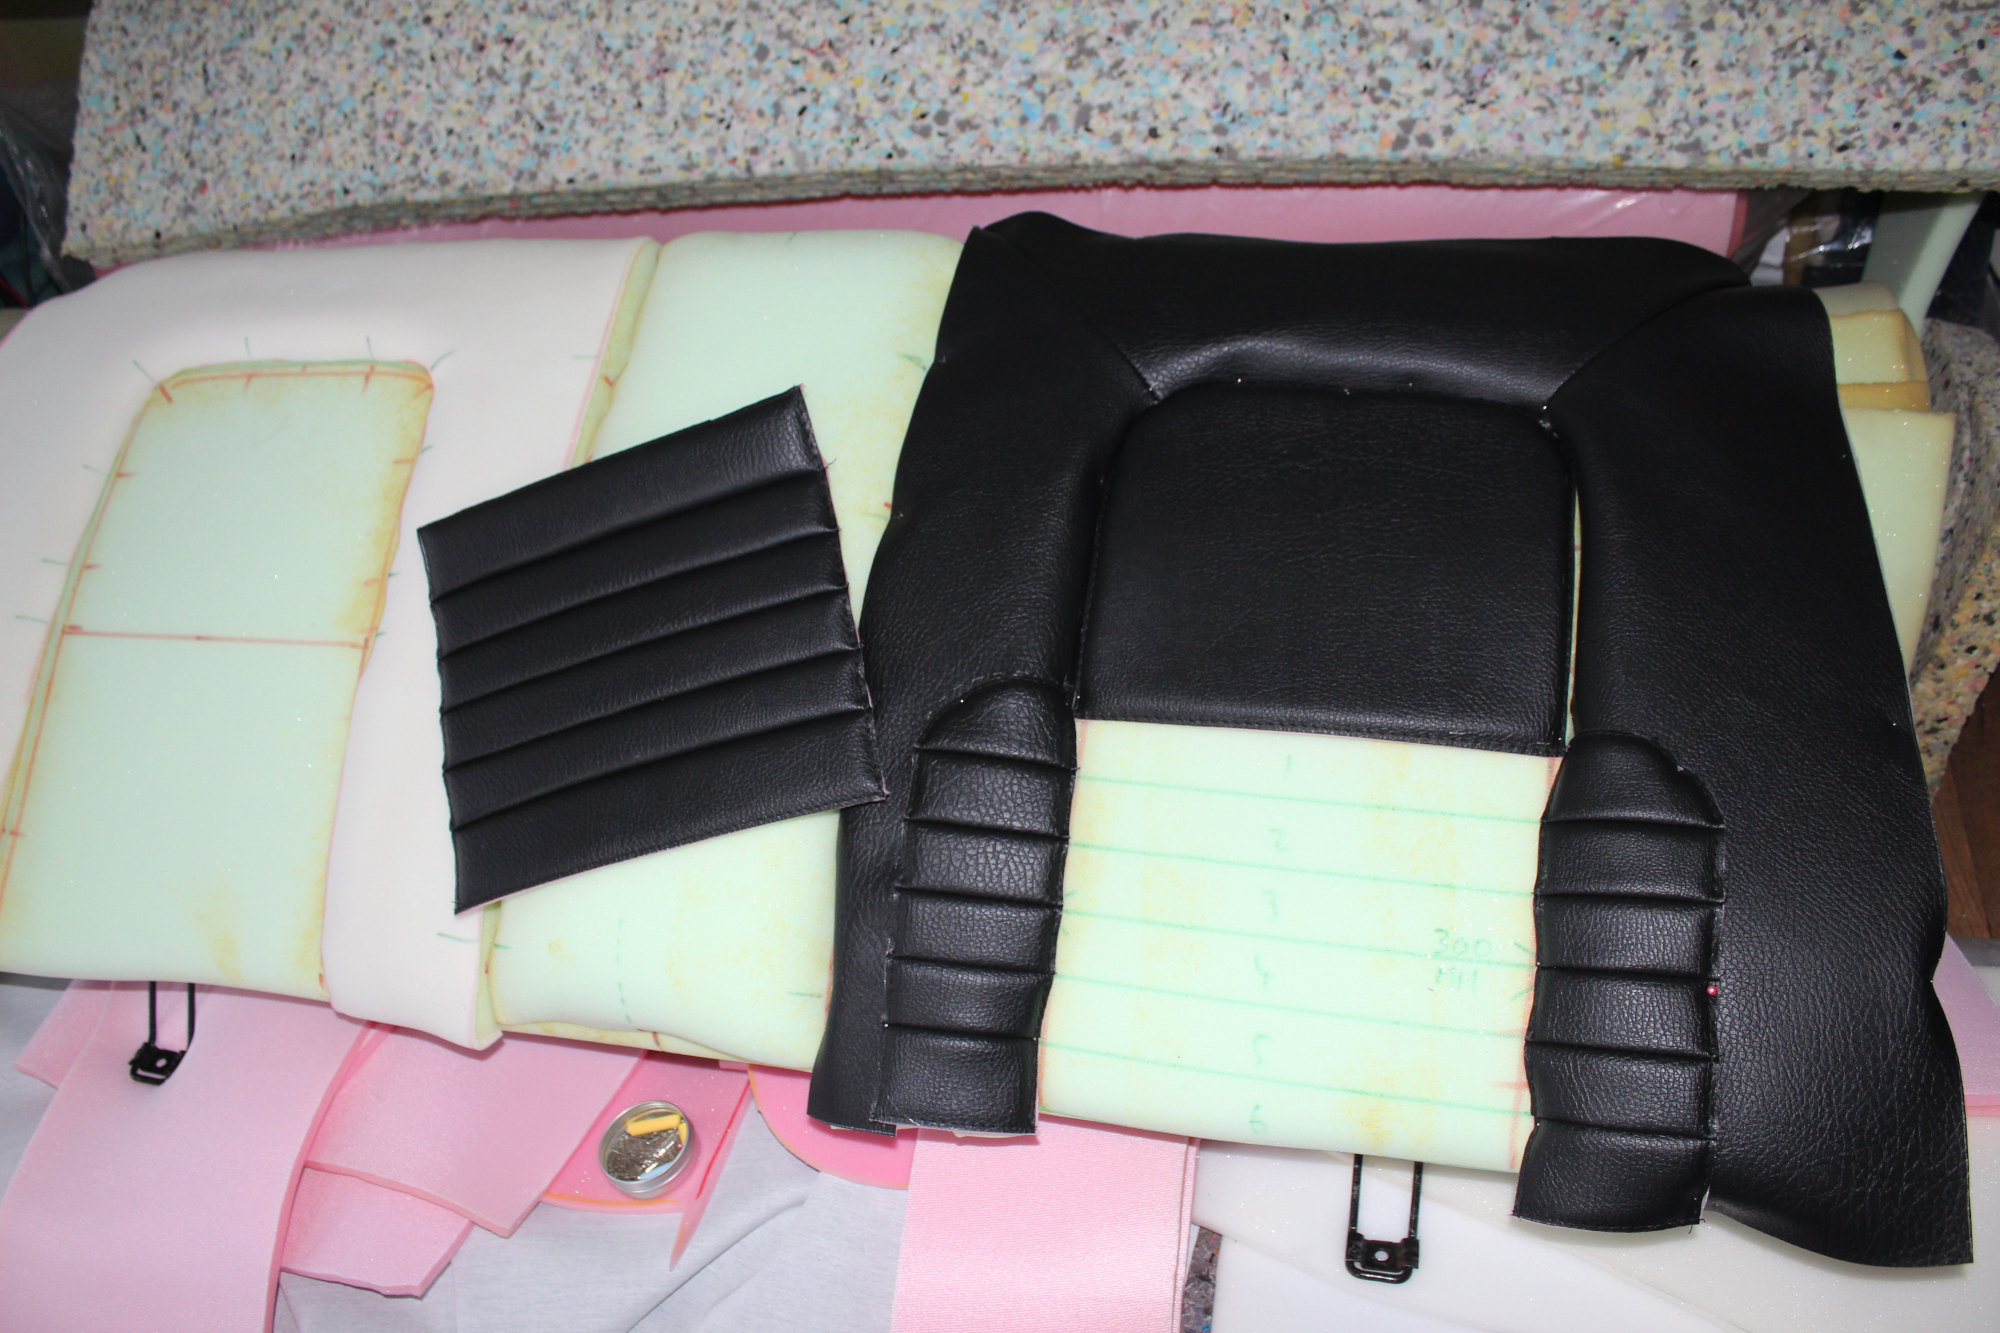
The frame is akin to a mannequin. With access to the actual thing we can check our patterns and make adjustments and/or improvement where required.
The end result is the proof is the pudding!